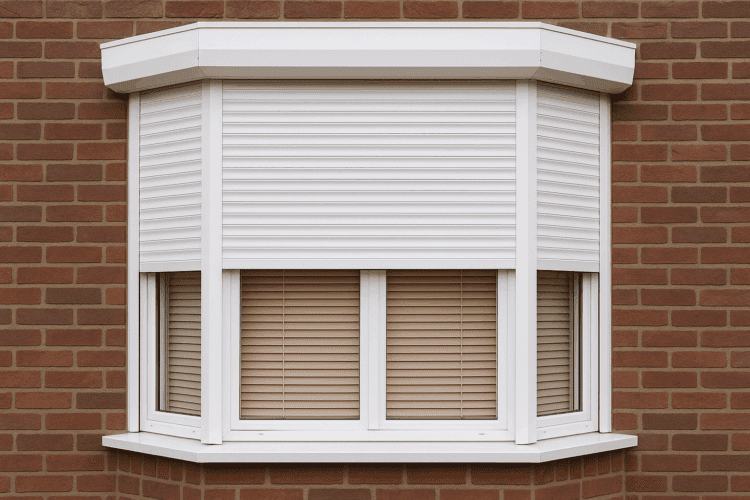
Yes — you can fit blinds neatly inside almost any bay window. The secret lies in matching the blind style to the angles of your bay, measuring each section down to the last millimetre, and setting the brackets so every panel lines up like it was made for the space. Do that and you gain all the privacy, insulation and light control you need without sacrificing the architectural charm that drew you to a bay window in the first place. this is a step by step guide but we specalise in installations o call us on 83692266 to talk you through all your bay window options, help you choose the right product and install it for you.
This step-by-step guide walks you through the process from choosing the right blind type through to that satisfying final tug on the chain when everything sits level. You’ll learn how to read tricky recess depths, calculate supplier deductions, and install headrails so the joins are seamless. Most DIYers can complete the job with a metal tape, cordless drill and a free afternoon—saving the cost of professional fitting while still achieving a polished, custom look.
Step 1: Choose the Ideal Blind Style for Your Bay Window
Before you touch a tape measure, decide which blind will actually work in the space. Different materials, stack heights and hardware clearances change how far each panel can reach into a corner, so the style you pick dictates every later step. Spend a few minutes sizing up the bay and you’ll avoid ordering a gorgeous but un-installable product.
Assess Depth, Angles & Obstructions
Measure the recess depth at several spots on each face and jot down the smallest figure—this is the real limit for headrails and brackets. Note whether the bay meets at 90 °, 135 ° or curves smoothly, and look for handles, window-winder cranks, radiators or a built-in seat that could block the blind’s drop.
Compare Popular Blind Types for Bays
| Blind style | Light control | Insulation | Min. recess depth* | Stand-out benefit |
|---|---|---|---|---|
| Roller | Good (block-out/screen fabrics) | Moderate | 45 mm | Slim tube clears tight angles |
| Roman | Excellent when lined | Good | 70 mm | Soft folds hide joins |
| Wooden/Faux-wood Venetian | Precise tilt | Fair | 60 mm (25 mm slat) | Timber warmth, privacy |
| Vertical | Very good | Fair | 80 mm | Suits floor-to-ceiling bays |
| Cellular/Honeycomb | Good | Top performer | 50 mm | Superior thermal rating |
*Headrail depth including brackets.
Inside Mount vs Outside Mount
Inside-mounted bay window blinds sit flush with the frame and show off the architecture, but require millimetre-perfect measuring and leave a small light gap. Outside mounts overlap the architrave, cover gaps and hide uneven frames; add 50 mm each side and 100 mm above for total blackout.
Emerging Options: Smart & Motorised Blinds
Motorised rollers, Venetians and honeycomb shades are now available with plug-in, battery or solar motors. Check you have 55–65 mm clearance for the motor head at one end of each blind, and plan a power point or rechargeable battery pack. Voice control via Google Home or Alexa is the 2025 trend to keep your bay future-proof.
Step 2: Gather Tools & Prepare the Workspace
Tidy surroundings and the correct kit turn bay-window measuring from guesswork into precision engineering. Before you start jotting numbers, lay out your tools and give the window area a quick reset.
Essential Measuring & Fitting Toolkit
- 3 m metal tape
- 300 mm steel rule
- Spirit level
- Digital angle finder
- Sharp pencil & masking tape
- Cordless drill/driver
- 2 mm & 4.5 mm bits
- Assorted screws and wall plugs
- Safety glasses and step ladder
Understand Your Bay Window Geometry
Identify whether you’re working with a box (90 °), splay (135 °), canted (flat centre with angled sides) or fully curved bay. Each shape sets different bracket positions and measuring points, so note it now.
Prep for Accurate Work
- Remove old curtains or poles
- Clear the sill and vacuum dust
- Wipe recess surfaces dry for adhesive tapes
- For painted timber, mark and pre-drill pilots
- On brick or masonry, switch to hammer drill and plugs
- Snap a phone photo of each face; they’re a lifesaver when ordering blinds later
Step 3: Take Precise Width Measurements
With your blind style locked in, it’s time to capture the exact width of every face so your bay window blinds arrive ready to click straight into place. Work methodically, record to the nearest millimeter, and always measure twice—once is never enough in a bay.
Identify Mount Points & Bracket Positions
Lightly mark a line 50–100 mm back from the front edge of each recess; that setback keeps the hardware clear of glass and handles. On curved bays, note the chord width the track will span—your supplier will bend it to match the radius.
Measuring Individual Sections
Measure the inside width at the top, middle and bottom of each panel. Write down the smallest figure; that’s the one that matters. For an outside mount, add at least 50 mm each side to overlap the frame and 100 mm above to hide the top roll.
Allowance for Brackets, Ladders & Light Gaps
Manufacturers deduct 5–12 mm for bracket clearances—check their guide and do not duplicate the deduction. Mark where adjacent blinds meet so slats or fabrics clear neighboring brackets by 2–3 mm.
Common Pitfalls & How to Avoid Them
- Cloth tape measures that stretch—use a rigid metal tape
- Measuring to plaster instead of the frame
- Forgetting to deduct twice for both ends of a Venetian headrail
- Recording widths in meters when the order form wants centimeters
Step 4: Measure the Drop Accurately
Width is only half the story—an otherwise perfect blind that stops short or drags on the sill will look amateur. With the windows closed and your metal tape upright, capture each vertical measurement just once, then confirm it twice.
Decide on Finished Length
Pick where the blind should finish before you start measuring.
- Sill-length: stop 10 mm above the sill to prevent scuffing.
- Floor-length: finish 10–20 mm above the floor or skirting for easy cleaning.
Factor in radiators or window seats that might need additional clearance.
Recording Drop for Each Panel
Measure the left, center and right of every section. For an inside mount write down the shortest drop; for an outside mount take the longest. Uneven floors? Use the highest point as your reference to avoid a crooked bottom bar.
Mechanism & Hem Allowances
Add the manufacturer’s specified cassette or headrail height—often 35–45 mm for rollers, slightly more for Romans. Never trim the fabric allowance yourself; leave that deduction to the factory.
Double-Checking Before Ordering
Repeat the process from the opposite side of the bay. If any figure differs by more than 3 mm, measure a third time. Label each panel (Left, Centre, Right) so the drops stay matched on installation day.
Step 5: Calculate Deductions & Complete Your Order Sheet
Your measurements are only half the job; you now need to translate them into the numbers the factory actually cuts. Each blind style has its own built-in clearance, and mixing that up is the fastest way to end up with daylight leaks. Follow the guides below, fill out the order sheet line by line, and you’ll give the workroom everything they need to build perfectly fitting bay window blinds.
Inside Recess Deduction Reference
Most Australian manufacturers automatically shave a few millimeters off your stated width to allow for brackets and easy running. Double-check their handbook, then enter your exact wall-to-wall figures—no DIY deductions unless noted.
| Blind type | Factory deduction (mm) | Typical side gap (mm) |
|---|---|---|
| Roller | 5 – 7 | 2 – 3 |
| Roman | 3 – 5 | 1 – 2 |
| Venetian | 10 – 12 (headrail) | 5 – 6 |
Outside Mount Add-On Guide
For overlap, add at least 50 mm on each side and 100 mm above the opening (more for deep pelmets). Bedrooms chasing blackout often push side overlap to 70 mm to block sunrise creep.
Converting Metric to Supplier Input
Many forms ask for centimeters to one decimal place. Convert by moving the decimal left: 1487 mm → 148.7 cm. Round halves up; anything else risks a blind that’s 5 mm short.
Recording & Labelling Blinds
Create a simple spreadsheet: Blind A (Left), Blind B (Centre), Blind C (Right), listing width, drop, mount type and colour. Stick matching masking-tape labels on the frame so installation day is plug-and-play rather than guess-and-check.
Step 6: Install Brackets & Headrails with Confidence
With the numbers confirmed, grab your drill and turn those pencil marks into a rock-solid fixing line. Take it slow here—level brackets and square corner joints are what give bay window blinds that seamless, showroom finish.
Mark & Pre-Drill Fixing Points
Hold a bracket against each mark, project a horizontal line with the spirit level, then pencil the screw holes. Pre-drill with a 2 mm bit for timber or a 4.5 mm pilot in masonry plugs. Keep every bracket the same setback so all blinds sit on a single invisible rail.
Drilling into Different Substrates
- Timber frame: use 30 mm wood screws after the 2 mm pilot.
- Aluminium or uPVC: slow speed, self-tapping screws—avoid cracking the extrusion.
- Brick or stone: 6 mm masonry bit, nylon wall plug and 40 mm countersunk screw. Vacuum dust before inserting plugs.
Corner Connectors & Angle Joints
For verticals or venetians, clip supplied elbow joints to adjoining headrails; check they pivot freely to the bay angle. Rollers usually meet edge-to-edge—leave a 2–3 mm breathing gap.
Level Check & Dry Run
Snap each headrail into its bracket without the fabric. Close the bay and sight along the fronts; anything off by more than 3 mm is worth adjusting now, not after the blinds are hung.
Step 7: Hang Blinds & Make Final Adjustments
With the brackets level and secure, the hard work is behind you. Now it’s simply a matter of clipping the blinds in, tweaking cords or chains, and running a few functional tests so every panel lines up neatly at the corners.
Attaching Fabric or Slats
- Rollers: slot pin end into idle bracket, click chain drive onto control side.
- Venetians/Romans: slide headrail into brackets and lock levers.
- Check each cassette is fully seated before releasing your grip.
Tension, Cord & Chain Adjustments
Level bottom bars first: lower blinds fully, tilt slats or unroll fabric, then use cord condensers or roller ratchets to even sides and remove sag.
Child Safety & Compliance
Secure loose cords with P-clips or tensioners fixed 1600 mm above floor. Loop chains must be taut and routed through a compliant safety device.
Testing Operation & Alignment
Raise, lower and tilt every blind; gaps at corner junctions should be no more than 2–3 mm. Fine-tune by nudging brackets or trimming end caps.
Troubleshooting Quick Guide
- Blind tracks sideways → re-centre fabric on tube.
- Large light gap one side → insert shim behind offending bracket.
- Chain stiff → remove one bead link to slacken.
Step 8: Style, Maintain & Future-Proof Your New Bay Blinds
You’ve earned that cuppa—the blinds are up and working. A few finishing touches will lift them from “fitted” to “feature”, keep them looking box-fresh, and make sure today’s install still feels modern in five years.
Layering for Designer Finish
- Team block-out rollers with a sheer curtain on a curved track for hotel-style softness.
- Add a slim pelmet or bonded fabric valance to hide hardware and mask light seepage.
Colour & Fabric Selection Tips
- Neutrals recede, making bays feel larger; match slats to the window frame for a built-in vibe.
- Bedrooms: blackout or thermal linings; living rooms: 3–5 % sunscreen weave to tame glare without killing the view.
Cleaning & Care by Material
- Rollers: monthly vacuum using a brush attachment, spot-wipe with mild detergent.
- Wooden/faux-wood Venetians: microfibre glove; avoid wet sprays that warp slats.
- Romans: gentle steam or upholstery attachment; never machine-wash linings.
Upgrading to Motorisation Later
Order tubes with plug-and-play motor slots now; you can clip in a rechargeable or 240 V motor later. Most Australian systems pair with Google Home or Alexa—just add a Wi-Fi bridge when you’re ready.
Ready for Flawless Bay Window Blinds
From eyeballing recess depth in step-one to that final tug on the chain in step-eight, the recipe never really changes: pick the right blind, measure in millimeters, apply the factory allowances, and fit the brackets level. Follow those moves and your bay window blinds will meet neatly at every corner, cut out stray light, and look as if they grew there.
If you’d rather have a seasoned tradie double-check the angles—or you just don’t own a hammer drill—our Adelaide team is on standby. Book a free, obligation-free in-home consultation and we’ll measure, manufacture and install locally-made blinds that match your bay to perfection. Call today or jump onto Classic Roller Shutters Adelaide to lock in a timeslot.


