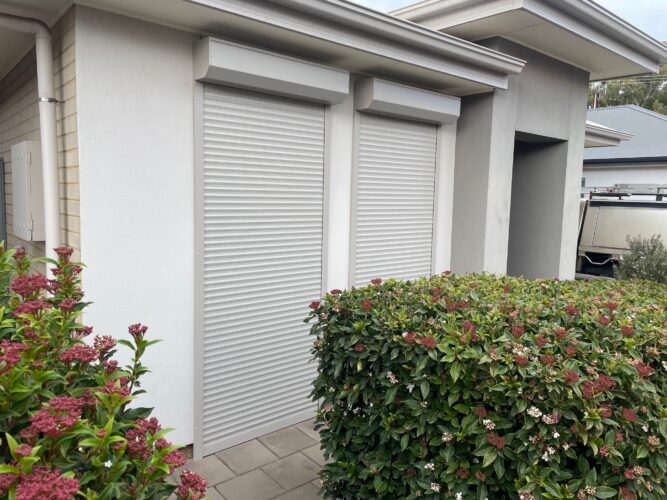
Picture this: it’s a sunny Saturday, the ladder is out, and the thought of paying another trades-person has finally worn thin. With a tape measure, a decent drill and the right made-to-measure kit, fitting window roller shutters is a project most homeowners can finish in an afternoon—shaving hundreds off labour costs while boosting security, insulation and even bushfire protection in one go.
This guide hands you a complete, jargon-free roadmap from first measurement to final seal. You’ll see realistic price breakdowns, tool checklists and clear decision points that flag when a professional might still be the smarter option. By the time you’ve scrolled through the nine steps, you’ll know exactly how to choose the correct shutter system, mount it square, wire or wind it up, and keep it gliding for years. Ready to roll up your sleeves? Let’s get the shutters moving.
Step 1: Confirm Suitability & Measure Your Windows Precisely
No matter how fancy the kit, a window roller shutter installation only works if the numbers add up. Before you hit ‘buy now’, spend a few patient minutes sizing-up each opening and checking that the wall can actually take a set of guides, a headbox and the fixings that hold them. Good measurements save money on returns, stop light gaps, and keep your warranty intact. if your unsure of how to measure call one of our technicians and get the professionals to do the job.
Assess the Window & Surrounding Structure
Start with a quick site inspection:
- Wall construction – brick veneer, double brick, timber frame, or lightweight cladding all need different screws and anchors.
- Reveal depth – you need at least the guide width plus 3-5 mm clearance.
- Obstacles – downpipes, eaves, fly-screen frames, external lights, power points or security bars can block the headbox or guides.
- Access – confirm there’s safe ladder footing and no overhead power lines.
If the wall is cracked or crumbly, repair or reinforce it first; the shutter’s weight should never rely on soft mortar or rotten timber.
Measuring Width, Drop & Headbox Clearance
Grab a steel tape and notepad (lasers are fine, but still jot the figures). Measure to the nearest millimetre (1 mm) and keep the tape straight:
- Width: brick-to-brick at the top, middle and bottom; record the smallest.
- Drop: sill (or bottom of reveal) to underside of lintel.
- Add the headbox height from the table below to find total clearance.
| Approx. Curtain Drop (mm) | Typical Headbox Size (H × D mm) |
|---|---|
| 600 – 1200 | 165 × 165 |
| 1201 – 1800 | 180 × 180 |
| 1801 – 2400 | 205 × 205 |
| 2401 – 3000 | 230 × 230 |
Leave at least +10 mm margin above the box so the front cover can hinge open for servicing.
Recording & Double-Checking Measurements
Label each window (“Bed 1 East”, “Kitchen North”) and write the width first, then drop – e.g., 1200 W × 1450 H. Pop everything into a simple spreadsheet or print-out template so nothing gets mixed up when ordering multiple shutters. Finally, grab the tape again and re-measure; a second pass catches the odd 5 mm slip that could ruin the fit. Two minutes now beats trimming aluminium later.
Step 2: Choose the Right Roller Shutter System & Materials
Locking-in the right combination of drive mechanism and slat profile now will spare you retrofit headaches later. Think about how the shutter will be used day-to-day, the climate it must endure and, of course, your budget. The three decision layers below will steer your window roller shutter installation toward the sweet spot of performance, compliance and cost.
Manual vs Electric vs Battery-Powered Operation
| Feature | Manual Winder/Crank | Hard-wired Electric | Battery/Solar Motor |
|---|---|---|---|
| Up-front cost | Lowest | Highest (motor + sparky) | Mid-range |
| Everyday effort | Physical winding | One-touch switch/app | Remote or auto |
| Works in blackout | Yes | Only with UPS | Yes |
| Child safety | Strap can dangle | No cords | No cords |
| Smart-home ready | No | Full integration (e.g. Alexa) | Limited (RF remote) |
| Retrofit friendly | Base option | Needs cabling | Slips into existing axle |
Manual suits single windows on a tight budget; battery is the go-to for retrofits or rentals where wiring is tricky; electric shines on new builds and large spans where lifting weight is an issue.
Material Options: Aluminium, Steel, PVC & Insulated Slats – know the difference
- Aluminium: Light, corrosion-resistant and available with polyurethane-filled cavities giving
U-valuesas low as2.2. Rated up to BAL-40 when paired with stainless mesh. - Steel: Tougher against forced entry but heavier; powder-coat choice narrower; may need larger motors.
- PVC: Cheap and quiet yet prone to UV warping—best kept for interior shutters, not exteriors.
- Double-wall insulated slats: Sandwich foam core boosts thermal and acoustic performance; ideal for busy roads or extreme temps.
Sourcing Quality Kits & Spare Parts
Factory-cut, made-to-measure kits cost a little more than off-the-shelf packs but arrive trimmed, pre-drilled and labelled—saving hours on site and keeping warranties intact. A complete kit should include: custom curtain, colour-matched headbox, guide channels, axle with bearings, end stops, wind locks, chosen drive unit, fixings and step-by-step instructions. Grab a few spare slats and extra screws now; they’re cheap insurance for future repairs.
Step 3: Gather Tools, Safety Gear & Prepare the Work Area
A smooth day on the tools starts with an organised workspace. Lay tarps, clear kids’ toys and stage every screw within arm’s reach before you even open the shutter carton. Good prep not only speeds up a window roller shutter installation but also stops accidental scratches, lost fixings and last-minute dashes to the hardware store.
Essential Tools Checklist
Tick these off first:
- 18 V drill/driver (spare battery charged)
- Masonry & timber bits
6 mm,8 mm,10 mm - Impact driver or socket wrench
- 1200 mm level or laser line
- Steel tape & combination square
- Rivet gun with
4.8 mmrivets - Fine-tooth hacksaw or drop saw for guide trims
- Exterior-grade caulking gun
- Extension ladder or mobile scaffold
Fixings & Sealants for Different Wall Types
Choose anchors that bite the underlying structure, not just the render:
- Brick/double brick –
8 × 65 mmstainless coach screws + nylon plugs - Timber frame –
14ggalvanized bugle screws - Light cladding – batten screws into studs, pack with PVC shims
- All walls – neoprene washers to isolate metals
- Sealant – neutral-cure exterior silicone or polyurethane
Safety Equipment & Worksite Setup
Safety gear is cheaper than a hospital visit:
- PPE: safety glasses, cut-resistant gloves, ear muffs, P2 mask
- Tag power leads; keep children, pets and cars clear of the drop zone
- Position ladders on solid ground at a 4:1 angle; tie off near eaves
- Postpone work if wind gusts exceed 30 km/h or rain is forecast
Step 4: Fit the Guide Channels Square & Plumb
The two aluminium side channels are the train tracks of your shutter—get them crooked and the whole curtain will bind, rattle or refuse to budge. Because the guides are the first permanent parts to meet the wall, accuracy here sets the tone for the rest of the window roller shutter installation. Take your time, check every line twice and you’ll save yourself an afternoon of swearing and re-drilling later.
Marking Drill Points Accurately
Transfer the window width you confirmed in Step 1 onto the wall, working from the centerline outwards so the headbox will end up perfectly centered. Using a spirit level or laser, draw two vertical reference lines for the outer edges of the guides. Allow a 3–5 mm clearance gap between the guide and the reveal to accommodate expansion and silicone. Mark fixing points on each line—top, bottom and every 400 mm in between—keeping at least 75 mm clear of lintel edges to avoid cracking brick.
Drilling & Fixing Guides Securely
For masonry: pilot drill 6 mm holes through the guide, then use a 6.5 mm or 7 mm bit to open the wall. Tap in nylon plugs, hold the guide in place and drive 8 × 65 mm stainless coach screws with neoprene washers, lightly countersinking the heads so they sit flush. For timber framing, skip the plugs and use galvanized bugle screws. Don’t fully tighten yet; leave a hair of movement for final tweaks.
Checking Alignment & Smooth Glide
Before cinching the screws, dry-run the bottom bar and a couple of slats down each channel. If you feel binding, shim behind the offending screws with PVC packers until the curtain glides freely. Once satisfied, torque all fixings, snip off any packer excess and run a bead of exterior-grade silicone along the outside edge to weather-seal. Your tracks are now square, plumb and ready for the headbox.
Step 5: Mount the Headbox & Feed the Shutter Curtain
With the guides locked in, attention shifts to the headbox—the aluminium cassette that hides the axle, spring or motor, and keeps weather out. A crooked or poorly-secured box will throw the whole curtain off line, so aim for dead-level mounting and solid anchoring. Two people make life easier: one to hold weight, the other to drill and fasten. If you’re solo, prop the box on timber blocks cut to the required height.
Mounting the Headbox at Correct Height
- Sit the headbox on your supports, centered to the opening; confirm the lid can still hinge clear of eaves or awnings.
- Using a 600 mm level, check the box is perfectly horizontal. Pack with PVC shims if the brickwork is uneven.
- Drill through each end plate into the lintel:
- Masonry lintel –
8 mmpilot then10 mmSDS bit, insert galvanized sleeve anchors. - Timber lintel –
14 g × 100 mmbugle screws straight through.
- Masonry lintel –
- Drive fixings to 20–25 Nm; over-torquing can warp the end plates and bind the axle. Remove temporary props and re-check level.
Feeding & Tensioning the Curtain Slats
Manual or motorized, the curtain feeds the same way:
- Clip the top slat (starter) onto the axle clips; ensure locking tabs click home.
- Rotate the axle slowly, rolling the curtain evenly so both sides enter the guides together—no bunching.
- For spring-loaded manual shutters, pre-tension the axle by 6–8 turns before inserting the starter slat. This stores energy for effortless lifting.
- Keep light pressure on the bottom bar as you roll to guarantee each interlocking profile seats fully.
Securing End Stops & Wind Clips
End stops stop the curtain disappearing into the box at full height. Align them flush with the guide mouths, drill 4.8 mm holes through the bottom bar and pop-rivet in place. In cyclone-prone or high-rise locations, fit wind clips (also called wind locks) every second slat: slide clip tabs into the slat cavities, squeeze with pliers, then test by pulling the curtain outward—there should be minimal play but no binding in the guides. A quick cycle confirms smooth travel and completes this crucial stage of the window roller shutter installation.
Step 6: Connect Manual, Battery or Electric Operation
With the guides true and the curtain hanging square, the final mechanical piece of any window roller shutter installation is hooking up the drive system. Whether you go old-school with a strap, cable-free with a battery motor or all-in on hard-wired automation, the goal is identical: smooth, safe and reliable movement every time you press, crank or tap.
Manual Winder Strap or Crank Setup
- Drill a
15–18 mmhole through the wall at the pre-marked location, sloping 5° downwards to drain any water. - Fit the rubber grommet supplied, then cut the strap 300 mm longer than the reveal-to-winder distance.
- Thread the strap through the grommet and around the axle pulley, making sure the webbing lies flat.
- Inside, mount the winder box at shoulder height on a solid stud; wind the handle clockwise until light tension is felt.
- Test-lift the shutter fully; if it stops short, add one extra pulley turn.
Crank systems follow the same steps but use a steel rod and universal joint instead of webbing—ideal where a strap might be within a child’s reach.
Battery Tube Motor Installation & Charging Point
- Slide the tubular motor into the axle, aligning the drive wheel and crown adaptor.
- Secure with the locking pin, then clip the motor cable into its channel to avoid chafing.
- Mount the solar panel or USB charge port on the headbox face; a northerly aspect maximizes sun hours.
- Pair the remote with a long press of the program button, run the shutter up and down once, then set upper and lower limits per the handset instructions.
Hard-Wired Electric Motor & Switch/Smart Upgrade
Under Australian law, a licensed electrician must connect 240 V supplies. Pre-run conduit from the headbox to the closest junction box, leaving a 150 mm tail of twin-active cable. After the sparky wires in the wall switch—or Wi-Fi hub for smart homes—use the motor’s teach pendant to store open/close limits and activate obstacle detection. Finish by clipping the cover plate and logging the motor serial number on your warranty card.
Step 7: Commissioning, Weatherproofing & Finishing Touches
The shutter is up, but the job isn’t signed-off until it runs flawlessly and keeps the elements out. This commissioning stage validates your measurements, alignment, and wiring, guaranteeing the window roller shutter installation performs for years without rattles or leaks. Give each window fifteen careful minutes now and you’ll dodge countless call-backs later.
Operational Tests & Limit Setting
Run the shutter through at least ten full cycles:
- Listen for scraping or grating; if heard, slacken the offending guide screw and re-shim.
- Check the bottom bar sits snug on the sill without daylight.
- For motorized units, program upper/lower limits—hold the program button, jog to the stop point, press to save.
- Trigger obstacle detection with a rolled towel; the curtain should auto-reverse.
- Verify manual straps rewind neatly without slack.
Sealing, Flashing & Painting
Weatherproofing is the final amour:
- Gun a continuous bead of neutral-cure silicone along the external guide edges and around the headbox sides.
- Fit clip-on flashing over the top of the box; slope it 5 ° away from the wall to shed rain.
- Touch-up any cut edges with colour-matched enamel or powder-coat repair spray.
Final Safety Checks & Clean-Up
Confirm all fixings are torqued, ladder holes patched, and remotes labelled. Remove drill swarf from the guides, bin packaging, and wipe the curtain with a microfiber cloth. Hand the owner the warranty card, remote instructions, and spare slats—installation complete, driveway clear.
Step 8: DIY Maintenance & Troubleshooting
A neat install still needs a little love. Spending ten minutes every quarter on cleaning and checks keeps the curtain whisper-quiet and extends motor life—saving you the call-out fee. The good news? Most upkeep can be done from ground level with a garden hose and basic hand tools.
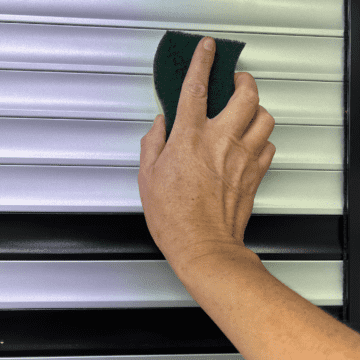
Routine Cleaning & Lubrication Schedule
- Hose off dust and salt, starting at the headbox and working down; avoid pressure cleaners.
- Wash with mild detergent and a soft brush, rinse, then dry with a microfiber cloth.
- Spray a light coat of silicone (never oil-based WD-40) inside the guide channels; wipe excess.
- Cycle the shutter twice to spread lubricant and confirm smooth travel.
Common Issues & Quick Fixes
- Stuck curtain: check for twigs in the guides, clear, then re-cycle.
- Slipping strap: open the winder box, replace the $10 plastic clutch cog.
- Motor won’t move: reset at the handset, verify power, then re-set upper/lower limits.
- Rattling in wind: tighten guide screws and fit additional wind clips.
Simple Repairs Without Removing the Shutter
- Swap damaged slats by sliding out the bottom bar, unclipping the faulty profile, and feeding in a new one.
- Replace broken locking pins from the outside—no headbox removal required.
- Battery tube changeover: disconnect the plug, slide out the old cell, insert new, and re-pair remote.
Regular TLC keeps your window roller shutter installation performing like new and protects the warranty.
Step 9: Calculate Your Project Costs & Decide DIY vs Professional
Before the drill dust settles, tally the figures so you know whether the sweat equity stacks up. A typical window roller shutter installation has two moving parts: hardware and labour. The hardware is fixed whether you DIY or hire; the labour is where the savings (or headaches) hide. Use the guide below to set a realistic budget per window and avoid nasty bill shock. Weve done our own figures on the DYI options and by time you order, deliver and install our family friendly prices are the same.
Professional Installation Price Guide in Australia
- Labour: $200 – $350 per window (simple access, ground floor)
- Electrical connection & certificate: +$150 per motorised unit
- Multi-window or whole-house packages: often 10-15 % discount
- Extra charges: double-storey, BAL-rated hardware, rural travel, after-hours callouts
For a motorised unit, expect $850 kit + $350 labour + $120 electrical = ≈ $1,320 all-in.
Decision Matrix: When to Call a Licensed Installer
- Multiple storeys or roof-pitch work at height
- No spare time or deadline clash (e.g., rental inspection)
- Hard-wired 240 V motors needing compliance sign-off
- Smart-home or NBN integration you’d rather not troubleshoot
- Heritage façades where a warranty hinges on professional fitting
- Physical limits: heavy steel shutters or wide spans
If you tick two or more boxes, the extra few hundred dollars for a pro could be the cheaper option in the long run.
Ready to Roll
Measure twice, drill once—those nine steps are really that simple. You’ve confirmed the opening, chosen the right kit, gathered tools, squared the guides, levelled the headbox, connected the drive, sealed the lot, penciled in a maintenance routine and sanity-checked the budget. Follow them in order and a smooth, rattle-free window roller shutter installation is almost guaranteed.
Precision and patience are the twin secrets. If any stage feels shaky—maybe the wall is three storeys up or the motor wiring looks like spaghetti—calling a licensed installer is money well spent. Otherwise, crack on and enjoy the payoff: cooler summers, quieter nights, lower power bills and a safer home.
Need factory-direct kits, genuine spare parts or a full “done for you” service? The team at Classic Roller Shutters Adelaide is only a phone call away. Happy installing and enjoy the roll-down peace of mind!