Summer afternoons on an Adelaide veranda, a gentle breeze and a cold drink in hand—until the western sun turns your favourite spot into an oven, or the wind and rain send everyone dashing indoors. For many South Australians, making the most of outdoor spaces means striking a delicate balance between comfort, privacy, and protection from the elements. Off-the-shelf solutions rarely fit the bill: every home and patio is unique, and Adelaide’s climate isn’t known for its subtlety.
That’s where custom outdoor blinds step in, offering tailored shade and shelter that transforms outdoor living areas into inviting retreats all year round. Whether you’re after crisp lines to complement a new build, robust protection for a windswept deck, or seamless integration with your home’s aesthetic, made-to-measure blinds deliver both form and function—no compromises required.
But how do you go from inspiration to installation with confidence? The process begins with a free local measure and quote, and—step by step—you’ll discover how simple it can be to specify, compare, and order blinds perfectly suited to your space and lifestyle. In this guide, you’ll find everything you need to make informed choices: from clarifying your objectives and selecting materials, to understanding compliance and arranging professional installation. Let’s get started on creating your ideal outdoor sanctuary.
Step 1: Define Your Outdoor Need and Objectives
Before you dive into fabrics and mechanisms, take a moment to clarify exactly what you want your outdoor blinds to achieve. Are you chasing afternoon shade on a west-facing patio, shielding a poolside dining area from insects or protecting a breezy veranda from gusty southerlies? By listing your top three requirements in order of priority, you’ll have a clear roadmap for selecting the right style, fabric and operation method.
Having well-defined objectives not only narrows down the vast range of options, it also keeps your budget and design on track. In this first step, we’ll help you pinpoint your primary needs, assess the characteristics of your outdoor space and set realistic expectations around cost and timing—so you can move confidently to the next stages of planning.
Identify Your Main Requirements: Shade, Privacy, Weather Protection
Understanding how each objective influences your blind choice will streamline the decision-making process. Use the table below to match your key requirement with the most suitable blind type:
| Requirement | Why It Matters | Blind Type Suggestion |
|---|---|---|
| Shade | Blocks harsh sun and UV, keeps temperatures down | Light-blocking fabrics or café blinds |
| Privacy | Prevents prying eyes from neighboring properties | High-opacity PVC or solid roller shutters |
| Weather Protection | Shields against wind and rain | Waterproof PVC slats (roller shutters) |
Exercise: Grab a notepad and jot down your top three needs—whether it’s maximising afternoon shade, creating a cosy bug-free zone or extending outdoor use when it’s raining. You’ll refer to this list as you explore styles, materials and automation options.
Analyse Your Outdoor Space: Orientation, Exposure, Style
Your outdoor environment plays a big part in choosing the right blinds. Start by observing:
- Sun path and exposure: Note when and where the sun hits—north-facing terraces may bake in midday heat, while west-facing decks need strong afternoon shade.
- Prevailing winds: Identify where breezes come from and how strong they are, especially if you entertain outdoors or have lightweight furniture.
- Architectural style: Consider whether a sleek aluminium cassette suits a contemporary façade, or if a soft-drape mesh complements a coastal cottage.
Take photographs at different times of day and walk around the space with a simple sketch. This visual record will help you—and your supplier—zero in on the ideal product.
Set Budget and Timeline Expectations
Being realistic about costs and timing from the outset prevents surprises later. Here’s what to factor in:
• Budget range
- Manual blinds: $600–$3000 per window, depending on size and fabric
- Motorised systems: $600+ per window, with home-automation add-ons increasing the price
• Cost drivers - Dimensions and fabric choice
- Extras such as side channels, pelmets or remote controls
- Installation complexity (height, access, electrical work)
• Timeline - Quoting and measure: 1–2 weeks
- Manufacture: typically 2–6 weeks
- Installation slot: depends on your supplier’s schedule, but plan for a further one-week window
Tip: Build in a buffer of two to four weeks from initial measure to final installation—this will cover any unexpected delays in manufacturing or site access.
Step 2: Explore the Benefits of Custom Outdoor Blinds
Investing in made-to-measure outdoor blinds brings a host of advantages that go far beyond simply blocking the sun. Tailored to Adelaide’s harsh summers, cool winters and occasional downpours, these blinds strike the perfect balance between function and style. From slashing energy bills to boosting property appeal, custom solutions ensure you get just the features you need—without paying for extras you won’t use.
Thermal Comfort and Energy Savings
External blinds are one of the most effective ways to reduce heat gain before it even reaches your windows. According to the Australian Government’s Your Home guide, “Blocking the sun before it reaches the glass is the most effective way to control unwanted heat gain.” By preventing up to 90% of solar radiation from entering your home, custom outdoor blinds can lower indoor temperatures by several degrees, easing the load on air-conditioning and cutting energy costs. Over the long term, that adds up to significant savings on power bills and a smaller carbon footprint.
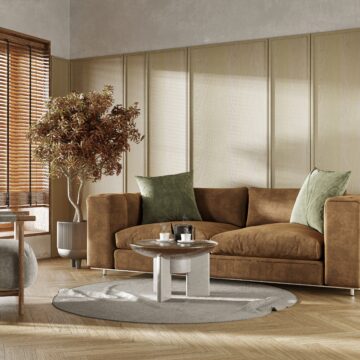
Enhanced Outdoor Living Experience
Picture summer lunches that stay cool long after the sun climbs high, or spontaneous barbecues in autumn without worrying about a sudden shower. Custom blinds transform verandas, patios and balconies into all-season retreats. With the right fabric and operation—be it motorised or hand-crank—you can adjust your blinds in seconds to suit changing weather or mood. The result is a seamless extension of your living space where family and friends gather, no matter the forecast.
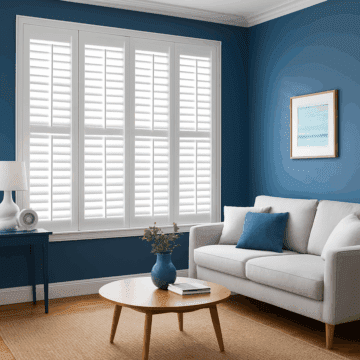
Improved Curb Appeal and Property Value
Beyond everyday comfort, bespoke outdoor blinds enhance your home’s exterior aesthetic and marketability. You can coordinate colours, fabrics and finishes to complement architectural features or existing landscaping. These thoughtful design touches not only elevate curb appeal but also make a strong selling point. Quality window coverings are increasingly seen as a desirable feature by buyers, offering both visual impact and practical benefits from day one.
Step 3: Research Types and Styles of Outdoor Blinds
Before committing to any particular outdoor blind design, it pays to explore the range of outdoor-blind systems on offer. In Adelaide, options span from robust roller shutters to stylish mesh screens, each suited to different applications and weather conditions. In this step, we’ll introduce the main categories—highlighting how they operate, stand up to wind and rain, and fit into your alfresco lifestyle. For a deeper dive, check out Classic Roller Shutters’ guide on choosing the right product.
Roller Shutters, Ziptrak and Zipscreen Options
Roller shutters, Ziptrak and Zipscreen systems each bring unique strengths:
- Roller Shutters
Made of interlocking aluminium slats, roller shutters offer solid protection against high winds, heavy rain and even impact. They’re ideal for blocking light completely, enhancing security and insulating against temperature extremes. Operation can be manual or motorised, and they’re often the go-to solution when ultimate durability is required. - Ziptrak
This patented system uses a fine mesh panel that glides up and down within rigid side channels. Ziptrak screens excel in high-wind areas (with ratings up to 120 km/h) while maintaining an unhindered view. The mesh blocks insects and filters UV, making it perfect for pool enclosures, pergolas and wide-open patios. - Zipscreen
Similar to Ziptrak but utilising a zip-locked fabric edge, Zipscreen combines a neat, pelmet-concealed cassette with the flexibility of various fabrics—PVC, mesh or block-out. Wind resistance is strong (up to 95 km/h), and swapping out fabric is straightforward if you want to refresh the look down the track.
Each of these systems can be tailored to your space—whether you need maximum privacy, insect control or clear sightlines—and engineered to match the architectural style of your home.
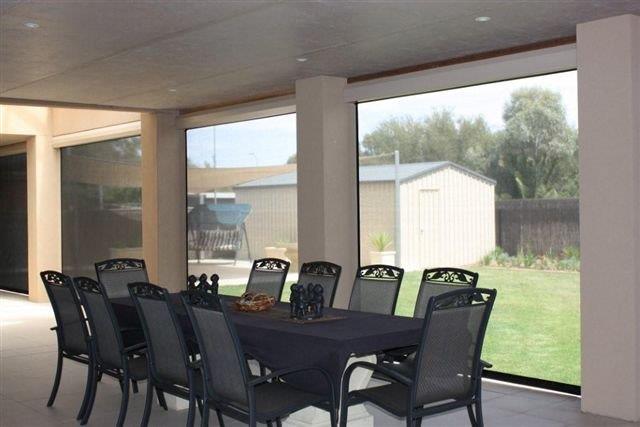
Café Blinds and Straight Drop Verandah Blinds
If you’re after a softer aesthetic or a less enclosed feel, café blinds and straight-drop verandah blinds might be the answer:
- Café Blinds
These typically drop around half the height of the opening, providing moderate shade and privacy without feeling boxed in. Often made from PVC or mesh, café blinds latch at the bottom with simple pin locks or tensioned wires—ideal for breezy days where full protection isn’t essential. - Straight Drop Verandah Blinds
For a complete shield against sun and rain, straight-drop blinds run the full height of your opening. They’re available in waterproof PVC for heavy-duty weather protection or UV-resistant mesh to preserve your view and airflow. Operation is via spring-loaded rollers or a sturdy gearbox, depending on panel size and frequency of use.
Both styles lend themselves to alfresco dining areas and covered verandas where you want a balance between openness and shelter. To see the full Outdoor Living range, visit the Outdoor Living overview.
Manual vs Motorised Operation
Once you’ve settled on a blind type, the next choice is how you’ll operate it:
- Hand-Crank or Spring-Loaded
Manual systems are budget-friendly, typically ranging from $250 to $500 per blind. Hand-crank versions use a gearbox that makes lifting large blinds easier, while spring-loaded rollers rely on internal tension to raise and lower at a steady pace. - Motorised Blinds
Prices for electric motors start around $800 and can exceed $1,200 when paired with smart-home integration. Motorised options offer the ultimate convenience: control blinds with a remote, wall switch or smartphone app. They also eliminate the need for cords with potential safety risks, and can be programmed to adjust based on sunlight, wind or time of day.
Motorisation can be retrofitted to many manual systems, giving you flexibility to upgrade later. Whether you choose manual simplicity or the luxe feel of motor control, consider how often you’ll adjust your blinds and how automation might complement your daily routine.
Step 4: Select Materials, Fabrics and Colour Choices
Choosing the right materials and colours ensures your outdoor blinds not only perform well in Adelaide’s weather but also complement your home’s aesthetic. In this step, we’ll look at common fabric types, essential performance ratings and how to coordinate finishes for a seamless design.
PVC vs Mesh for Durability and View
Two of the most popular fabric choices for outdoor blinds are PVC and mesh. Each offers different benefits:
- PVC
- 100% block-out and fully waterproof
- Excellent wind and rain protection
- Low-maintenance wipe-clean surface
- Mesh
- 70–90% UV block, depending on weave density
- Maintains outward visibility and airflow
- Naturally resists mould and mildew
| Feature | PVC | Mesh |
|---|---|---|
| Opacity | 100% block-out | 10–30% transparency |
| Wind Resistance | Up to 120 km/h (with channels) | Up to 95 km/h |
| Maintenance | Wipe with mild detergent | Rinse with water, gentle brush |
Your priorities will guide the decision—full privacy and protection favour PVC, while uninterrupted views and breezes point to mesh.
UV and Waterproof Ratings for Australian Conditions
Adelaide’s intense sun and occasional storms mean your blinds need robust ratings:
- UV Protection
Fabrics are tested to AS 2001.2.18 standards. A UV rating of 5+ indicates excellent resistance to sun damage and colour fade. Look for suppliers who certify fabric performance under prolonged UV exposure. - Waterproof Classes
Waterproof ratings range from Class 1 (light spray) to Class 3 (heavy downpour). For verandas exposed to driving rain, aim for Class 2 or Class 3 fabrics and ensure seams are sealed with marine-grade welding.
Always check supplier data sheets for specific test results—this guarantees the fabric you choose will withstand Adelaide’s harshest days.
Colour, Finish and Design Coordination
Blinds are a design statement as much as a weather shield. Custom powder-coat finishes on aluminium pelmets, side channels and brackets let you match or contrast with guttering, window frames and outdoor furniture. Here are a few tips:
- Select a neutral base (charcoal, off-white or mid-grey) for understated elegance.
- Choose bold accent colours (deep blue, forest green) to complement landscaping or brickwork.
- Consider texture—metallic or satin finishes add depth in changing light.
Browse a range of blind design options to see how different palettes and finishes can transform your façade. A small sample pack can make all the difference in visualising the final look.
With materials, performance ratings and colours selected, you’re ready to move on to compliance and measurement—ensuring your custom blinds fit perfectly and comply with relevant standards.
Step 5: Understand Compliance and Energy Efficiency Requirements
Custom outdoor blinds do more than look good—they must also meet legal standards and deliver real energy savings. By understanding the relevant construction codes, passive solar principles and safety requirements, you’ll ensure your new blinds not only perform well in Adelaide’s climate but also comply with national regulations. In this step, we’ll cover the shading standards set out in the National Construction Code, explain key passive solar concepts for South Australia and outline operational and safety guidelines you need to know before installation. read our guide for keeping your home cool roller shutters v double glazing.
National Construction Code Shading Standards
The National Construction Code (NCC) sets minimum energy-efficiency requirements for new and existing buildings. Under NCC Part 13.3—External Glazing, “external shading devices must be capable of restricting at least 80% of summer solar radiation.” In practical terms, this means your outdoor blinds need to block the majority of direct sunlight before it hits your glazing, reducing internal heat gain and easing the load on air-conditioning.
When selecting fabrics and systems, look for performance data that confirms compliance with these standards. Whether it’s mesh screens with proven UV block or solid PVC panels rated for high wind zones, proper certification guarantees you’ll meet—or even exceed—the NCC’s shading thresholds. For the full details, refer to the official NCC guidance on external glazing.
Passive Solar Design Principles in South Australia
South Australia’s climate features hot, dry summers and cool winters, making passive solar design essential for year-round comfort. The goal is simple: allow winter sun to warm living spaces while blocking unwanted summer heat. In practice, that means positioning and operating your blinds seasonally—fully retract them on north-facing windows during winter to maximise solar gain, then lower them in summer to shield interiors from peak heat.
According to the Australian Government’s YourHome guide, understanding your home’s orientation and thermal mass is key to harnessing passive solar benefits. Materials such as masonry or concrete absorb sun-warmed air in winter and release it slowly when temperatures drop. By combining these principles with custom blinds, you’ll enjoy a more stable indoor environment and reduced energy bills, regardless of the time of year. Learn more about design-climate strategies on the YourHome website.
Safety and Operational Adjustability Requirements
Beyond performance, safety and ease of use are non-negotiable. Adjustable shading systems should be operable from ground level—without ladders or awkward reaches—and controls must remain reliable throughout the lifespan of the blind. If you choose motorised options with sensors or timers, ensure wiring and installations comply with Australian electrical standards.
Regular maintenance is also part of compliance. Inspect control mechanisms, tension springs and sensor units at least twice a year to confirm smooth operation. Replace any worn or damaged parts promptly—this not only preserves safety but also keeps your blinds within the parameters of warranty and building code requirements. With the right combination of design, installation and upkeep, your custom outdoor blinds will deliver comfort and compliance in every season.
Step 6: Take Accurate Measurements for a Made-to-Measure Fit
Accurate measurements are the backbone of any made-to-measure blind. Even minor miscalculations can lead to unsightly gaps, drafts or blinds that won’t operate smoothly. Whether you’re preparing for a professional measurement or tackling it yourself, following a systematic approach ensures your new outdoor blinds fit perfectly and perform as expected.
Preparing for a Professional Measurement Service
Before the installer arrives, gather everything they need to hit the ground running. Have your site plans or floor plans at hand—whether digital PDFs or printed drawings—and mark the exact openings where blinds will be fitted. Photographs of each area, taken from multiple angles, give extra context about surrounding obstructions like downpipes or overhangs. Finally, clear the space: move furniture, remove decorations and ensure easy access to walls and windows so measurements can be taken without delays.
DIY Measurement Guide and Common Pitfalls
If you prefer to take measurements yourself, these simple tools and best practices will help you avoid common mistakes:
Tools you’ll need:
- A steel tape measure (at least 5 m long)
- A straight-edge or spirit level
- A notepad and pen
Measurement steps:
- Width: Measure the recess width at the top, middle and bottom, then record the smallest dimension.
- Drop height: Measure from the top mounting point to the sill or floor at left, centre and right—again noting the smallest figure.
- Depth: If fitting inside a recess, check the depth to ensure there’s enough room for the blind cassette or roller.
Common pitfalls:
- Never round up measurements—always subtract an installation tolerance (typically 5 mm) to prevent a tight or jammed fit.
- Avoid estimating heights visually; small errors magnify over larger spans.
- Don’t forget to factor in any slopes or irregularities in the wall or ceiling surface.
By double-checking each reading and following these steps, you’ll provide precise figures that lead to a flawless installation.
Using Floor Plans and Rough Dimensions for Preliminary Estimates
Before a site visit, many suppliers can offer reliable ballpark quotes from your floor plans or hand-drawn sketches. Simply scan or photograph your plan and email it along with any rough dimensions you’ve noted. This early insight helps you budget and compare different options without waiting for in-home measurements. Once you’re ready to proceed, a quick follow-up visit will confirm the final sizes and iron out any site-specific details—keeping your project on track from start to finish.
Step 7: Request Your Free Measure & Quote from Trusted Local Suppliers
Once you’ve nailed down your requirements, materials and style preferences, it’s time to bring in the experts. A free measure and quote from a reputable, factory-direct supplier in Adelaide takes the guesswork out of sizing, pricing and feasibility. Best of all, it’s obligation-free—so you can explore options, compare recommendations and fine-tune your specifications without any pressure to commit.
Benefits of Factory-Direct Free Measure & Quote
Choosing a factory-direct provider means you deal straight with the manufacturer, not a middleman. That translates into:
- Transparent pricing with no hidden mark-ups or surprise fees
- Honest, hands-on advice from technicians who understand product performance inside out
- Access to the latest fabrics, hardware finishes and operation methods tailored for Adelaide’s climate
- An opportunity to see physical samples on site—so you can check colour, texture and operation before you buy
To explore the full range of outdoor blinds overview that Classic Roller Shutters offers, head to their dedicated page and get inspired by local success stories.
What to Expect in Your In-Home Consultation
When your consultant arrives, they’ll come prepared with fabric swatches, cassette and channel samples, plus the tools needed to capture precise measurements. During the visit, expect them to:
- Walk you through product demonstrations and explain differences in materials, wind ratings and operation styles
- Take detailed site measurements—checking for obstacles like roof overhangs, downpipes or power points
- Identify any installation challenges, such as uneven walls or limited ceiling clearance
- Advise on the best solution to match your objectives, whether that’s a motorised Ziptrak screen or a heavy-duty PVC roller shutter
Ready to book a time that suits you? Simply Contact the team to arrange your free consultation and secure a spot in their busy schedule.
Providing Details for Accurate Quotes
To make the quoting process as smooth and accurate as possible, gather the following information before your consultation:
- Your property’s full address and access instructions (gate codes, parking tips)
- The exact locations where each blind will be installed (e.g. west-facing pergola, poolside enclosure)
- Any preliminary measurements or sketches you’ve taken, including widths and drop heights
- A rough budget range—this helps the consultant recommend solutions within your price point
- Photographs of mounting surfaces, nearby obstructions and electrical points (crucial for motorised setups)
Armed with these details, your supplier can prepare a comprehensive, no-obligation proposal that aligns with your needs, schedule and budget.
Step 8: Compare Quotes and Choose the Right Supplier
With multiple quotes in hand, it’s time to weigh up the offers and decide which supplier will deliver the best overall value for your custom outdoor blinds. Rather than simply choosing the cheapest option, consider how each proposal stacks up in terms of long-term performance, peace of mind and after-sales support. A systematic comparison makes it easier to pinpoint the supplier that ticks all your boxes—budget, quality, warranty and service.
Key Factors: Price, Quality, Warranty and Service
When reviewing competing quotes, create a simple comparison chart to keep everything visible at a glance. At minimum, include:
| Factor | What to Look For |
|---|---|
| Price | Itemised breakdown of materials, installation, delivery and any optional extras |
| Quality | Locally manufactured components, fabric ratings (UV, waterproof), hardware finish and wind ratings |
| Warranty | Duration (e.g. 5–7 years), coverage details (mechanical parts, fabric fade, motor) |
| Service | In-home consultations, ongoing maintenance, emergency repairs and response times |
This side-by-side view highlights hidden costs—like delivery fees or extended lead times—and reveals which supplier offers the most comprehensive package for your investment. Don’t hesitate to ask for clarification on any line item that seems vague or open-ended.
Why Choose Classic Roller Shutters Adelaide?
Classic Roller Shutters brings more than four decades of South Australian expertise to every project. As a factory-direct manufacturer based in Adelaide, they offer:
- Transparent, competitive pricing with no middle-man mark-ups
- A comprehensive range of outdoor-blind systems, from Ziptrak and Zipscreen to heavy-duty roller shutters
- Free, obligation-free measure and quote—on site and from your floor plans
- Custom powder-coat finishes and locally tested fabrics engineered for Adelaide’s climate
- A dedicated repair division and spare-parts store, ensuring ongoing support long after installation
Discover the Classic Roller Shutters difference for yourself by visiting their website and arranging your free consultation: Classic Roller Shutters Adelaide.
Other Reputable Suppliers in Adelaide
While Classic Roller Shutters offers an unbeatable local solution, it’s wise to be aware of other established names in the market:
- Ozrite Blinds: Known for a wide DIY-friendly outdoor range and instant online quotes.
- Spotlight: Offers fashion-forward fabrics and made-to-measure awnings with quick turnaround.
- Budget Awnings: Specialises in cost-effective outdoor blinds and straightforward installation kits.
Comparing these suppliers side by side—using the criteria above—will help you choose the partner best aligned with your project needs and budget. Once you’ve made your selection, you’re ready to confirm final details and move on to placing your order.
Step 9: Finalise Your Order, Delivery and Installation Plan
With your supplier chosen and your ideal blind system selected, it’s time to tie up the final details. This phase ensures that every specification is locked in, you’re clear on payment and contractual terms, and the logistics of manufacture, delivery and installation are firmly scheduled. Taking these steps now will prevent delays, avoid unexpected costs and guarantee a smooth handover of your custom outdoor blinds.
Confirming Measurements and Specifications
Before production begins, review every aspect of your order:
- Dimension drawings: Verify widths, drop heights and any recess depths.
- Fabric swatches and codes: Ensure the chosen material matches your UV, waterproof and opacity requirements.
- Hardware finishes: Check powder-coat colours or anodised options for pelmets, side channels and brackets.
- Operation details: Confirm whether you’ll have a hand-crank, gearbox or motor, and the type of control (wall switch, remote or smart-home integration).
Go through each item line by line. If a measurement doesn’t match your site notes or a colour looks different to your sample, raise it right away. This final check is crucial to prevent production errors and ensure the blinds fit perfectly on installation day.
Understanding Payment, Deposits and Contracts
Most reputable suppliers will ask for a deposit to secure your order. Key points to clarify:
- Deposit percentage: Often 30% of the total quote.
- Progress payments: Some contracts split payments into deposit, mid-manufacture and balance on completion.
- Balance due: Payable once installation is complete and you’re happy with the result.
- Cancellation and changes: Ask about fees or lead-time implications for amendments to fabric, dimensions or operation methods after production has started.
Always obtain a written contract or order confirmation detailing timelines, cost breakdowns and any additional fees. Keeping a digital copy ensures both parties have a clear reference and protects you from unexpected charges.
Schedule for Manufacture, Delivery and Installation
Once contracts are signed and the deposit paid, your blinds head into manufacture. Typical timeframes are:
- Manufacture: 2–3 weeks for cutting, welding, powder-coating and motor assembly.
- Delivery window: A one-week slot when completed blinds arrive at your property.
- Installation: Usually one to two days on-site, depending on the number and complexity of installations.
To facilitate a hassle-free installation:
- Clear all access points at ground level—move furniture, planters and obstructions.
- Ensure a safe, unobstructed workspace for installers.
- Confirm power availability for motorised systems or discuss temporary cabling.
- Have an on-site contact to approve final positioning and sign off on completion.
On installation day, your technician will demonstrate blind operation, hand over any remotes or control devices and provide guidance on care and maintenance. With the final checks done, you’ll be ready to enjoy your bespoke outdoor living area.
Step 10: Maintain and Care for Your Outdoor Blinds
Even the most robust outdoor blinds benefit from a little TLC to keep them looking sharp and operating smoothly. A few simple maintenance tasks carried out at regular intervals will extend the life of your investment, preserve performance ratings and prevent minor hiccups from turning into costly repairs. Below, we’ve outlined easy-to-follow cleaning routines, common issue fixes and where to find spare parts should you need them.
Regular Cleaning and Inspection Tips
Keeping your blinds clean not only enhances their appearance but also prevents dirt build-up that can strain mechanisms and fabrics over time. Aim to perform the following checks every three to six months:
- Rinse with fresh water: Use a garden hose on a gentle setting to wash away dust, pollen and airborne pollutants.
- Mild detergent wipe-down: For stubborn marks, mix a small amount of pH-neutral detergent in water. Gently wipe the fabric or slats with a soft cloth, then rinse thoroughly.
- Air-dry completely: After cleaning, leave the blinds fully open to dry. Avoid rolling them up damp, which can encourage mould or mildew.
- Inspect tension and alignment: Check that the roller mechanism moves freely and the fabric hangs straight. Look for any sagging or uneven edges that might indicate a loss of spring tension or misaligned side channels.
- Examine seals and fixings: Ensure pelmets, end-caps and guide channels are firmly attached. Tighten any loose screws, brackets or clips.
A few extra minutes on maintenance day go a long way towards fending off wear and tear—and mean you’ll spend more time enjoying your outdoor space.
Troubleshooting Common Issues
Even with routine upkeep, you might encounter the odd glitch. Here are three frequent problems and how to tackle them:
- Blind won’t retract smoothly
Possible cause: spring tension has loosened or debris in the cassette.
Quick fix: Fully extend the blind, then gently guide it back up while applying light pressure to the bottom rail. This can re-tension the spring. If it still sticks, remove the cassette cover and clear out grit or leaves. - Uneven drop or fabric waves
Possible cause: fabric tracking off-centre or side-channel misalignment.
Quick fix: With the blind half-down, gently pull the bottom rail to centralise the fabric. Check that side-channels are clean and fastened evenly; a small adjustment of the mounting brackets often restores straight tracking. - Wrinkles or creases in the fabric
Possible cause: fabric was rolled up before fully dry or stored under tension.
Quick fix: Unroll the blind completely and leave it down on a dry, flat surface for 24 hours. Lightly mist the fabric with water to help relax the fibres—then re-roll it, ensuring it moves smoothly.
If a simple tweak doesn’t resolve the issue, contacting a repair specialist early prevents further damage and keeps your warranty intact.
Accessing Spare Parts for DIY Repairs
For handy homeowners who prefer to fix things themselves, having the right replacement parts on hand can save time and money. Classic Roller Shutters and many local suppliers stock a comprehensive range of components, including:
- Tension springs and spring-reloading kits
- End-caps, bracket covers and locking pins
- Side-channel fasteners and guide-wire sets
When ordering parts, provide the make and model of your blind, along with any serial or batch numbers if available. Many suppliers will also ask for fabric samples or old components to ensure you receive an exact match. Whether you need a new spring or a locking catch, sourcing genuine manufacturer parts guarantees compatibility and long-term reliability.
Step 11: Enhance Functionality with Accessories
Once you’ve settled on the main blind type, a suite of accessories can take performance and aesthetics up a notch. Whether you crave the convenience of hands-free operation or want a seamless finish that complements your home, these add-ons let you tailor every detail to your lifestyle and design taste.
Motorisation and Home Automation Integration
Adding a motor transforms outdoor blinds from manual fixtures into effortless living aids. You can choose from:
- Single-channel or multi-channel remotes: control one blind or programme several zones to move in unison.
- Wall-mounted switches: a discreet panel keeps controls at your fingertips, without the risk of lost remotes.
- Smart-home compatibility: integrate blinds with platforms like Google Home or Amazon Alexa to automate by time of day, sunlight levels or voice command.
- Wi-Fi or solar-powered motors: ideal for pergolas or freestanding structures where mains power is tricky. Battery-rechargeable options mean you won’t need a sparky for every little adjustment.
Motorisation not only adds luxury but also enhances safety—no dangling cords—and preserves the integrity of fabrics and springs by ensuring smooth, consistent operation.
Optional Extras: Pelmets, Side Channels and Locking Mechanisms
These finishing touches aren’t just for looks—they’ll boost the durability and weather performance of your installation:
- Pelmets and fascias: powder-coated aluminium covers that conceal the roller barrel, protecting it from debris, insects and UV exposure while giving a crisp, architectural edge.
- Side channels and guide wires: create a tight seal at the blind edges for superior wind resistance and keep your fabric tracking perfectly, even in gusty conditions.
- Lock-down bars and latches: secure your blinds in the fully closed position, ideal for storm-prone seasons or added security when you’re away.
Choosing from a range of extrusion profiles and locking options means you can dial in just the right balance of functionality and sleek design.
Matching Hardware to Your Home’s Aesthetic
Your blind’s hardware should feel like an extension of your home’s exterior, not an afterthought. When planning finishes, consider:
- Coordinating powder-coat colours: match pelmets, channels and brackets to guttering, window frames or nearby metalwork for a cohesive look.
- Textured versus smooth: a satin finish in mid-grey lends a subtle, contemporary vibe, while a timber-effect powder coat can inject warmth into a seaside cottage façade.
- Minimalist lines or decorative trims: slimline channels and hidden fixings suit modern builds, whereas more pronounced Fascias and ornate end caps might better complement heritage or bungalow styles.
A few carefully chosen samples against your wall or decking will help you visualize the end result—ensuring your final installation not only works brilliantly but also looks spectacular.
Ready to Transform Your Outdoor Space?
You’ve now seen how straightforward it is to move from a vague idea to a bespoke solution that ticks every box. From defining your needs (Step 1), exploring the benefits (Step 2) and researching types and styles (Step 3), all the way through to measuring accurately (Step 6), comparing quotes (Step 8), finalizing your order (Step 9) and caring for your blinds long after installation (Step 10). And if you still want to push the envelope, accessories and automation (Step 11) ensure your outdoor blinds work seamlessly with your lifestyle.
Best of all, you don’t need to navigate these steps alone. Classic Roller Shutters Adelaide offers a free, no-obligation in-home measure and quote service—so you can see fabrics, colours and operation methods up close, have your questions answered by local experts and receive a transparent cost estimate tailored to your project.
Ready to get started? Arrange your free measure and quote today with Classic Roller Shutters Adelaide, and take the first step towards a year-round outdoor living area you’ll love.