Your Adelaide patio gets hammered by summer sun and you need shade without blocking the breeze. You want outdoor blinds but professional installation quotes are eating into your budget. The good news? Installing outdoor blinds yourself is more achievable than you think.
This guide walks you through the complete DIY installation process for outdoor blinds. You’ll learn how to measure your space accurately, choose the right materials and hardware, mount everything securely, and avoid the common mistakes that trip up first timers. We’ll also break down realistic costs so you know exactly what to expect.
By the end, you’ll understand whether this is a weekend project you can tackle or when it makes sense to bring in the professionals. Either way, you’ll save money and get the shade solution your outdoor space needs.
What to know before you start
Before you grab your drill and head outside, you need to understand what makes outdoor blinds installation different from hanging regular curtains. Outdoor blinds face harsh Australian weather including UV rays, wind, and rain, so your installation must be rock solid. A dodgy mounting job means blinds that sag, flap around, or worse, tear away during Adelaide’s notorious spring winds.
Most DIY installations take 4-6 hours per blind once you have all materials on hand. You’ll need basic power tool skills and a helper for larger blinds over 2 metres wide. The installation requires drilling into brick, timber, or steel, so you must identify your mounting surface before buying fixings. Masonry surfaces need different plugs and screws than timber frames.
Professional installers charge $150-$300 per blind for labour, so doing it yourself saves real money on multiple blinds.
When to call in the professionals
You should reconsider the DIY approach if your installation area is above second storey height or you’re mounting onto difficult surfaces like rendered walls or heritage brickwork. Motorised blinds with electrical components also require licensed electrical work for safe operation. Complex track systems with multiple blinds or unusual angles add complications that can quickly turn frustrating. Professional installers carry insurance that protects you if something goes wrong during the job, which matters when you’re drilling into your home’s structure.
Step 1. Measure, plan and budget your blinds
Accurate measurements make or break your outdoor blinds installation. Measure three times across the width of your opening (top, middle, and bottom) because many patios and pergolas aren’t perfectly square. Use the smallest measurement to ensure your blinds fit without binding. Add 50mm clearance on each side for bracket mounting and smooth operation.
How to measure your outdoor areas
Start by identifying whether you need a recess mount (inside the opening) or a face mount (outside the frame). Recess mounts require measuring the exact width and drop of your opening at multiple points. Face mounts need you to add 100-150mm to both width and drop to ensure adequate coverage and light blocking.
Record your measurements in millimetres rather than centimetres to avoid rounding errors that compound across multiple blinds. Measure the drop from where you’ll mount the brackets down to where you want the blind to stop, typically 50-100mm above ground level. Account for any obstructions like downpipes, lights, or wall-mounted taps that might interfere with blind operation.
Getting measurements wrong costs you time and money, as most blind suppliers won’t accept returns on custom-cut products.
Calculate your total budget
Your total outdoor blinds installation budget includes three main components. Canvas blinds cost $300-$2,500 per blind while PVC options run $600-$2,000 depending on size and quality. Track systems, brackets, and fixings add another $50-$150 per blind to your materials cost.
Budget breakdown for a standard 2.4m x 2.4m installation:
| Item | DIY Cost | Professional Cost |
|---|---|---|
| Blind (PVC/Canvas) | $800-$1,200 | $800-$1,200 |
| Hardware & fixings | $80-$120 | Included |
| Installation labour | $0 | $200-$300 |
| Total per blind | $880-$1,320 | $1,000-$1,500 |
Purchase 10% extra fixings beyond what you think you need, because stripped screws and dropped plugs happen during installation.
Step 2. Choose materials, hardware and fixings
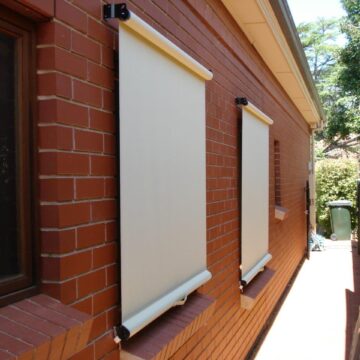
Your blind material choice directly impacts durability and maintenance requirements in Adelaide’s climate. Canvas blinds offer superior breathability and come in various colours, making them ideal for areas where airflow matters. PVC blinds block wind completely but can develop mould in humid conditions if not cleaned regularly. Visit suppliers with your measurements ready to compare material weights and UV ratings, as lighter fabrics won’t last in exposed positions.
Select the right blind material
Heavy duty PVC rated at 650gsm or higher handles Adelaide’s summer heat without warping or becoming brittle. Canvas options need 320gsm minimum weight for outdoor applications, with acrylic-coated versions performing best against UV degradation. Check that your chosen material includes anti-mildew treatment and UV stabilisers in the manufacturing process, not just surface coatings that wear off.
Request sample swatches before committing to large orders, especially for multiple blinds where colour matching matters. Test samples by leaving them in direct sun for a week to check for fading or material breakdown.
Material quality determines whether your blinds last two years or ten years in Australian conditions.
Hardware and mounting components
Your outdoor blinds installation requires specific fixings matched to your mounting surface. Masonry surfaces need 10mm x 75mm dynabolts or concrete anchors that can handle the lateral force when wind catches your blinds. Timber frames work with 75mm batten screws driven into solid structural members, not just fascia boards.
Essential hardware checklist:
- Mounting brackets (2-4 per blind depending on width)
- Guide tracks or side channels (both sides)
- Bottom rail with tie-down points
- Stainless steel fixings (avoid zinc-plated in coastal areas)
- Wall plugs matched to drill bit size
- Tensioning springs or clips
- Operating mechanism (crank, rope, or motorised unit)
Step 3. Install brackets, blinds and guides
Your outdoor blinds installation succeeds or fails based on how securely you mount the brackets. Start by marking your bracket positions with a pencil after checking measurements one final time. Use a spirit level to ensure brackets sit perfectly horizontal because even a 2-degree tilt causes binding and uneven wear. Hold brackets against your mounting surface and mark through the screw holes with a sharp pencil or marking pen.
Mark and drill bracket positions
Drill pilot holes at marked positions using the correct bit size for your wall plugs, typically 8mm for masonry or 3mm for timber. Keep your drill perpendicular to the surface to prevent angled holes that weaken fixing strength. Blow out dust from masonry holes before inserting plugs, as compressed dust prevents plugs from seating properly.
Insert wall plugs flush with the surface, tapping them gently with a hammer if needed. Position your first bracket and drive screws finger tight initially, allowing minor adjustments before final tightening. Check level again before fully tightening each bracket, as surfaces that appear flat often have subtle variations. Install remaining brackets following the same process, maintaining consistent height across all mounting points.
Brackets that aren’t level cause your blind to hang crooked and create excessive wear on one side.
Mount the blind and attach guides
Slide your blind’s top tube into the brackets, ensuring it clicks or locks securely in place. Most bracket systems require you to insert one end first before pivoting the blind into the opposite bracket. Test that the blind rotates freely in its brackets before proceeding to guide installation.
Mark guide track positions on both sides of your opening, ensuring they run perfectly vertical using your spirit level. Guide tracks prevent wind from pushing blinds sideways and keep fabric tensioned. Drill and fix tracks at 300-400mm intervals down their length, with extra fixings near top and bottom where stress concentrates. Feed the blind’s side edges into the guide channels, checking that fabric moves smoothly without catching or bunching as you raise and lower the blind several times.
Step 4. Test, troubleshoot and maintain your blinds
Testing your outdoor blinds installation immediately after mounting reveals problems you can fix before they become serious. Raise and lower each blind at least ten times checking for smooth operation without binding or fabric bunching in the guides. Apply gentle sideways pressure to simulate wind and ensure brackets hold firm without movement or creaking sounds.
Test your installation thoroughly
Walk around your patio checking that blinds hang level and sit flush against mounting surfaces. Lower blinds completely and check bottom rails reach their intended stopping points without excessive slack or tension in the fabric. Wind the blind back up while watching the fabric roll evenly onto the tube without creasing or riding up one side. Check that tie-down points engage properly when the blind reaches full extension, as loose tie-downs allow wind damage during Adelaide’s gusty conditions.
Fix common installation problems
Blinds that won’t lower smoothly usually suffer from misaligned guide tracks or brackets that aren’t level. Loosen bracket fixings slightly, adjust using your spirit level, then retighten while checking blind operation improves. Fabric catching in guides means tracks need repositioning closer to the blind edges or the fabric requires trimming if it’s oversized.
Regular maintenance extends blind life from five years to over ten years in harsh Australian weather.
Keep your blinds working properly
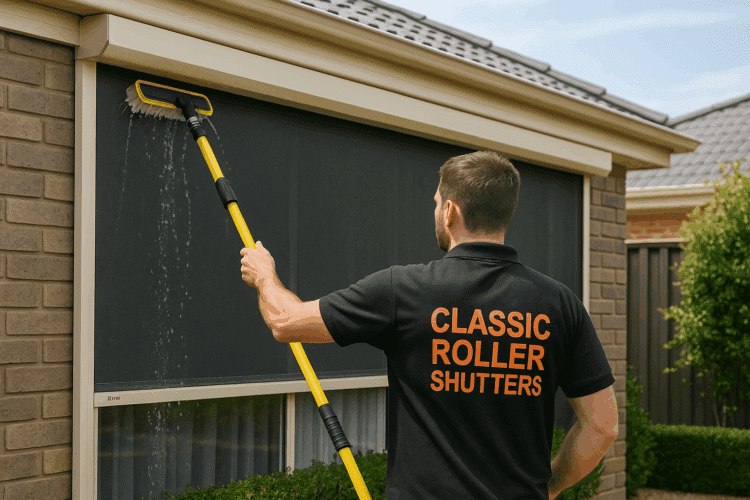
Hose down PVC blinds monthly to remove dust and prevent mould growth, using mild detergent for stubborn marks. Canvas blinds need brushing with a soft broom rather than hosing, as excess water damages the fabric treatment. Lubricate moving parts including crank mechanisms and guide tracks every six months using silicone spray, never oil-based products that attract dirt.
Next steps for your outdoor blinds
You’ve completed your outdoor blinds installation and saved hundreds of dollars on professional labour. Your blinds now protect your patio from Adelaide’s harsh sun while giving you control over privacy and airflow. Document your installation with photos and keep receipts for warranty claims, as most manufacturers require proof of purchase date.
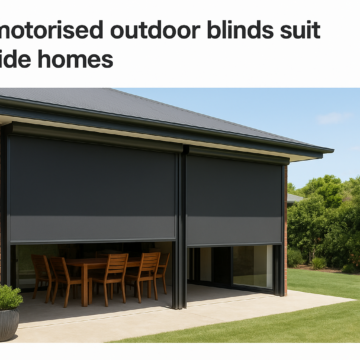
Schedule your first maintenance check for three months after installation to catch any adjustment needs early. Tighten fixings that may have loosened during initial use and check guide tracks haven’t shifted. Consider upgrading manual blinds to motorised systems once you’re confident with the basic installation process.
Professional installation makes sense when your project involves motorised systems or difficult mounting surfaces. Classic Roller Shutters Adelaide manufactures and installs outdoor blinds with over 40 years of experience, offering free in-home consultations and competitive pricing on quality products. Contact them for repairs, upgrades, or your next outdoor blind project.