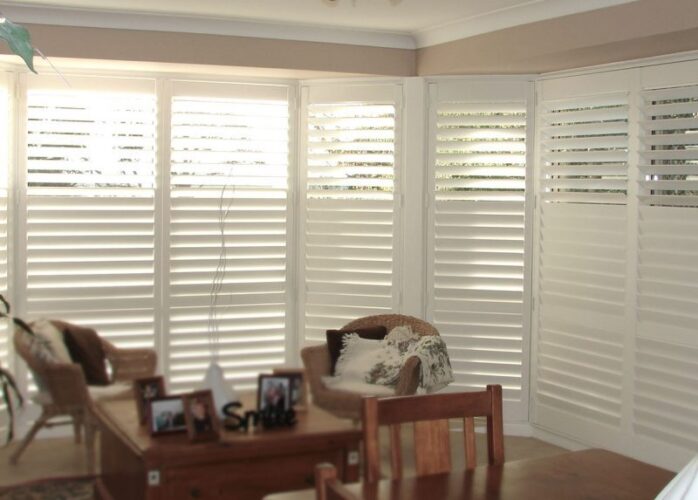
Bay windows add character and natural light to any room, but finding window coverings that actually fit those angled frames is frustrating. Standard blinds look awkward, curtains bunch up at the corners, and most off-the-shelf options simply don’t work. You need something that follows the shape, controls light properly, and looks like it belongs there.
Plantation shutters solve this problem. When measured and configured correctly, they fit each section of your bay window perfectly, whether you have three panels at 45 degrees or a curved bow window. You get precise light control, better insulation, and a finish that adds real value to your home.
This guide walks you through measuring bay windows for plantation shutters and choosing the right configuration for your space. You’ll learn how to define your goals and budget, measure each section accurately, plan a layout that works with your window angles, and select materials that suit your needs. By the end, you’ll know exactly what to specify when getting quotes or ordering shutters yourself. Whether you’re comparing local installers or considering a DIY approach, these steps will help you get the right shutters at the right price.
Why plantation shutters suit bay windows
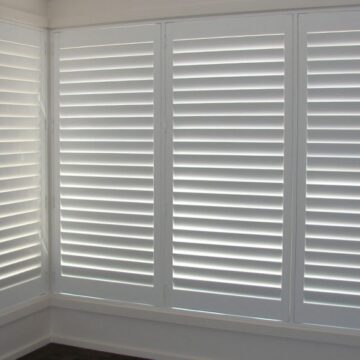
Bay windows have multiple frames set at angles, and plantation shutters adapt to this geometry better than any other window covering. Each shutter panel is custom-made to fit the exact width and height of its frame, so you avoid the gaps, overlaps, and awkward fittings that come with standard blinds or curtains. The shutters follow your window’s shape precisely, whether that’s three panels at 45-degree angles or five sections forming a gentle curve.
Custom fit for angled frames
You measure each section of your bay window individually, and the manufacturer builds panels that slot into those specific openings. This means no light gaps at the corners where angled frames meet. The shutters mount inside each recess or across the face of the frame, depending on your depth and preference, and they operate independently so you can angle louvres in the centre differently from those on the sides. This gives you fine control over privacy and light direction throughout the day.
Plantation shutters for bay windows eliminate the compromise you’d make with curtains or standard blinds that never quite fit the angles properly.
Better insulation and durability
The rigid construction of shutters creates an insulating air pocket between the glass and your room, reducing heat loss in winter and blocking heat gain in summer. This matters more on bay windows because their larger surface area and outward angle expose more glass to the elements. Shutters also last longer than fabric blinds or curtains, with solid materials that won’t sag, fade, or need frequent replacement. You clean them with a quick wipe rather than washing or dry-cleaning.
Step 1. Define your goals and budget
Before you measure anything, write down what you need these shutters to achieve. This determines which materials you’ll choose, how you’ll configure the panels, and where you’ll spend your budget. If you want maximum light control for a bedroom, you’ll prioritise different features than someone looking for insulation in a living room or privacy in a street-facing window.
What you want the shutters to do
List your priorities in order. Do you need complete blackout for sleeping, or just filtered light during the day? Are you blocking noise from a busy road, improving energy efficiency, or adding security? Your bay window might serve multiple purposes, but ranking these needs helps you make trade-offs later. For example, if insulation matters most, you’ll favour thicker materials and tighter seals over decorative louvre widths.
Set a realistic budget
Plantation shutters for bay windows cost more than standard windows because you’re covering a larger area with custom angled panels. Expect to pay $800 to $2,500 per bay window depending on size, material, and installation complexity. Write down your maximum spend before you get quotes, then research typical prices for your window dimensions.
Setting your budget first stops you from over-specifying features you don’t actually need or under-investing in areas that matter.
Break your budget into material cost, installation labour (if hiring), and any electrical upgrades if you want motorised operation. If quotes come back higher than expected, you’ll know which features to adjust rather than abandoning the project or accepting poor quality.
Step 2. Assess and measure your bay window
You need accurate measurements before ordering anything, and bay windows require more attention than standard frames. Start by identifying your bay window type because this affects how you measure and which shutter configurations will work. Canted bay windows (three panels with angled sides) measure differently from bow windows (curved with four or more panels) or full-height box bays. Take photos of your window from inside and outside, noting any window seats, deep sills, or architectural features that might affect shutter installation.
Identify your bay window type
Bay windows come in four common configurations, and each requires a different measurement approach. Canted bays have a flat front panel with two angled sides, typically at 30, 45, or 60 degrees. Bow windows form a gentle curve with four to six equal sections. Box bays sit at 90-degree angles, forming a rectangular protrusion. Oriel bays project from an upper floor with brackets underneath. Walk up to your window and note how many glass panels you have and what angles they form. This determines whether you need straight shutter panels with angled posts or custom curved frames for plantation shutters for bay windows.
Measure each section accurately
Measure every window section separately because even matching-looking panels often differ by a few millimetres. You need three measurements per section: width at the top, middle, and bottom, plus height on the left, middle, and right. Record the smallest dimension for each, as this ensures your shutters fit without binding. Use a steel tape measure, not fabric, and measure in millimetres for precision.
Record your measurements like this:
Section 1 (Left):
- Width: Top 680mm, Middle 678mm, Bottom 679mm → Use 678mm
- Height: Left 1420mm, Middle 1422mm, Right 1421mm → Use 1420mm
- Recess depth: 85mm
Section 2 (Centre):
- Width: Top 920mm, Middle 918mm, Bottom 920mm → Use 918mm
- Height: Left 1421mm, Middle 1423mm, Right 1422mm → Use 1421mm
- Recess depth: 85mm
Repeat for each section, including the angle between panels if you’re mounting face-fitted shutters across the bay. Also measure your recess depth (how far back the glass sits from the wall) at each section, as you need at least 65mm depth for inside-mounted shutters to clear window handles and locks.
Measuring each section separately prevents the expensive mistake of assuming all panels are identical when they’re not.
Step 3. Plan your shutter layout – or call the experts on 83692266
Now you know your measurements, decide how the shutters will mount and operate across your bay window. This step determines whether panels fold left, right, or in the middle, where corner posts sit, and how the whole system opens without panels colliding. Getting this wrong means shutters that jam, won’t open fully, or leave gaps at the corners.
Mounting position
Choose inside-mount if your recess depth is at least 65mm and you want the shutters flush with the wall. This gives the cleanest look and protects the shutter frame from damage. Measure from the glass to the front of your window frame at multiple points to confirm you have consistent depth. If your recess is shallower or you have protruding window handles, use face-mount (outside-mount) shutters that sit on the wall surface around your window opening. Face-mount adds 10-15mm projection into the room but works on any window depth.
Inside-mount gives a neater finish but face-mount solves depth problems and can make small windows look larger by extending the frame slightly.
Panel divisions and folding direction
Split each bay section into panels based on your window width. Panels should be no wider than 600mm for stable operation. For example, an 1800mm centre section needs three panels (each 600mm), while a 680mm side section can be one or two panels depending on your preference. Decide which way each panel folds open. On a three-section bay window, configure left panels to fold left, right panels to fold right, and centre panels to fold in the middle (bifold style) so they don’t block each other when fully opened.
Sketch your plan like this:
Left section: 2 panels (340mm each) → fold left Centre section: 3 panels (600mm each) → middle panel fixed, outer panels fold inward Right section: 2 panels (340mm each) → fold right
Corner posts and frame connections
Bay windows need corner posts (T-posts) where angled sections meet. These posts form the mounting point for adjacent shutter panels and maintain the angle. Specify the angle of each corner post (30°, 45°, or 90° for box bays) when ordering. The supplier machines posts to match your measurements, creating a continuous frame around the entire bay. If you’re DIY-installing plantation shutters for bay windows, these posts arrive pre-angled and marked left/right so you fit them in the correct orientation.
Step 4. Choose materials, operation and installation
Your measurements and layout plan are complete, so now you specify which materials to use, how the shutters will open, and who installs them. These choices directly affect your budget, maintenance schedule, and how long the plantation shutters for bay windows will last. Match materials to your environment (humid bathrooms need different products than dry bedrooms) and choose operation methods that suit how you’ll actually use the shutters daily.
Material selection
PVC shutters cost less and resist moisture better than timber, making them practical for bathrooms or kitchens where condensation forms on bay windows. They typically run $200-$350 per square metre installed and come in white or limited colours. Timber shutters offer more colour options and a premium appearance, costing $400-$600 per square metre, but they need repainting every 5-8 years in high-UV locations. Timber also expands slightly with humidity, so leave 2-3mm clearance in your measurements if you choose this material. Aluminium shutters suit commercial installations or high-traffic areas where durability matters most, though they conduct heat more than PVC or timber.
Choose PVC if your budget is tight or the bay window faces moisture, timber for living areas where aesthetics matter most, and aluminium only where you need extreme durability.
Operation and installation approach
Manual shutters with tilt rods (the vertical bar that controls all louvres together) cost nothing extra and suit most applications. Hidden tilt rods add $80-$150 per panel but give cleaner lines. Motorised shutters start at $800 per bay window section on top of your base shutter cost, and you’ll need a licensed electrician to install wiring or specify battery-powered units that recharge every 6-12 months.
Professional installation typically costs 20-30% of your total shutter price and includes measuring, fitting corner posts correctly, and guaranteeing operation. Most installers in Adelaide complete bay window jobs in 3-4 hours. DIY installation saves this cost but requires drilling angled pilot holes accurately, shimming frames level, and adjusting panels so they close without gaps. Order shutters with pre-drilled hinge positions if you’re installing yourself.
Next steps – call us on 83692266 supply only or install included.
You now have the measurements, layout plan, and material choices needed to get accurate quotes for plantation shutters for bay windows. Request quotes from at least three local suppliers using your documented measurements and specifications, then compare pricing on identical configurations (not just total cost). Ask each supplier about their warranty terms, installation timeline, and whether they handle any required electrical work if you’re considering motorised options.
Contact Classic Roller Shutters for a free in-home consultation on your Adelaide bay window project. As a factory-direct manufacturer, they’ll measure your bay window professionally, show you material samples in their showroom, and provide competitive pricing on custom-made shutters built to your exact specifications. Their experienced installation team handles corner posts, panel alignment, and all adjustments needed for smooth operation across angled frames.