Yes, you can swap a frayed or snapped roller-shutter strap yourself in under an hour. Grab the right width of replacement webbing, a screwdriver and a steady chair, and you’ll have your shutter gliding again without calling a tradie or prying open your wallet.
This step-by-step guide shows you how to confirm the strap really is the culprit, measure and buy the correct size, remove the old webbing without losing spring tension, and fit the new strap like a pro. We also list trusted Australian suppliers, price ranges, and the simple maintenance habits that keep a fresh strap working for a decade or more.
If at any point you decide the job looks fiddly, we’ll flag the warning signs that call for professional help and explain why a bargain-bin strap can cost more in the long run. Ready to start measuring? or if you need this fixed contact us on 83692266
Step 1 – Confirm the Strap Really Needs Replacing
A manual strap will usually last 10–15 years, but the fibres around the winder-box slot and the spool cop the most stress. Before ordering parts for a roller shutter strap replacement, run this quick health check.
Visual Inspection Pointers
- Lower the curtain fully so the strap is slack.
- Check the inside run for glazed, shiny fibres or edge frays.
- Shine a torch into the head box to see the loop around the spool; splits here spell imminent failure.
- Wind the shutter up and down—if the strap slips, squeaks or feels jerky, it’s on the way out.
Repair vs Full Replacement
Minor edge fluff can be heat-sealed with a lighter and trimmed; anything deeper than 2 mm, or a central tear, warrants a complete change to avoid sudden breakage.
Safety First
Opening a pelmet voids some warranties. Wear gloves, eye protection, and isolate nearby electrics if the shutter has been motor-prepped.
Step 2 – Measure and Select the Correct Replacement Strap
Grab the wrong size and the webbing will either jam in the winder box or slip off the pulley, so a two-minute measure-up is time well spent. In Australia most manual shutters use either 12 mm or 14 mm webbing. Pop a steel ruler across the old strap—measure the woven width, not the fluffy edges. Length is next: a handy rule is (opening height × 2.2) + 0.5 m. A standard window (up to 2.4 m) therefore needs about five metres, while French doors can swallow seven. If your shutter sits on a balcony or is hard to reach, buy an extra metre so you can trim clean ends later.
Strap Size Reference Table
| Opening Height | Recommended Strap Length |
|---|---|
| Up to 1.2 m | 3 m |
| 1.2 – 2.4 m | 5 m |
| 2.4 – 3.0 m | 6 m |
| French doors | 7 m |
Material Comparison
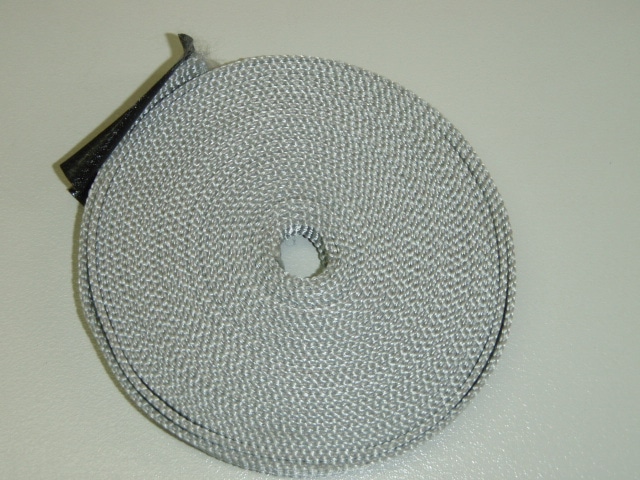
- Polyester (grey OEM style): high UV and abrasion resistance, minimal stretch—our pick for coastal SA sun.
- Nylon: cheaper and a touch softer but can elongate, meaning more frequent re-tensioning & replacement more often, generally the cheaper version found for a bargain on ebay (beware)
Checking Winder Box & Pulley
Before ordering, pop the wall plate and confirm the slot width matches your chosen strap. While you’re there spin the drum: gritty teeth or cracked gears are signs you should add a replacement winder box to the cart—cheaper than doing the job twice.
Step 3 – Gather Tools, Parts, and Prep Your Workspace
A smooth roller shutter strap replacement starts with a tidy bench and the right kit within arm’s reach. Lay everything out before you touch a screw so you’re not balancing on the ladder yelling for a missing driver.
- Phillips and flat-blade screwdrivers (size 2 covers most shutter screws)
- screw gun to drill out rivets on pelmet
- Needle-nose pliers for teasing the old strap off the drum
- Tape measure and permanent marker
- Sturdy step ladder rated for your weight
- Drop cloth or old towel to protect the sill and floorboards
Parts:
- New strap cut to length
- Replacement screw pack or self-tappers
- Fresh anchor clip or strap pin if the old one is rusty
Protective gear:
- Cut-resistant gloves
- Safety glasses — aluminium shards sting
Optional Handy Extras
A couple of small add-ons make life easier:
- Spring clamp to hold the shutter curtain while you thread the strap
- Low-tack masking tape to label left/right pelmet screws
- A head torch for those deep, shadowy boxes
Safe Setup
Safety beats speed. Follow these basics:
- Fully close the shutter so internal springs are relaxed.
- Position the ladder on level ground; get a mate to foot it if you’re over 1.8 m.
- Kill power to any nearby lighting circuits or retrofit motors.
- Keep children and pets clear of the work zone.
With the workspace sorted, you’re ready to remove the tired cord without scratching paint or losing tension.
Step 4 – Remove the Old Strap Without Damage
Slow and methodical wins here. The goal is to liberate the worn strap or cord without letting the spring-loaded axle spin free or scratching the powder-coated pelmet. Keep your phone handy—snapping photos as you go makes reassembly a cinch.
Detach the Winder Box
Start indoors. Unscrew the face plate of the winder box and ease it off, exposing the plastic spool. Before the spool can unwind, push a small flat-blade screwdriver through one of the spokes to lock it in place. Note the direction the strap wraps—clockwise on 90 % of South Australian installs. Pull the free tail out of the slot and set the box aside.
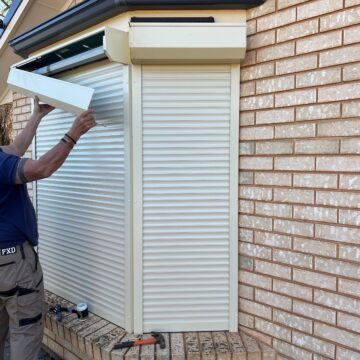
Open the Pelmet & Release the Axle
Move outside. Remove the two side rivets or spring clips, then hinge the lid forward. Support the shutter axle with one hand while sliding it 30 mm toward you; this releases tension but keeps the curtain seated in the guides. Mark the axle position with your marker for later alignment.
Remove Strap from spool
Rotate the plastic spool until the staple or anchor screw appears. Pry it out with needle-nose pliers and slide the frayed strap clear. Inspect the drum teeth; brittle or rounded edges mean it’s time to budget for a new spool.
Clean & Prep for New Strap
Brush away dust, wasp nests and aluminium shavings, then wipe the pulley groove with a dry cloth. A tiny squirt of silicone spray stops future squeaks but avoid oil-based lubricants—they attract grit and shorten the life of your fresh roller shutter strap replacement.
Step 5 – Fit the New Strap Like a Pro
Fresh strap in hand, take a breath—this part is easier than the removal. Keep the matte, slightly rough side of the webbing facing the pulley; it grips better and reduces squeal compared with the silky face. Work slowly, check for twists, and keep fingers clear of the spring. – If you bought Nylon (cheap) then both sides are the same.
Thread Strap Through Wall Guide & Winder Box
Feed the strap from the pelmet, through the wall guide, and into the open winder box. Pull in just enough length to reach the drum. Secure it with the factory anchor screw or tie a compact double-fisherman’s knot, then seat the tail snugly inside the drum slot.
Attach Strap to spool and Drum
Back outside, loop the free end clockwise around the spool five full turns, keeping each wrap tight and flat. Slide the spool onto the axle, lining up the marker you made earlier, and refit its retaining clip.
Re-Tension Spring & Wind Correctly
Have a helper hold the curtain. Rotate the axle towards the window four to six turns—add a seventh for tall doors. Test: the curtain should rise smoothly, pause halfway, then settle without slamming.
Replace Pelmet Cover and Winder Box
Close the pelmet lid, tightening screws diagonally to prevent rattles. Indoors, clip the winder box face plate back on, trim excess strap leaving a 10 cm service tail, and give the handle a gentle wind to seat the webbing. One roller shutter strap replacement done—on to testing.
Step 6 – Test, Adjust, and Final Checks
With the fresh webbing fitted, resist the urge to pack the tools away just yet. A quick performance check will catch minor niggles before they become call-backs and ensures your roller shutter strap replacement feels factory-smooth.
Smooth Operation Test
- Wind the shutter fully up, then down, three times.
- Listen for scraping, ticking, or strap slap against the wall.
- Feel for even resistance—no sudden soft or stiff spots.
Fine-Tune Tension
If the curtain stalls midway, add one extra axle turn.
If it rockets skyward or thumps at the top, release a single turn.
Aim for a gentle stop at both extremes.
Lubrication & Alignment
- Mist silicone spray down each guide rail; wipe excess with a rag.
- Check the bottom bar sits level—adjust side screws if it’s crooked.
- Confirm the pelmet lid and winder plate are snug to prevent future rattles.
Step 7 – Keep the New Strap in Top Shape
A quality polyester webbing will happily clock up a decade of daily winds provided you give it the odd once-over. The following micro-maintenance habits cost nothing, take minutes, and can save you another Saturday on the ladder.
Routine Inspection Schedule
Add the shutter to your six-monthly spring and pre-summer check. Lower the curtain, run your fingers along the strap for fluff or glazing, and listen for squeaks that hint at guide-slot burrs forming.
Cleaning Best Practices
Wipe the exposed strap with a damp, lint-free cloth; a drop of mild dish soap shifts greasy fingerprints. Skip solvents and silicone sprays on the webbing itself—both weaken fibres over time.
When to Call a Pro – 83692266
Ring a technician if you spot frayed edges wider than a matchstick, a jumpy drum, or bent aluminium side guides. Attempting DIY fixes on damaged springs or motor conversions can void insurance and injure fingers.
Step 8 – Buy Guide: Where to Source Quality Straps in Australia
A fresh strap is cheap insurance—just make sure you’re buying UV-stable webbing from a supplier that understands shutters, not generic haberdashery tape.
Classic Roller Shutters Adelaide parts page – Factory-Direct Straps & Pickup
Pop into the salisbury factory or phone order for same-day dispatch of roller shutter cord, roller shutter strap. Their locally woven 14 mm polyester comes in 5 m and 6 m rolls, colour-matched to most OEM greys, and staff can double-check compatibility while you wait.
Specialist Online Parts Stores
Websites like RollerShuttersblindsonline and ShutterMasters list both 12 mm and 14 mm kits, plus videos that walk you through roller shutter strap replacement—handy if you’re stuck at midnight.
Hardware Chains vs Specialised Retailers
Bunnings carries limited lengths; fine in a pinch, but widths and colours are hit-and-miss. Dedicated shutter shops stock anchors, pulleys and winder boxes as well.
Typical Prices & Shipping Costs
| Supplier Type | 5 m Strap Price | Postage (Metro) | Key Advantage |
|---|---|---|---|
| Factory-Direct (Classic) | $14–$15 | $9 flat | Local tech support |
| Online Specialist | $14–$20 | $10–$12 | Wider accessory range |
| Big Box Hardware | $18–$22 | Pick-up only | Grab on the day |
Step 9 – Quick Answers & Troubleshooting
Still have a niggling question? The cheat-sheet below distils the queries we hear most on service jobs and Adelaide DIY forums—each answer is short enough to skim mid-project.
Can I Replace the Strap Without Opening the Head Box?
Not on most Aussie installs. The strap anchors to a pulley hidden in the pelmet, so you must pop the lid. External pulley systems (mainly 1990s units) are the rare exception.
How Long Will a New Strap Last?
Quality polyester webbing typically clocks 10–15 years. Coastal salt air, daily cycles and poor tensioning shorten that; six-monthly inspections keep you ahead of surprise failures.
What Does a Professional Replacement Cost?
Budget $140 –$180 for labour plus $15–$25 for the strap—about $155 –$200 all-in. Steep compared with DIY, but worthwhile if access is high or the spring looks tired. Need help with your repair contact us 83692266
Is It Worth Upgrading to a Motorised Shutter?
Convenience is huge—one-touch control, timers, better security. Expect $600 + per opening to convert (motor, switch and labour). If your curtain, guides and pelmet are healthy, the upgrade reuses them.
Keep Your Shutters Rolling Smoothly
A fresh strap isn’t a set-and-forget fix; it’s the first step in keeping your shutters working quietly, safely and efficiently for the next decade. Remember the winning formula: inspect twice a year, clean lightly, and tension when needed. If you spot early wear—fluffy edges, glazing, or jerky travel—deal with it straight away rather than waiting for a mid-storm snap.
Measured carefully, fitted tidily, and maintained with the odd wipe-down, quality polyester webbing should give 10–15 years of daily ups and downs. Pair that with an occasional squirt of silicone in the guides and your shutters will block heat, noise and prying eyes as well as the day they were installed.
Prefer to leave the ladder work to someone else, or need factory-direct parts in a hurry? The team at Classic Roller Shutters Adelaide is only a phone call away—ready with advice, spare-part packs and same-day pickups.