Wondering whether your roller shutters really need a scrub or if the rain is doing the job for you? The short answer is yes — a gentle, routine wash keeps residential roller shutters looking sharp, sliding smoothly and lasting years longer. Better still, the task rarely takes more than an hour and costs little more than a bucket of warm water, a dash of dishwashing liquid and a microfibre cloth.
Neglect, on the other hand, lets dust, salt spray and pollen creep into the tracks, fade powder-coat and even void manufacturer warranties, all of which nudge up repair bills and energy costs. This guide lays out a safe, step-by-step cleaning system: from a quick pre-inspection and dust-off, through a soap-and-rinse that won’t scratch aluminium, to smart lubrication and a seasonal maintenance calendar. Follow along and you’ll protect your shutters, your comfort and your wallet.
Step 1: Prepare and Inspect Before You Start
Good results begin before a single drop of soapy water hits the slats. Close the curtain all the way down, switch off the isolator on motor-driven units and lock any manual winders. Put on safety specs and position a stable ladder where needed; even the most straightforward job of cleaning residential roller shutters can go pear-shaped if you over-stretch or cop debris in the eye.
With the shutter shut and safe, run your eyes—and hands—over the surface. Note dents, powder-coat blisters, early corrosion, frayed straps or a motor that sounds sluggish. These items can’t be “washed out” and may need professional attention once the clean is finished.
Before you head outside, grab the gear below. Print the table and tick items as you go so nothing gets forgotten halfway up the ladder.
| Supplies | Why you need it | √ |
|---|---|---|
| Soft broom | Knock off loose dust and cobwebs | |
| Microfibre cloths (x 3) | Wash, rinse, dry | |
| Mild pH-neutral detergent | Protects powder-coat | |
| Two buckets | Two-bucket wash method | |
| Soft-bristle brush | Textured slats & end caps | |
| Garden hose (shower setting) | Low-pressure rinse | |
| Silicone spray | Lubricate tracks & locks | |
| Cotton buds / old toothbrush | Detail inside guides | |
| Towels / chamois | Speed-dry | |
| Touch up paint | touch up |
Why Fully Closing the Curtain Matters
Interlocked slats create a single, rigid sheet that resists pressure. Washing an open or partly rolled curtain can force water between slats, invite streaks and even swell wood-trimmed reveals inside.
Identify Material and Finish
Check whether you’re dealing with powder-coated aluminium (most Adelaide installs) or PVC. Aluminium tolerates warm water but only pH-neutral cleaners; PVC can yellow if hit with anything alkaline.
Do a Hidden-Area Spot Test
Pick an inconspicuous bottom corner, dab on your diluted detergent and wait 60 seconds. If no colour leaches or haze appears, you’re good to proceed.
Step 2: Remove Loose Dust, Pollen and Cobwebs
Start dry. With the curtain still closed, sweep downward with a soft broom or long-handled duster, letting gravity carry grit away from the slat joints. Follow with a vacuum brush held 2–3 cm off the surface; this lifts fine pollen without scratching the powder-coat. A quick wipe of diluted eucalyptus oil (one cap per litre) along the bottom rail discourages spiders from rebuilding their webs—an Adelaide backyard special. Clearing the loose stuff first makes the wet wash faster and stops embedded sand acting like sandpaper while you’re cleaning residential roller shutters.
Clearing Exterior Debris from the Headbox
Use a feather duster or a short burst of low-pressure compressed air to whisk leaves and mud-wasp nests clear. Work gently around motor wires and limit-switches—yanking them now means an electrician later.
Cleaning the Interior Face Without Removing the Shutter – we can do the inside for you call 83692266
Raise the curtain halfway and engage the manual lock or motor stop. Slide a slim microfibre wand between window and shutter, sweeping side to side. For upstairs windows, the same wand on a telescopic pole saves climbing a second ladder.
Step 3: Wash the Curtain with Mild Soapy Water
Time for water and suds. Fill one bucket with 5 L of warm water, add one or two caps of mild, pH-neutral dishwashing liquid (target pH 6–8), and leave the second bucket for plain rinse water. This “two-bucket” routine keeps grit out of your wash cloth and off the powder-coat while you’re cleaning residential roller shutters. Working in one-metre bands from the top down, wipe horizontally so you follow the direction of the slats and don’t force water into the joins. Rinse the cloth in the clean bucket every few passes, then wring it before picking up more soapy water.
A few golden rules:
- Never scrub vertically—water will track behind the curtain.
- Never rub side ways on top 5-8 slats as you may be hitting back on forth on the control (eg: wires)
- Refresh both buckets once the rinse water looks cloudy.
- If suds begin to dry on the surface, mist with clean water before moving on.
Choosing the Ideal Cloth or Sponge
| Tool | Pros | Cons |
|---|---|---|
| Microfibre cloth | Traps fine dirt, lint-free finish | Must be rinsed often |
| Non-abrasive sponge | Holds lots of solution, good on flat panels | Can drag grit if over-loaded |
| Shutter-mitt glove | Wraps around slats, speeds large areas | Pricier, needs thorough drying |
Gentle Brushing for Textured Slats & End Caps
Lightly dip a soft-bristle brush, then use small circles to coax dirt from embossed patterns, ventilation holes and rubber side seals. Minimal pressure is key; let the bristles—not arm strength—do the work to avoid micro-scratches.
Refreshing Tracks and Guides
Run a cotton bud or old toothbrush dipped in the wash mix along each track, then wipe dry immediately with a towel. Leaving moisture here invites mould and the gritty grind that shortens motor life.
Step 4: Rinse and Dry Correctly
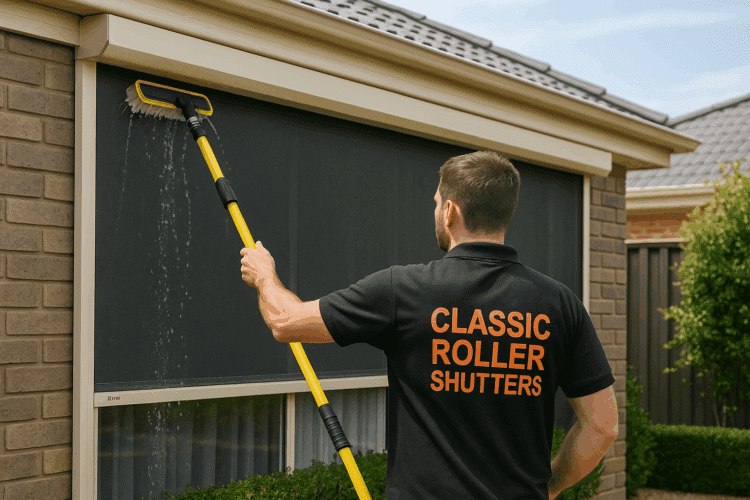
While cleaning residential roller shutters, rinsing is where paint damage happens, so drop the pressure and let gravity help. Stand a metre back, set the hose to a gentle “shower” (< 550 kPa) and start at the headbox. Work top-to-bottom, keeping the nozzle at a 45-degree downward angle so water can’t get behind the slats or into the motor. When suds vanish, wipe once with a damp microfibre to remove detergent residue, then dry.
Safe Hose Technique for Upper-Storey Shutters
For second-storey shutters, clip an extension wand to the hose or use a 5-litre pump sprayer set to mist; never balance on windowsills.
Speed-Dry Options
- Chamois wipe soaks up surface water fast.
- Microfibre towels blot tracks and seals.
- On cool days, a low-speed leaf blower speeds drying—keep 30 cm off paint.
Step 5: Remove Stubborn Stains, Mould and Early Corrosion
If the curtain still shows specks of bird lime, sap or that orange salt haze common on Adelaide’s coastal suburbs, you need a spot-clean rather than more elbow-grease. The aim is to soften and lift the contaminant, not scour it off, so keep the pressure light and the products gentle.
| Offender | DIY solution | Dwell time | Extra tips |
|---|---|---|---|
| Bird droppings | Warm water compress | 3 – 5 min | Lay a soaked cloth on the mark first; never scrape dry. |
| Tree sap | Citrus-based household cleaner | 2 min | Wipe in one direction; reapply rather than scrub. |
| Coastal salt film | 1:4 white-vinegar : water rinse | 1 min | Follow immediately with fresh water to neutralise acidity. |
| Early rust bloom | Bicarb-soda paste (3 tbsp + splash H₂O) |
10 min | Use a cotton bud and circular strokes; rinse twice. |
Process is simple: dab the chosen solution on with a cotton bud or microfibre tip, wait the suggested dwell time, then wipe gently, rinse and dry. For mould in tracks, spritz the vinegar mix, leave five minutes and towel dry; bleach will corrode aluminium, so steer clear when cleaning residential roller shutters.
Touch-Up Paint for Chips and Scratches
Tiny paint nicks invite corrosion. Feather the edge with 1500-grit wet sandpaper, wipe dry, then dab on colour-matched touch-up paint with a fine artist brush. Two thin coats beat one thick blob. Let the area cure for 24 hours before rolling the shutter up to avoid imprint lines on the fresh finish.
Step 6: Lubricate Moving Parts and Re-Test Operation
Once the shutter is spotless, keep it that way by banishing friction. Shake a silicone spray, mist it onto a rag—never directly on the curtain—and wipe down both side tracks, the bottom locking bar and any visible axle bearings. Two light passes do the job; puddles collect dust. Manual tape gear appreciates a single drop of sewing-machine oil on the spring spindle, while motorised units just need a full up-down cycle to spread the lubricant.
Reset Slats That Have Jumped the Track
If a slat has hopped out of its guide, stop halfway, pinch the rogue edge, flex inward and ease it back. Work slowly—aluminium dents in a heartbeat and a warped slat will never roll cleanly.
Post-Lubrication Safety Check
Run the shutter fully up and down twice. It should coast quietly, sit flush on the sill and stop without lurching. Grinding, jerks or drag after cleaning residential roller shutters signal it’s time to book a technician.
Step 7: Put Cleaning on Autopilot with a Maintenance Schedule
A one-off blitz is great, but the real money-saver is routine. Lock in the intervals below, tweak for your climate, and you’ll spend less time cleaning residential roller shutters and more time enjoying the view.
| Environment | Quick hose rinse | Full soapy wash | Deep service & lube |
|---|---|---|---|
| Coastal suburb | Monthly | Quarterly | Every 6 months |
| Inland metro | Quarterly | Every 6 months | Annually |
Australian Standard AS 1851 recommends professional inspection at least twice a year for shutters that double as fire or security barriers—matching our “deep service” line.
When to Book Professional Servicing
Call a technician if you notice motor strain, uneven rolling, water inside the headbox, or rust at the axle. A service visit usually covers electrical testing, retensioning and warranty-safe repairs. Phone: 83692266
DIY vs Professional: Time and Money Comparison
Expect about 60 minutes per window for a homeowner deep clean versus a South-Australian call-out at roughly $120–$180 for two shutters. Weigh your Saturday against that invoice and decide what’s worth more.
Step 8: Costly Cleaning Mistakes to Avoid
Even a well-intentioned Saturday clean can undo years of care if you use the wrong tool or rush the final steps. Keep the following “never-dos” front of mind whenever you’re cleaning residential roller shutters:
- High-pressure washer: chips powder-coat and forces water into motors and bearings.
- Abrasive scourers: steel wool or green pads scratch aluminium and leave rust-prone grooves.
- Chlorine bleach: fades PVC, stains paint and dries out rubber seals.
- Rolling up while wet: traps moisture, breeds mould and etches track liners.
- Ignoring the headbox: hidden grit rains down later and sabotages today’s effort.
Slip up? Flood the area with fresh water straight away, neutralise any bleach with a mild vinegar rinse, towel dry thoroughly, then re-lubricate tracks and locks.
Myth-Busting the Common Questions
“Should roller shutters be serviced?”
Yes—plan a professional check at least every six months; it catches wear you can’t see.
“What’s the best cleaner?”
Plain pH-neutral dish soap plus a microfibre cloth; furniture polish leaves oily residue that attracts dust.
“Can I use a pressure washer?”
Technically under 500 kPa on the widest fan and one metre away, but a gentle hose is safer and just as quick.
Key Takeaways & Next Steps
Regular, low-stress care keeps your shutters gliding, cuts power bills and avoids warranty dramas. Follow the framework above and cleaning residential roller shutters becomes a quick household habit instead of an annual slog.
- Always close, isolate power and inspect first
- Dry-dust before you break out the bucket
- Wash with pH-neutral suds using the two-bucket method
- Rinse gently from the top down and dry straightaway
- Spot-treat stains, touch up chips, then lubricate tracks
- Stick to a climate-based maintenance calendar and dodge harsh tools
If today’s clean uncovered bigger issues—or you’d simply rather spend Saturday at the beach—our Adelaide team can tackle the job for you. Book a professional service or annual clean with Classic Roller Shutters Adelaide and enjoy perfectly smooth shutters all year round.