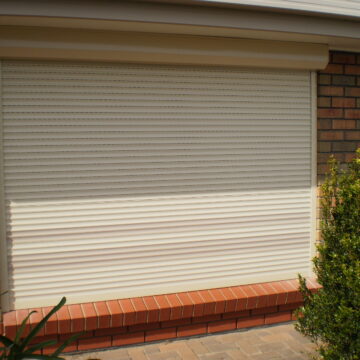
A reliable electric roller shutter does more than keep your windows covered—it safeguards your property, manages indoor temperatures, and adds a welcome touch of convenience. But when these systems falter, the effects can be more than a minor annoyance, potentially leaving your home or business exposed or uncomfortable. Whether your shutter won’t budge, hums without moving, or has simply stopped responding to the remote, finding answers can be confusing—especially with so much conflicting advice online.
This guide is designed for Adelaide residents and property managers who want practical, step-by-step solutions for electric roller shutter repair. We’ll address the most common questions—such as why your shutter isn’t working, how to fix a jammed mechanism, or when it’s time to call a licensed professional—while accounting for the unique requirements of South Australian homes and commercial buildings. From simple checks you can do yourself, to understanding local electrical regulations and sourcing the right spare parts, you’ll find clear guidance tailored to our local conditions. Let’s get your electric roller shutters operating smoothly and safely again. If you need help with this, contact us on 83692266
Step 1: Understand How Electric Roller Shutter Systems Work
Before you start troubleshooting, it pays to know what makes an electric roller shutter tick. These systems combine electrical and mechanical components to lift and lower a curtain of interlocking slats with the press of a button. By understanding each part’s role and how they interact, you’ll avoid unintentional damage during DIY repairs and speed up your diagnosis when things go wrong.
Here’s a quick overview of the main components, their functions and the faults you’re most likely to encounter:
| Component | Function | Common Failure Mode |
|---|---|---|
| Motor | Converts electrical energy into rotational force to wind the curtain | Overheating, worn brushes, electrical fault |
| Drive Tube | The axle around which the curtain rolls | Slippage, tube deformation |
| Curtain Slats | Interlocking aluminium or steel segments forming the barrier | Bent or cracked slats |
| Side Guides | Channels on either side that keep the curtain aligned | Debris blockage, wear on guide strips |
| Limit Switches | Sensors that stop the motor at pre-set upper and lower positions | Misalignment, electrical or mechanical failure |
| Control Unit | The remote, wall switch or hardwired interface | Faulty wiring, dead batteries, water ingress |
Breaking down the shutter system into these building blocks not only simplifies fault-spotting but also highlights which parts you can safely service yourself—and which should remain in the hands of a licensed professional.
Components of an Electric Roller Shutter
Electric roller shutters typically share the same basic set of parts:
- Motor (Tubular vs External)
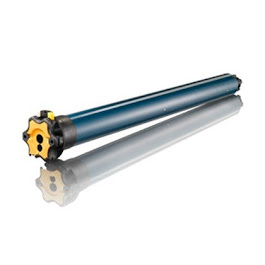
Most installations use a tubular motor housed inside the drive tube, powered by 240 V AC. Some setups feature an external gearbox motor if space or load requirements demand it. Common brands you’ll see in Adelaide include Somfy and Merlin, although Classic Roller Shutters Adelaide also offers factory-direct motors designed for local conditions. - Drive Tube
This steel or aluminium tube anchors the motor and carries the curtain as it winds and unwinds. Proper alignment and secure mounting are vital to prevent slippage or wobble. - Curtain Slats & Bottom Security Bar
Slats lock together to form a rigid barrier when closed. The bottom security bar adds weight and locks into the side guides for extra security. Damage to any slat can throw the entire curtain off-track. - Side Channels/Guide Strips
These aluminium tracks ensure the curtain moves smoothly up and down. Dirt or damage here often leads to jamming or excessive noise. - Limit Switches and Sensors
Mounted inside the motor housing or near the drive tube, limit switches stop the motor once the curtain reaches its fully open or closed position, preventing over-travel and damage to the motor or curtain. - Control Unit
This can be a wireless remote, wall switch or integrated smart controller. It sends the signal that starts or stops the motor, and in advanced systems, controls intermediate positions and timers.
Key Electrical and Mechanical Principles
A few core principles govern how these parts work together, and knowing them will help you avoid common pitfalls:
- Torque vs Load
The motor must generate enough torque to lift the curtain’s weight plus any wind-loading. If you fit an under-sized motor, it may hum or stall under load. - Friction and Wear
Contact between slats, guides and the drive tube creates friction. Over time, this can wear bearings or strip paint, making operation rougher and placing extra strain on the motor. - Role of Limit Switches
Limit switches prevent the curtain from winding too far in either direction. Misadjusted switches can let the curtain slam into the box or overwind, risking damage to the motor and drive tube. - Importance of Spring Tension
While electric shutters rely on motors, many systems still incorporate torsion springs to balance the curtain weight. Springs that are too tight or too loose will cause the motor to work harder, reducing its lifespan.
By familiarising yourself with these components and principles, you’ll be better equipped to spot the source of a fault—whether it’s electrical or mechanical—and decide if it’s a quick DIY fix or a job for a licensed technician.
Step 2: Identify Common Issues Affecting Electric Roller Shutters
Before jumping into fixes, it helps to see which symptoms point to electrical faults and which are down to mechanical wear or damage. Below is a quick-reference table that outlines the most frequent warning signs alongside their probable causes. You’ll notice we cover questions like “Why is my electric roller shutter not working?” and “How to fix a shutter that’s stuck down?” in later steps—but this overview will help you home in on the right diagnosis.
| Symptom | Probable Cause |
|---|---|
| No response when pressing the switch or remote | Tripped breaker/RCD, isolator off, faulty wiring |
| Motor hums but the shutter doesn’t move | Motor overload, seized gearbox, jammed slats |
| Remote control unresponsive | Dead batteries, lost pairing, control unit fault |
| Circuit breaker trips during operation | Short in motor windings, damaged control wiring |
| Intermittent or slow movement | Low supply voltage, worn motor brushes |
| Curtain stops part-way up or down | Debris in side guides, misaligned slats |
| Excessive rattling or grinding noise | Dry guides, worn bearings, bent slats |
| Bottom bar fails to lock into the guides | Bent bottom bar, worn locking clip |
| Slats rub against frame or each other | Warped slats, side channels out of alignment |
| Curtain runs unevenly or wobbles | Loose drive-tube bearings, misaligned motor mount |
By matching your shutter’s behaviour to one (or more) of these symptoms, you can pinpoint whether you need to check the power, reset the controls, Cleaning and inspecting the channels is your first step, clean and lubricate moving parts or replace damaged components. The sections that follow dive into each cluster of problems in detail.
Electrical Symptoms to Watch For
Electrical faults often manifest as a total lack of response or erratic operation:
- Silence on command: No hum, no movement. This usually means the motor isn’t receiving power—check your consumer unit for tripped breakers or RCDs, then confirm power at the local isolator with a multimeter.
- Humming motor: The motor tries to turn but stalls. This hints at overload or internal seizure, often caused by excessive load on the curtain or a gearbox fault.
- Control unit failure: If the wall switch or remote won’t trigger any movement, try fresh batteries, re-pair the remote to the receiver and clean switch contacts with electronic contact cleaner.
- Breaker trips: A sudden trip when you operate the shutter suggests an electrical short in the motor windings or damaged control wiring—leave this to a licensed electrician if isolating and resetting the breaker doesn’t help.
- Slow or intermittent operation: A sluggish shutter can mean the motor’s brushes are worn or the supply voltage is dipping under load. It may also be a sign of an under-rated motor struggling with the curtain’s weight.
Mechanical Symptoms to Watch For
If your shutter makes noise, jams or behaves jerkily, the culprit is often mechanical:
- Mid-travel jams: Debris, grit or twisted slats catching in the side guides will stop the curtain dead. Cleaning and inspecting the channels is your first step.
- Grinding and rattling: Lack of lubrication or worn bearings can produce harsh noise. Applying a greaseless, anti-friction spray to guides and bearings often smooths things out.
- Bottom bar issues: A bent or damaged bottom security bar may not engage properly in the guide entry, causing the shutter to slip or refuse to lock down fully.
- Slat misalignment: Bent or warped slats can rub on each other or the frame, leading to uneven or jerky travel. Gently realign minor bends or replace heavily damaged slats.
- Wobbly curtain: If the curtain tilts to one side, check for loose drive-tube bearings or a motor mount that has shifted. Tightening fasteners and shimming the tube can restore even winding.
Armed with this symptom guide, you’re ready to move on to Step 3 and confirm the power-and-control side of your repair. From there, we’ll look at resets, mechanical servicing and when to bring in a professional.
Step 3: Check Power Supply and Control Units
Ensure your electric roller shutter has a reliable power source and that the control units are functioning correctly before dismantling any parts. A large proportion of shutter issues stem from tripped breakers, drained batteries or dusty switches. Follow these steps safely and read why its important to hire the right repairer.
- Inspect the consumer unit
Head to your building’s consumer unit (fuse box) and look for any tripped breakers or RCDs labelled for the shutter circuit. A tripped breaker usually sits midway between OFF and ON—switch it fully off, then back on to reset. - Isolate power before opening covers
Safety first: switch off the isolator for the shutter circuit at the consumer unit. Confirm the circuit is dead using a non-contact voltage tester or multimeter. Never touch live wiring. - Check the local isolator
Many installations include an isolator switch near the pelmet or on an adjacent wall. Verify this switch is firmly ON; a worn or loose isolator can cause intermittent power loss. - Use a multimeter to confirm voltage
Set your multimeter to an AC range above 240 V. At the shutter’s isolator or junction box, measure between the live (L) and neutral (N) terminals. You should read around230–250 V. Significant deviations may point to supply issues or faulty wiring.
Completing these checks rules out basic power and control faults and helps you decide whether to investigate electrical wiring or move on to mechanical components.
Test the Remote and Wall Switch
Start with the simplest fixes to restore communication between your command device and the shutter’s receiver:
- Replace batteries: Dead or weak batteries are a common culprit. Swap in fresh cells and retest.
- Re-pair or re-sync: After a power cut, some remotes lose their pairing. Follow the manufacturer’s re-pair procedure—usually involving a reset button on the motor head or control unit.
- Clean switch contacts: Dust and grime can accumulate inside wall switches. Use an electronics contact cleaner to remove any build-up.
- Swap components: If you have a spare remote or secondary wall switch, try it. If the shutter responds, you’ve identified a faulty control unit.
These steps quickly reveal whether the issue lies with the controls rather than the motor or wiring.
Verify Electrical Connections and Power Points
If the controls are sound but power still won’t reach the motor, inspect the wiring and connection points:
- Examine the isolator switch: Check all screws and terminals for tightness. Loose connections here can cause flickering or complete power loss.
- Inspect conduit and junction box: Look for signs of water ingress, rodent damage or crushed cables. Any physical damage should be repaired by a licensed electrician.
- Measure at the motor terminals: With power safely isolated, open the junction box on the pelmet. Use your multimeter to confirm
L–Nvoltage and test for earth continuity. A missing earth is a critical safety hazard. - Record your readings: Note the voltage and any irregularities. These details will assist a technician or speed up support from Classic Roller Shutters Adelaide.
With power and controls verified, you’ll know if a simple DIY fix will do or if it’s time to bring in professional help. Next, we’ll look at resetting the motor and control system in Step 4.
Step 4: Reset the Motor and Control System
Sometimes an electric roller shutter will enter a fault mode after an overload, power surge or limit-switch mis-fire. Resetting the motor and control electronics can clear error codes and restore normal operation without resorting to part replacement. Before you begin, double-check the manufacturer’s instructions for your specific motor model—reset procedures can vary. If in doubt, contact a licensed technician.
Before any work, isolate the power at the consumer unit and confirm there is no voltage at the shutter’s isolator switch. A safe, completely de-energised circuit is essential whenever you open the pelmet or remove the motor cover. Once power is off, allow the motor to rest for at least 30 seconds; this pause helps internal capacitors discharge and ensures a clean reset.
Locating and Using the Reset Button
Most tubular motors or control units include a concealed reset switch. Common places to look are:
- Inside the pelmet box, on the motor head
- On the control module mounted beside the drive tube
- Under a small plastic flap on the receiver unit
Follow these steps to perform a generic reset:
- Turn off the circuit breaker or isolator and confirm the shutter has no power
- Open the pelmet cover and locate the reset button on the motor or control unit
- Press and hold the button for around 10 seconds—you may hear a click or see an LED flash
- Release the button, close the cover and restore power at the isolator and consumer unit
- Operate the shutter via the wall switch or remote to confirm the reset has cleared any fault codes
If the shutter still doesn’t respond, check that the reset procedure matches your motor’s manual. Reset points can differ by brand, and some models require a sequence of button presses rather than a long hold.
Re-calibrating Limit Switches
Once the motor is reset, you may need to re-set the upper and lower travel limits so the curtain stops in the correct positions:
- Find the limit-adjustment dials or screws on the motor head—they are often labelled “UP” and “DOWN”
- Move the shutter to its fully open position and turn the “UP” dial until the motor clicks off
- Next, lower the shutter fully and adjust the “DOWN” dial to the desired closed‐position cut-off
- If your system uses a remote for programming, follow the on-screen prompts: typically, you hold the “UP” or “DOWN” button until the shutter crawls to the end point, then press a confirm key
- Cycle the shutter a few times to make sure it stops smoothly at each end without jerking or overshooting
Accurate limit settings prevent the curtain from slamming into the box or overwinding on the tube—both of which can damage the motor or slats. With the motor reset and limits calibrated, most electric roller shutters will run quietly and reliably once more.
Step 5: Inspect and Service Mechanical Components
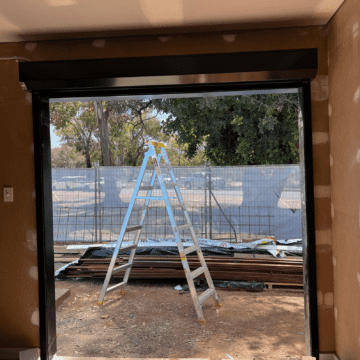
With power and controls sorted, turn your attention to the mechanical parts that keep your shutter running smoothly. Before you begin, make sure you’ve isolated the circuit at the consumer unit and verified there’s no residual power at the isolator. Use a sturdy, non-marking ladder to access the pelmet safely, and don protective gloves to guard against sharp edges or pinch points. Never lean or put weight on the shutter curtain itself.
Start by removing the pelmet cover. Most covers either hinge down on spring clips or slide horizontally. Work methodically: release each clip or track, lower the cover slowly and set it aside on a soft surface to avoid scratches. With the motor and drive tube exposed, you can inspect the tracks, slats, springs and bearings directly.
Cleaning and Lubricating Tracks
- Clear debris: Use a soft brush or vacuum cleaner to remove dust, grit and small stones from the side channels.
- Wash guides: Wipe the tracks with a cloth dipped in warm, soapy water. A mild detergent works well—avoid abrasive cleaners that can damage anodised aluminium.
- Rinse and dry: After washing, rinse with clean water and dry thoroughly with a lint-free cloth or allow to air-dry.
- Apply lubricant: Choose a greaseless, anti-friction spray such as Inox or WD-40 Specialist® Anti-Friction Dry. Apply a small, even patch along each guide rail.
- Cycle the shutter: Run the curtain up and down five to ten times to distribute the lubricant evenly. This helps seal out moisture and minimises wear on slats and bearings.
Regular track maintenance not only prevents jamming but also reduces the load on your motor, extending its service life.
Checking and Adjusting Springs and Slats
Torsion springs (where fitted) and slats balance the curtain’s weight. Incorrect spring tension forces the motor to work harder, while bent slats can cause misalignment and noise.
- Inspect spring tension: With the pelmet open and the shutter partly lowered, gently tug the bottom bar. The curtain should hold its position midway without drifting. If it slides down or snaps up, the springs need adjusting. Consult your motor or spring manufacturer’s specifications—small tension adjustments are usually made via adjusting cones on the spring barrel.
- Realign bent slats: Lightly dented slats can often be nudged back into line by hand. For significant bends or splits, order replacement slats measured to match your existing profile—Classic Roller Shutters Adelaide stocks a full range of spare parts for DIY repairs.
- Identify worn springs: Look for rust, fraying or loss of spring “memory” (when a spring no longer holds tension). Springs showing these signs should be replaced in pairs to maintain even balance.
After any adjustment or slat replacement, cycle the shutter slowly and listen for smooth, even movement. Any new rubbing or binding indicates a need for further alignment before you refit the pelmet cover and restore power.
Step 6: Replace Faulty Parts Safely
Replacing worn or broken components can restore your electric roller shutter to like-new performance—but only if you do it correctly and safely. Before you begin, remember that even small parts like slats and springs carry stored energy, and electrical components must be handled with care. Always switch off and isolate power at the consumer unit, don appropriate personal protective equipment (PPE) such as safety glasses and gloves, and work with clean, organised tools on a stable surface.
Ordering and Identifying Spare Parts
Accurate measurements and part numbers are key to getting the right replacement components the first time:
- Measure slat thickness and profile: Remove a damaged slat and use calipers to record its thickness, width and curvature.
- Record drive-tube diameter: Note the internal diameter where the motor and spring fit. This ensures new springs or tube sections seat correctly.
- Identify spring size: Count coils or measure overall spring length and wire gauge—torsion springs vary widely between models.
- Note motor and gearbox details: Photograph the motor label (brand, model, voltage) so you can source an exact match or factory-approved equivalent.
Once you have these details, browse Classic Roller Shutters Adelaide’s DIY supply of Spare parts & repair services for genuine, locally stocked components. Using manufacturer-rated parts helps maintain warranty coverage and ensures compatibility with your existing fittings.
Safe Replacement of Components
Follow these steps in order, and never skip the power-isolation check:
- Isolate power at the consumer unit and verify the shutter circuit is de-energised with a non-contact voltage tester.
- Remove the pelmet cover and, if necessary, detach the curtain from the drive tube by releasing the split-pin or spring clip. Keep all fasteners and small parts in a labelled container.
- Replace the faulty part—whether it’s a broken slat, worn spring or gearbox component—using the measurements and part numbers you recorded. Fit new springs with care to avoid sudden tension release.
- Reassemble the curtain onto the drive tube, ensuring any clips or pins fully engage. Tighten motor and bearing fixings to the manufacturer’s torque specifications.
- Refit the pelmet cover, restore power, and run the shutter through a few open/close cycles to confirm smooth operation and correct limit settings.
Caution: never use second-hand or non-rated parts. Substandard components can fail prematurely, damage adjoining parts, or even void electrical safety compliance. If a replacement seems beyond your comfort zone, don’t hesitate to contact a licensed technician for professional support.
Step 7: Adhering to Licensing and Safety Regulations
Electric roller shutter repairs often straddle the line between DIY maintenance and regulated electrical work. Even if you’re comfortable with tools, South Australian laws set clear boundaries on what an unlicensed person can tackle. Ignoring these rules won’t just put you at risk of a dangerous fault—it can lead to fines, void your insurance or create non-compliant installations. Let’s break down the licences you need and the safety standards you must meet when working on electric roller shutters in Adelaide.
Licensing Requirements for Electric Repairs in South Australia
In South Australia, anyone performing electrical repairs must hold an appropriate licence issued under the Electricity Act 1996. The two most common categories are:
- National Restricted Electrical Licence (NREL):
• Permits disconnection and reconnection of existing circuits (for example, isolating the shutter circuit and swapping a motor).
• Cannot add new wiring, reconfigure consumer units or alter fixed electrical installations. - A-Grade or C-Grade Electrical Licence:
• Authorises full electrical installation work, including new circuits, switchboards, conduits and wiring.
• Required for any power-point additions, rewiring or modifications beyond simple motor replacements.
If you hold an NREL, tasks such as changing limit switches or replacing a tubular motor are allowed, but running a new cable back to the consumer unit or refitting circuit breakers is not. Always display your licence number on quotes, invoices and advertising, and carry proof of credentials on-site. For full details, refer to the SA licensing requirements.
Safety Measures and Compliance Standards
Meeting the Australian electrical standards isn’t optional—it’s mandatory. Electric roller shutters must comply with AS/NZS 3000:2018 (“Wiring Rules”), which set out critical safety measures:
- RCD Protection on Final Circuits
All final sub-circuits (including shutter motors) must be protected by residual-current devices to guard against earth faults. - Earthing, MEN System and Bonding
The shutter motor and any exposed metalwork must be correctly earthed and bonded into the building’s Multiple Earthed Neutral system to prevent touch-voltage hazards. - Mechanical Protection for Ceiling Cables
Cables running within the ceiling or pelmet boxes require mechanical guards (conduit or conduit equivalent) to shield them from abrasion or impact. - Conductor Sizing and Installation
Conductors feeding the shutter motor should match the motor’s full-load current rating, and any terminations must be tight and corrosion-free.
Non-compliance can lead to safety risks, insurance claims being denied or even prosecution. If you’re ever unsure whether your work meets the standard, consult the full summary of AS/NZS 3000:2018 on the Standards Australia store: AS/NZS 3000:2018 Wiring Rules.
By staying within your licence scope and following the Wiring Rules, you protect yourself, your property and everyone who uses the shutter. Up next, we’ll cover how to test and calibrate your repaired shutter to ensure it runs smoothly—and safely—every time.
Step 8: Test and Calibrate Your Repaired Shutter
After finishing repairs, part replacements and limit-switch adjustments, you need to verify that your electric roller shutter runs smoothly, quietly and safely. A methodical test-and-calibrate routine will catch any lingering faults and ensure every safety feature works as intended.
Use this 10-point post-repair checklist to confirm performance:
- Cycle the shutter fully open and closed five times, noting any hesitations or jerks.
- Ensure the curtain stops exactly at the upper and lower limits without overshoot.
- Measure motor current draw during both upward and downward travel and compare with the motor’s rated full-load current.
- Listen for odd noises – grinding, rattling or high-pitched squeals – along the entire travel path.
- Verify that travel speed is consistent on each cycle and matches manufacturer specifications.
- Test both remote and wall switch for immediate response and no intermittent failures.
- Observe the side guides as the shutter moves, checking for binding or debris.
- Confirm the bottom security bar locks firmly into the guide entry without slipping.
- Simulate an obstruction (for example, hold a soft cushion against the slats); the auto-reverse or safety sensor must trigger a reversal within milliseconds.
- Record all measurements, noise readings and observations for future maintenance logs.
Completing this list gives you a clear snapshot of your shutter’s electrical load, mechanical alignment and safety operation before proceeding to fine-tuning.
Running Diagnostic Tests
Dig deeper by measuring the motor’s current draw with a clamp meter at mid-travel and end-stop positions. Ideally, readings should sit within ±10% of the nameplate’s full-load current; sustained higher values point to overload, friction or misalignment.
Next, check noise levels using a decibel meter or a calibrated smartphone app. A properly maintained shutter typically operates below 60 dB under normal load. Consistent readings above 70 dB indicate worn bearings, slat interference or gearbox issues that may need revisiting.
Fine-Tuning Settings for Smooth Operation
With diagnostics complete, adjust any available settings on your motor drive or control unit:
- If your motor supports speed tuning, alter the up/down velocity in small increments until you achieve brisk yet controlled movement.
- After each adjustment, re-cycle the shutter and re-verify limit-switch cut-offs to prevent over-travel.
- Test the auto-reverse and safety-edge features at least three times, ensuring the shutter reacts reliably every time.
Once you’re satisfied with travel speed, noise levels and safety response, replace any protective covers, stow your tools and enjoy the peace of mind that comes with a perfectly calibrated electric roller shutter.
Step 9: Preventative Maintenance for Longevity
Preventative care is the key to keeping your electric roller shutter in top-condition and avoiding costly repairs down the track. A simple maintenance calendar helps you spread the workload and stay on top of every critical check—from clearing debris out of the tracks to booking a yearly professional inspection. Here’s a practical schedule you can follow:
- Monthly
• Quick visual inspection of side guides, slats and pelmet for dust, cobwebs or signs of wear
• Wipe down the curtain surface with a dry cloth to remove loose dirt - Quarterly
• Clean and lubricate side channels, bearings and moving parts
• Test the remote, wall switch and safety-edge function to ensure reliable operation - Annual
• Schedule a professional tune-up to inspect electrical connections, adjust spring tension and recalibrate limit switches
• Verify RCD protection and earthing compliance under South Australian regulations
Routine Cleaning Schedule
Regular cleaning prevents grit and grime from building up in the guides and prematurely wearing out bearings or slats. Start by mixing a gentle, pH-neutral detergent in warm water—avoid strong solvents or abrasive cleaners that can damage anodised aluminium. Using a soft-bristled brush or non-abrasive cloth, wash the side channels and slats, then rinse thoroughly with clean water and dry with a lint-free cloth. Finally, cycle the shutter up and down a few times to dislodge any remaining particles and confirm a smooth glide.
Tip: In Adelaide’s coastal suburbs, salt spray can accelerate corrosion. If you’re near the coast, give your shutter a quick rinse with fresh water once a month and pay extra attention to crevices around the pelmet and guide entry points.
Scheduled Professional Inspections
Even the most diligent DIY maintenance can’t replace the detailed checks a trained technician performs. Once a year, book a service with Classic Roller Shutters Adelaide to have all electrical and mechanical components thoroughly tested. Our experts will tighten connections, measure motor current draw, verify RCD and earthing arrangements, and provide a full report on any parts nearing wear limits. Find out more about our service & repair maintenance packages and keep your shutter covered—literally and figuratively.
By sticking to this maintenance regime, you’ll extend the life of your electric roller shutter, maintain peak performance and ensure your home or business stays secure without unwelcome surprises.
Step 10: Knowing When to Call a Professional
As skilled as you might be at DIY maintenance, some electric roller shutter problems require more than a bit of elbow grease. Tackling advanced electrical faults or serious mechanical damage without the right qualifications can be dangerous, costly and risk non-compliance with South Australian regulations. Here’s how to know when it’s time to step back and bring in a licensed expert—and how to pick the right local service.
Signs You Need Expert Assistance
Even a thorough DIY inspection can miss critical issues. If you spot any of these red-flag symptoms, switch off your shutter immediately and arrange a professional call-out:
- Motor overheating or frequent trips: A motor that gets uncomfortably hot or causes breakers to trip repeatedly usually has internal faults.
- Burnt odour or smoke: Any smell of burning or visible smoke is an urgent warning—shut down the shutter and don’t attempt to operate it again.
- Persistent electrical faults: Recurring power losses, humming without movement or tripping RCDs point to wiring issues or motor failures beyond home repair.
- Structural damage: Bent drive tubes, cracked side channels or loose motor mounts can lead to sudden curtain drops if not fixed correctly.
- Complex automation failures: Integrated smart controls or networked setups often require specialist diagnostic tools and software.
Ignoring these symptoms can worsen damage, void warranties or even cause injury. A qualified technician has the licences, training and tools to diagnose and repair these serious faults safely.
How to Choose a Reliable Local Repair Service
When you decide to hire a professional, look for these markers of quality and reliability in Adelaide:
- SA-issued electrical licence: Verify your technician holds a National Restricted Electrical Licence (NREL) or higher, and ask for their licence number.
- Factory-direct support: A family-run, local manufacturer—like Classic Roller Shutters Adelaide—stocks genuine parts and often offers faster turnarounds.
- Transparent pricing: Seek a detailed quote covering call-out fees, labour rates and parts. Clear cost breakdowns ensure there are no surprises.
- Workmanship and parts warranty: Choose a repairer who guarantees both their labour and any new components.
- Free quotes and in-home assessments: On-site inspections provide accurate diagnostics and tailored recommendations without obligation.
Classic Roller Shutters Adelaide meets all these criteria, delivering licensed, factory-backed repairs backed by a workmanship warranty. Contact us for a fast, no-obligation quote or to book your free in-home consultation.
Typical Repair Cost Estimates
| Service | Price Estimate (A$) |
|---|---|
| Call-out Fee | 80 – 110 |
| Labour (per hour) | 85 – 120 |
| Motor Replacement (parts & labour) | 350 – 600 |
Actual costs vary with shutter size, access complexity and parts availability. Always confirm pricing before work begins.
By recognising these warning signs and choosing a licenced local specialist, you’ll have your electric roller shutter running safely and smoothly again. Ready to leave the heavy lifting to the professionals? Contact Classic Roller Shutters Adelaide today for expert, reliable service.
Final Checks and Next Steps
You’ve now walked through every stage of diagnosing, resetting and servicing your electric roller shutter—from confirming the power supply and testing controls, to cleaning tracks, adjusting springs and calibrating limits. By following the troubleshooting steps, replacing worn components with genuine parts and respecting South Australian licensing rules, you’ve set your shutter up for reliable, long-term performance. Remember to keep your maintenance calendar on hand—regular cleaning, lubrication and yearly professional inspections will pay dividends in smooth, quiet operation and fewer unexpected issues.
Safety and compliance remain non-negotiable. Always isolate power before opening the pelmet or handling electrical parts, and know your license scope: simple motor swaps and limit-switch adjustments are fine under an NREL, but new wiring or consumer unit work must be left to an A-Grade or C-Grade electrician. If you encounter burnt smells, persistent power trips or any sign of serious wear, it’s time to call in a professional rather than risk further damage or non-compliance.
Ready to secure expert support or arrange a no-obligation assessment? Visit our homepage to book your free in-home consultation with Classic Roller Shutters Adelaide. Whether it’s routine maintenance, a complex repair or a complete upgrade to electric operation, our factory-direct team is here to ensure your shutters stay safe, efficient and fit for Adelaide’s climate.