A hot northerly wind whips across the ridge, carrying ember-filled debris kilometres ahead of the firefront. In that moment your home’s survival depends less on heroic hose-work and more on the quiet upgrades you’ve already made: metal-sealed gutters, BAL-rated roller shutters, a 20-metre ring of low-fuel landscaping. When houses burn, research shows up to ninety per cent are lost to these flying embers, not flames licking at the walls. The good news? Blocking an ember’s path is straightforward when you know where the weak spots hide.
This practical guide gives you twelve engineer-backed improvements that stack together like fire-proof armour. We’ll start with airtight roller shutters and finish with community resources, so you can cherry-pick what suits your budget or tick them off in order. Each section includes cost cues, compliance notes, and maintenance tips written for South Australian conditions, yet useful wherever bushfires roam. By the end, you’ll hold a clear action list that turns fire season anxiety into quiet confidence. Ready to shut embers out for good? Bookmark the checklist before the mercury climbs next summer.
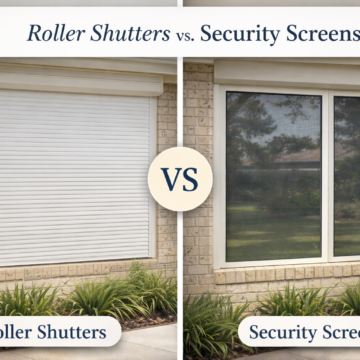
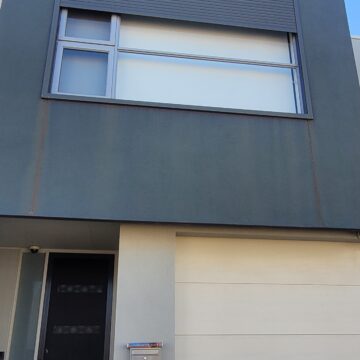
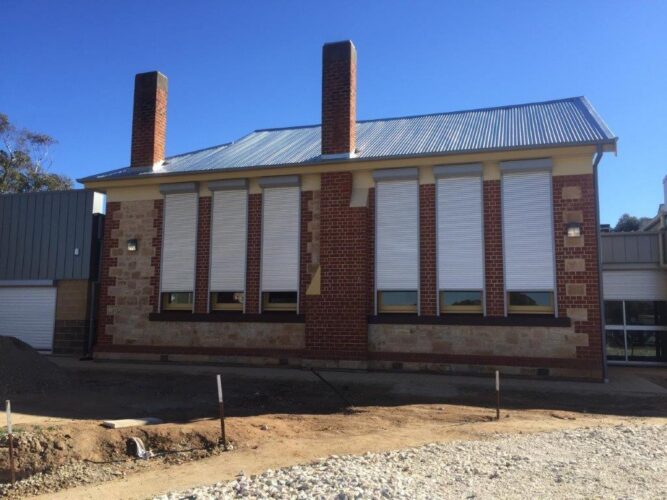
1. Install Bushfire-Rated Roller Shutters and Ember Guards
Roller shutters do far more than darken a bedroom for weekend sleep-ins. When specified to the correct Bushfire Attack Level (BAL) they become a solid aluminium shield that stops wind-borne embers, radiation and even opportunistic break-ins—all while lowering summer cooling bills. Because up to 90 per cent of houses lost in bushfires ignite from embers slipping through broken glass or tiny gaps, shuttering every exposed window is one of the fastest ways to protect your home from bushfires.
Why shutters are a first-line defence
- Ember block: BAL-40 and BAL-FZ shutters are constructed from interlocking, double-walled slats that seal gaps to < 2 mm, the threshold below which embers cannot pass.
- Radiant-heat barrier: Powder-coated aluminium reflects a portion of incident heat, delaying glass fracture and giving firefighters extra minutes.
- Insulation bonus: Foam-filled cavities add up to 30 % thermal resistance, shaving dollars off summer air-conditioning and winter heating.
Choosing the right product
- Materials & BAL rating
- Aluminium: lightweight, corrosion-resistant, available up to BAL-40 with 40 mm slats.
- Steel: heavier, can reach BAL-FZ where direct flame contact is plausible.
- Build quality
- Slat thickness ≥ 0.9 mm and deep side tracks (53 mm+ front-fix, 70 mm+ reveal-fix) reduce rattling under hot northerlies.
- An extruded bottom bar with brush seals closes that common ember entry point.
- Operation options
- Manual winders are fool-proof when mains power drops.
- 240 V motors with battery back-up give push-button ease and emergency override.
- Solar kits work well on remote sheds where wiring is costly.
Professional installation & maintenance
A BAL-rated shutter only performs if it’s snug within the window reveal and free of melt-prone plastics. Ask your installer to caulk perimeter gaps with high-temperature silicone and fit stainless-steel ember guards over any ventilation slots.
Every August, run this simple service routine:
- Hose and wipe tracks, removing cobwebs or leaf litter.
- Check motor torque, winder straps and locking pins.
- Inspect paint for chips; touch-up prevents corrosion.
Classic Roller Shutters Adelaide manufactures BAL-compliant shutters locally and offers free, no-pressure site assessments across SA. An annual service plan can be bundled in, so your first-line defence stays battle-ready long after the headline fires fade from the news.
2. Keep Roofs and Gutters Ember-Free All Year
Your roof is the largest horizontal ember-trap on the block. A single fist-sized gutter nest of leaves can smoulder for hours before flames show, giving bushfires a foothold even when the front is kilometres away. Staying on top of gutter hygiene is therefore non-negotiable if you want to protect your home from bushfires. The good news: a few scheduled clean-outs and some inexpensive hardware upgrades slash the risk dramatically.
Regular cleaning & metal guards
- Frequency: Empty gutters at the end of each season, bumping to monthly through spring when eucalypts shed oils and litter.
- Safe method: Use a fibreglass ladder on level ground, gloves, eye protection and a hose nozzle that lets you push debris toward the downpipe.
- Professional help: Commercial roof-vacuum teams cost ~$180–$300 for an average Adelaide house and include disposal.
- Guards: Install steel or aluminium gutter guards with a mesh aperture no larger than
5 mm. Plastic guards can melt under radiant heat. - Vacuum vs brush: Vacuums remove sludge without blocking downpipes but require powered equipment; brush-off kits are cheaper yet leave fine silt that can harbour embers.
Seal and protect the roof space
Cracked tiles, lifted ridge capping and unflashed penetrations give embers a straight shot into dry insulation.
- Replace missing or broken tiles immediately; silicone-seal minor chips.
- Under metal roofs, lay reflective sarking or bushfire-rated blanket insulation to catch stray embers that sneak past laps.
- Fit non-combustible valley gutters and aluminium flashing around chimneys, skylights and solar racking—ensure gaps are < 3 mm.
- If you have whirlybirds, cage them internally with stainless mesh so ventilation remains but embers don’t.
Water harvesting as a defence
Clean gutters aren’t just safer—they channel debris-free water to storage tanks you can later pump through sprinklers or hoses.
- Capacity: A dedicated 5,000 L metal or fibreglass tank is the minimum for suburban blocks; rural homes often aim for 22,000 L.
- Inlet screens: Fit 2 mm stainless strainers on both downpipes and tank inlets to stop leaves filling the tank.
- Fire pump: Pair the tank with a petrol or diesel pump (≥5 hp) and test it monthly—power failures are common during fires.
By keeping the roofline tidy, sealed and supplied with clean water, you remove three of the most common ignition points long before the first ember arrives.
3. Upgrade Doors, Windows and Screens to BAL Compliance
When glass shatters under radiant heat, negative pressure inside a dwelling sucks embers through the opening like a vacuum cleaner. Doors and windows are therefore the second-most common weak point after roofs. Bringing them up to the Bushfire Attack Level (BAL) specified for your postcode not only satisfies council approvals under AS3959, it could be the upgrade that stops a fatal ember ignition. Treat every glazed opening as a potential entry point and harden it accordingly if you want to truly protect your home from bushfires.
Selecting BAL-rated glazing and frames
BAL categories range from BAL-12.5 (low risk) to BAL-FZ (flame zone). As you climb the scale, glazing requirements tighten:
- BAL-12.5 & 19: single toughened glass ≥ 4 mm or double-glazed with one pane toughened.
- BAL-29: minimum 5 mm toughened or IGU with 6 mm outer pane plus steel or aluminium frames.
- BAL-40 & FZ: double-glazed units with 6 mm toughened outer and 5 mm laminated inner, metal frames, and steel mesh shutters or external drenching systems.
Aluminium frames cope better with heat than softwood, but treated hardwoods such as spotted gum are still permissible up to BAL-29 if fitted with metal beading and intumescent seals that swell to close gaps when temperatures spike.
Fine metal mesh screens
Mesh adds a sacrificial barrier that blocks embers if glass fails:
- Material: 316 stainless is the gold standard; bronze or powder-coated aluminium also pass up to BAL-40.
- Aperture: ≤ 2 mm as mandated by AS3959.
- Configuration: Fixed screens outside for windows that don’t need to open; hinged screens that release from the inside for bedrooms to maintain egress.
- Hardware: All screws, hinges and closers should be stainless or galvanised to avoid heat-induced failure.
Seals, draught stoppers and gap fillers
The best glazing still loses the battle if air gaps remain:
- Apply high-temperature silicone along frame junctions and around penetrations.
- Fit automatic drop seals to the base of entrance doors; they compress to the threshold when the door closes, eliminating the 3 mm ember pathway most often overlooked.
- Weather strips and foam tapes around jambs stop rattling and reduce energy loss year-round.
- Don’t forget weepholes—insert BAL-approved stainless inserts to keep wall cavities ventilated yet ember-tight.
Complete these sealing details and your upgraded doors and windows become a fortress, dramatically reducing the chance of internal ignition during an ember storm.
4. Create a 20 – Metre Defendable Space With Smart Landscaping
When the Country Fire Service maps ember attack zones it treats the first 20 metres around a building as the critical “defendable space”. Here, every blade of grass, mulch pile or patio chair becomes potential fuel. By redesigning this buffer you slow surface flames, starve embers of kindling and give firefighters a safe working envelope. The good news is you don’t need a moonscape; thoughtful plant choice, pruning and a few hardscape tweaks will do most of the heavy lifting. The principles below apply whether you live on a tree-lined Adelaide foothill block or a tight suburban lot hoping to protect your home from bushfires.
Horizontal and vertical separation of vegetation
- Follow the “rule of thirds”.
- Zone 1 (0–3 m): lawn or non-combustible surfaces kept under 100 mm high.
- Zone 2 (3–10 m): well-spaced shrubs, no crowns touching.
- Zone 3 (10–20 m): taller trees thinned so canopies are at least 2 m apart.
- Maintain a vertical gap of 2 m between ground fuels (grass, mulch) and the lowest tree branch to stop a surface fire climbing into crowns.
- Rake leaves and twigs weekly in fire season; compost heaps belong outside the 20 m ring.
Choose fire-smart plants and ground covers
Some species ignite like a petrol rag; others hold moisture and self-prune dead matter. Swap the former for the latter:
- Low-oil natives such as kangaroo paw, pigface, coastal rosemary and lomandra.
- Succulent borders (aloes, agaves) create living firebreaks.
- Ditch bark mulch within 5 m of structures; use river pebbles, decomposed granite or 20 mm crushed rock instead.
- Water-wise drip irrigation keeps foliage hydrated without encouraging explosive spring growth.
Hardscaping firebreaks
Permanent, non-combustible features interrupt flame paths and clear space for crews:
- 1.5–2 m wide paved paths or gravel strips around the house perimeter.
- Stone retaining walls and raised veggie beds double as radiant-heat shields.
- Store firewood, garden sheds and LPG cylinders at least 10 m from walls, on the downhill or leeward side if possible.
- Metal or masonry fences adjacent to the home add another spark-stopping layer compared with timber paling.
Treat your landscaping as a living component of your bushfire defence system, inspect it every spring, and the garden you enjoy today could be the barrier that saves the house tomorrow.
5. Enclose Under-Floor, Eaves and Ventilation Openings
Even with fire-smart landscaping, embers will probe every gap they can find. The biggest magnets are the dark, draughty cavities under decks, in eaves and through service vents. Once a spark lands in accumulated leaf litter or cobwebs, flames can race behind the cladding unseen. By physically enclosing or screening these openings you remove the oxygen supply and starve the ember before ignition. Think of it as shrink-wrapping the lower half of your home to protect your home from bushfires.
Box in under-deck and subfloor areas
- Fix non-combustible fibre-cement sheeting (minimum 6 mm) or corrugated metal from bearer level down to the ground.
- Keep a 400 mm ground clearance so moisture can escape; add a louvred metal access hatch for plumbing and pest inspections.
- If a full enclosure is impossible, at least staple
≤ 2 mmstainless mesh behind joists and install a removable lattice skirt for airflow. - Remove stored timber, paint tins and kids’ toys—anything that can smoulder belongs elsewhere.
Ember-proof vents and eaves
- Replace plastic or nylon eave vents with BAL-rated aluminium or stainless inserts.
- Gable, ridge and soffit vents should be backed by
≤ 2 mmmesh that sits flush with framing—no sagging pockets where embers can lodge. - Spring-loaded BAL vents are worth the extra dollars; they slam shut when radiant heat reaches ~70 °C, cutting airflow that feeds a fire.
Seal cracks and weepholes in external walls
- Walk the perimeter twice a year with a torch; fill gaps over 3 mm with high-temperature silicone or mortar.
- Clip in proprietary stainless weephole inserts rather than blocking them entirely—walls still need to breathe.
- Pay extra attention around window flashings and service penetrations where negative pressure can suck embers indoors.
Locking down these often-overlooked cavities completes the envelope, ensuring the expensive shutters and glazing upgrades already discussed aren’t undone by a single stray spark.
6. Replace Combustible Cladding, Fascia and Fencing
Timber weatherboards, thin PVC fascias and ageing paling fences look harmless, yet they behave like giant wicks once radiant heat tops 30 kW/m². Flames don’t even need to touch them; an ember lodged in a knot hole or between palings can smoulder unseen and set the wall alight hours after the main front has passed. Swapping these elements for non-combustible alternatives completes the external “armour” you’ve been building and is one of the most cost-effective ways to protect your home from bushfires.
Non-combustible wall options
| Material | BAL rating | Pros | Cons |
|---|---|---|---|
| Face brick / AAC block | BAL-FZ | High thermal mass, minimal maintenance | Heavy, higher labour cost |
| Fibre-cement board ≥ 6 mm | BAL-40 | Easy retrofit over studs, accepts any paint | Lower R-value than insulated panels |
| Colorbond steel sheeting | BAL-40 | Lightweight, quick install, recyclable | Can dent; needs insulation behind |
If full replacement is outside the budget, coat existing timber with an intumescent paint; it swells when heated, buying precious minutes for evacuation or firefighting.
Upgrade fascia, barge boards and pergola attachments
- Replace softwood fascias and barge boards with pre-finished Colorbond or aluminium profiles.
- Where pergola rafters meet the wall, insert a galvanised steel flashing so flames can’t leap directly onto the roofline.
- Paint exposed rafter tails with a fire-retardant primer if removal isn’t feasible.
Fire-resistant fencing
Fencing within 3 m of the house should be non-combustible:
- Colorbond or steel post-and-rail styles form a radiant-heat shield and need zero staining.
- Masonry block or stone walls double as privacy screens and solid firebreaks.
- If you must keep timber palings, stagger them to reduce airflow and keep the bottom rail at least 100 mm above ground to stop grass fires licking upward.
Assess these elements together—walls, roof edge and boundary—so there’s no weak timber link for embers to exploit.
7. Harden Decks, Verandahs and Stairs
Timber decks are a South Australian lifestyle staple—open-air barbies, sunset drinks, the lot. Unfortunately, that same airy construction makes them a red-carpet entry for wind-borne embers. Sparks lodge between boards, under bearers and in the cobwebs beneath stairs, then smoulder unseen until the whole structure ignites. A few targeted upgrades will turn these leisure zones from liabilities into another layer of defence as you protect your home from bushfires.
Close the ember highway
- Fix sheet-metal kick plates (0.6 mm galvanised or thicker) to the deck’s outer edge; they block drifting embers and stop flames licking the joists.
- Enclose gaps wider than
3 mmbetween boards with timber cover strips or intumescent acrylic sealant that expands when heated. - Staple ≤ 2 mm stainless mesh across the sub-floor to trap falling embers while maintaining airflow.
- Sweep leaves from between boards and the stair stringers weekly during fire season—fuel build-up defeats every other upgrade.
Choose BAL-rated decking materials
- Bush-hardwoods such as spotted gum, ironbark and blackbutt score low flammability indices and meet up to BAL-29 when board thickness is ≥ 18 mm.
- For higher BAL sites, opt for fibre-cement or high-density composite boards that include a fire-retardant core; check the manufacturer’s AS3959 test certificate.
- Avoid hollow PVC or low-grade plastic composites—they can melt, drip and spread fire even at modest radiant heat levels.
Fire-safe balustrades and handrails
- Swap timber lattice inserts for 3.2 mm stainless-steel wire rope, perforated aluminium, or toughened glass panels.
- Fit metal post caps so embers can’t nest in hollow tops, and use stainless fittings throughout to resist heat distortion.
- Where stairs meet the ground, clear a 1 m strip of grass and mulch, laying gravel or pavers to interrupt surface flames.
These tweaks keep your outdoor living spaces enjoyable 11 months of the year and a whole lot safer during the one month you hope never comes.
8. Fit Bushfire Sprinkler and Independent Water Supply Systems
A well-placed ember-proof shutter stops sparks at the window, but it does nothing for the radiant heat building on your roof or garden beds. A dedicated sprinkler system cools surfaces, dampens fine fuels and creates a humid “bubble” that makes ignition far harder. When mains pressure fails—as it often does during a bushfire—your sprinklers must keep running from their own tank and pump. A little plumbing now can buy priceless minutes later and further protect your home from bushfires.
Roof-mounted and perimeter sprinklers
- Use stainless-steel or brass rotating nozzles rated for 200 °C+.
- Space nozzles so water arcs overlap; the common rule of thumb is
10 L/minper nozzle. - On single-storey roofs, aim for 360° coverage; two-storey homes may need a mid-height perimeter line to wet walls and windows.
- Fit deflector plates under solar panels and satellite dishes to prevent shadow zones.
Water sources and pumps
- Storage
- Urban blocks: minimum 5,000 L metal or poly tank plumbed exclusively for fire use.
- Semi-rural: 22,000 L gives roughly 3 hours coverage for a typical four-bed home.
- Pump
- 5–7 hp petrol or diesel “fire-fighter” unit with at least 300 kPa delivery pressure.
- Mount on a concrete pad, shielded by a sheet-metal cover to deflect radiant heat.
- Keep a 5 m suction hose and foot valve ready for drafting from pools or dams if tanks run low.
Automation and remote activation
- Install heat-sensitive valves that open around 70 °C, soaking the house even if you’ve evacuated.
- Add a 12 V battery and GSM or Wi-Fi switch so you can trigger the pump from a phone once you receive a CFS Watch & Act alert.
- Test both manual and remote starts monthly; run fresh fuel through the pump and check hose couplings for leaks.
Remember, sprinklers complement shutters, sealing and smart landscaping—they don’t replace them. Combine all four layers and you dramatically improve the odds when the ember storm arrives.
9. Assemble a Bushfire Emergency Plan and Survival Kit
Hardware upgrades protect bricks and mortar, but people still win or lose the day. A written, rehearsed plan tells every family member when to leave, where to go, and what to grab—so no-one wastes precious minutes arguing at the gate. Think of it as the software that lets all your new bushfire hardware work properly. A clear plan backed by a grab-and-go kit is the simplest, cheapest way to protect your home from bushfires while keeping loved ones safe.
Drafting and practising the plan
- Identify “leave-early” triggers such as a Severe Fire Danger Rating, a CFS Watch and Act alert for your district, or smoke visible from the ridge.
- Map two exit routes in opposite directions; drive them in daylight and at night.
- Nominate an external meeting point (local oval, friend’s house) and an out-of-area phone contact.
- Assign roles—one person shuts shutters, another moves pets to the car.
- Run a drill at the start of each fire season; time it and refine.
What to pack in the survival kit
| Category | Essentials |
|---|---|
| Safety | P2 smoke masks, leather gloves, goggles, woollen blankets |
| Health | Prescriptions, basic first-aid kit, personal medications |
| Tech & docs | Charged power banks, USB with scans of IDs & insurance, copies of the plan |
| Comfort | Change of clothes, toiletries, snacks, 3 L water per person |
| Pets | Leads, food, carrier, vaccination papers |
Keep everything in a lidded plastic tub near the exit; refresh batteries, food and meds every spring.
Communication and alert systems
- Install the Alert SA app (CFS), Fires Near Me (NSW RFS) or local equivalent and enable location sharing.
- Battery AM/FM radio ensures updates when mobile towers fail.
- List key numbers—000, CFS Bushfire Information Line, vet, neighbours—on a laminated card tucked in the kit.
- Store spare mobile chargers in both cars; blackouts are almost guaranteed.
Revisit the plan annually, update phone numbers, and you’ll move from panic to purposeful action if a siren sounds.
10. Schedule Routine Inspections and Seasonal Maintenance
Even the best-rated shutters and sprinkler heads fail if they’re jammed with cobwebs or stuck on an empty water tank. A light, regular maintenance rhythm keeps every previous upgrade doing its job, turns small faults into inexpensive fixes, and ultimately helps protect your home from bushfires when summer peaks. Use the South Australian calendar below as a template; tweak dates for your own climate zone.
Pre-season to-do list (August–October)
- Roof & gutter audit: clear debris, flush downpipes, re-seat loose tiles and re-silicone flashing.
- Shutter service: run each roller shutter up and down, lubricate tracks, test battery back-ups.
- Landscape trim: mow lawns < 100 mm, prune tree limbs within 10 m of the house, rake mulch away from cladding.
- Seal check: inspect door sweeps, window seals and weephole inserts; replace any cracked silicone.
- Repaint exposed timber with a fire-retardant coating if replacement is still on the project list.
During fire season (Nov–March)
- Weekly yard scan: blow leaves off decks and verandahs, empty gutter strainers, check under-deck mesh for trapped litter.
- Water readiness: keep hoses connected, run the firefighter pump for two minutes each fortnight, top fuel and test remote start.
- Equipment staging: store rake, shovel and knapsack sprayer at the front of the shed; everyone should know their spot.
Post-season review
- Note what worked: Did shutters close smoothly? Did the sprinkler coverage reach that new pergola?
- Document faults and budget upgrades for winter—trades are quieter, and materials cheaper.
- Back up photos and receipts to the cloud so insurance records stay current.
A 30-minute circuit once a week beats a six-figure rebuild; add the reminders to your phone now before the calendar fills up.
11. Strengthen Insurance, Finance and Digital Records
You can bolt steel shutters to every window, yet a serious bushfire may still claim parts of the home—or the entire structure. Making sure you can afford to rebuild, replace valuables and keep the household running during recovery is every bit as important as ember-proof hardware. Think of the tasks below as the financial firewall that supports all the physical work you’ve done to protect your home from bushfires.
Adequate building & contents cover
- Review your policy at least once a year. Rising labour and materials costs mean last decade’s sum insured could leave you hundreds of thousands short.
- Use a current per-square-metre rebuild calculator and add 10–15 % for demolition, debris removal and temporary fencing.
- List recent upgrades—BAL shutters, sprinkler pumps, non-combustible cladding—and ask if they qualify for a premium discount. Some insurers will shave 5–10 % off when risk is demonstrably lower.
- Confirm “alternative accommodation” cover; aim for 12–24 months in high-risk regions where rebuild queues are long.
Create photographic and video evidence
- Conduct a slow, room-by-room phone video; open cupboards and zoom in on serial numbers.
- Upload the file to a cloud service (Google Drive, iCloud, Dropbox) and copy it to an external SSD stored off-site.
- Scan or photograph receipts, valuations, council approvals for recent renovations, and keep them in the same folder.
- Update the archive after big purchases—furniture, appliances, jewellery—so nothing slips through the cracks.
Emergency cash and documentation
- Keep $500–$1,000 in mixed notes sealed in a waterproof pouch; ATMs and EFTPOS often fail when power and mobile towers go down.
- Add certified copies of passports, licences, Medicare cards and prescriptions; originals can live in a fire-rated safe or bank vault.
- Slip a laminated contact list (insurer, mortgage lender, vet, builder, neighbours) into your survival kit for quick access on the run.
Sort these admin tasks now, and post-fire bureaucracy becomes a straightforward claim, not a second crisis.
12. Stay Informed: Community Resources and Professional Help
Installing hardware and rehearsing a plan are powerful steps, yet bushfire safety is never a solo project. Regulations evolve, hazard ratings change daily, and the fastest way to fill any knowledge gap is to lean on the agencies and experts who track fires for a living. Staying plugged into these networks puts real-time intelligence, rebates and skilled labour at your fingertips—everything you need to keep upgrades compliant and protect your home from bushfires year after year.
Tap into local fire authority guidance
- Bookmark your state fire service page—SA CFS, NSW RFS, CFA Vic, DFES WA all host “prepare your property” checklists, burn-off calendars and Fire Danger Rating explanations.
- Sign up for SMS or email watch zones so you receive incident alerts without refreshing an app.
- Check your council’s “Neighbourhood Safer Place” map each spring; these locations can shift after audits.
- Many brigades run free community workshops on gutter cleaning, pump testing and plan writing—30 minutes of Q&A can save costly mistakes.
Training and certified professionals
Bushfire retrofits worth thousands hinge on correct specification and sign-off:
| Service | Qualification to ask for | Tip |
|---|---|---|
| BAL assessor | FPAA or BPAD Level 2/3 | Needed for DA submissions or major renovations |
| Sprinkler designer/installer | FPAA Confined Level 3 or state plumbing licence | Ask for hydraulic flow test report |
| Arborist for fuel reduction | AQF Level 5 consulting arborist | Ensure tree work meets local biodiversity rules |
Gather at least two quotes, request references, and confirm the pro carries public-liability insurance that covers bushfire works.
Volunteer and community preparedness
- Join or support a local Community FireSafe or Fire Ready group; shared machinery days slash fuel loads across property lines.
- Organise a street WhatsApp group for early smoke sightings and hose-sharing offers when neighbours are away.
- If you have time and fitness, consider becoming a CFS volunteer. The training transforms theoretical advice into muscle memory and builds relationships that matter when roads close.
By coupling expert advice with grassroots action you create a living, adaptable defence system—one that evolves as quickly as the bushfire threat itself.
Ready to Fire-Proof Your Property?
Bushfire resilience is a jigsaw: each upgrade matters on its own, yet the real strength comes when all the pieces lock together. Solid roller shutters seal windows, metal gutter guards starve embers, BAL-rated doors and screens stop radiant heat, smart landscaping robs flames of fuel, and a rehearsed evacuation plan keeps people safe even if the worst happens. Routine maintenance, up-to-date insurance and community intel round out the picture.
Tick off one project at a time—start with the weak spot that worries you most and work outward until every entry point, cavity and garden bed is accounted for. The sooner you begin, the more fire seasons your home can sail through without drama.
Live in Adelaide or the Hills? Kick-start your layered defence with professional advice and locally made BAL-rated roller shutters. Book a free, no-obligation bushfire-readiness consultation with Classic Roller Shutters Adelaide and turn this checklist into real-world protection before next summer’s northerlies arrive.