Custom plantation shutters are made-to-measure window coverings with adjustable louvres, built to your exact sizes and style choices. Unlike off‑the‑shelf options, they’re tailored to each opening—controlling light and privacy, improving insulation, and lifting street appeal. “Custom” means you choose the material, colour, blade size, tilt type, frame and how the panels open, so they suit your room and Australia’s conditions.
In this guide, you’ll learn what “custom” really covers, the pros and cons, and how PVC, timber and aluminium compare. We’ll look at interior vs exterior use, design choices and frame options, costs in Australia (supply‑only vs installed), and what affects price. You’ll also get DIY measuring and install tips, lead times and warranties, care advice, comparisons with blinds and shutters, and local buying pointers for SA.
What does ‘custom’ mean for plantation shutters?
In simple terms, “custom” means your shutters are designed and built to your exact window or door measurements and preferences. With custom plantation shutters you choose the material (PVC, timber or aluminium), louvre size, colour and finish, tilt style (hidden or rod), panel configuration (hinged, bi‑fold or sliding), frame profile, and how they mount (reveal or face). The result is a millimetre‑true fit that works for tricky openings, moisture‑prone rooms and your home’s style.
- Your sizes: Made to fit each opening precisely.
- Your look: Colours, finishes and blade size to suit your décor.
- Your function: Pick how panels open and how you tilt for light and privacy.
The key benefits and drawbacks
Custom plantation shutters deliver a built‑in finish with practical gains. Sized to each opening, they give crisp sightlines, precise light and privacy control, and a solid, long‑lasting feel. In Australian conditions, angled louvres temper heat and UV while adding a useful insulating layer. With no cords and wipe‑clean surfaces, they suit family homes and rentals alike.
- Precise fit: Fewer gaps, better light control and privacy.
- Low maintenance: Wipe clean; PVC options handle moisture.
- Style: Timeless look and colours that lift street appeal.
- Upfront cost: Typically higher than many blinds or curtains.
- Not blackout: Expect some halo light around frames and blades.
- Clearance limits: Panels can obstruct winders; wide spans add weight/panels.
Materials explained: PVC, timber and aluminium
Choosing the right material is the biggest call you’ll make with custom plantation shutters. It affects how they handle steam and sun, how they look up close, and how they’ll wear over time. In Australia, most interiors use PVC or timber, while aluminium is popular for tougher spots and outdoor areas.
- PVC (with aluminium core): Moisture‑resistant and easy to wipe clean, ideal for bathrooms, kitchens and laundries. Many quality PVC shutters use an aluminium‑reinforced blade to add rigidity. Delivers a crisp, painted look; panels can feel heavier than timber on very wide spans.
- Timber: Natural grain and warmth with a classic, premium feel. Great for living rooms and bedrooms. Needs proper sealing and ventilation away from constant steam to minimise movement; can be refinished or repainted down the track.
- Aluminium: Robust and low‑maintenance with powder‑coated finishes, well suited to exteriors, high‑sun aspects and hard‑wear areas. Handles sliding and bi‑fold formats cleanly and copes well with Australian weather exposure.
Interior vs exterior plantation shutters
Interior plantation shutters mount inside the reveal or on the architrave for precise light control, privacy and insulation. Exterior shutters sit outside, shading glass from sun and weather, boosting privacy and airflow—great for decks and upper‑storey windows.
- Use: Interiors for daily light; exteriors for shade and privacy.
- Materials: Interiors PVC/timber; exteriors powder‑coated aluminium, stainless fixings.
- Mounting: Interiors hinged frames; exteriors hinged, sliding or bi‑fold tracks.
- Care: Interiors wipe; exteriors hose down, especially near coast.
- Effect: Interiors fine‑tune light; exteriors cut heat at source.
Design choices you can customise
With custom plantation shutters, you control both the look and how they work day to day. The right picks at order time avoid hassles later—think panel swing around winders, airflow when louvres are open, and how the finish ties into skirtings and trims. Use these levers to tailor each room.
- Material and finish: PVC, timber or aluminium with matte or low‑sheen paint; natural stains for timber.
- Colour palette: Classic whites through warm neutrals to match walls and architraves.
- Louvre size: Smaller blades maximise privacy; larger blades open views and airflow.
- Tilt style: Discreet hidden tilt or a visible rod (centre or offset).
- Panel layout: Single or double hinged, plus bi‑fold or sliding for wide spans.
- Opening direction: Left/right hinge, meeting rails and T‑posts to balance widths.
- Mid‑rail or split tilt: Independent top/bottom control and added rigidity on tall windows.
- Hardware details: Hinge and magnet colours to suit the frame.
Fit and frame options for a perfect install
A great-looking shutter starts with the right mount and frame. For most windows, a reveal (inside) fit gives the cleanest lines—provided there’s enough depth to clear handles, winders and louvre rotation. Where reveals are shallow or out‑of‑square, a face (outside) fit on the architrave or wall can cover imperfections, tighten light gaps and keep panels swinging freely.
- Reveal mount: Minimal look inside the recess; relies on true, square reveals.
- Face mount: Adds a trim to hide uneven plaster and boost light sealing.
- Frame profile: Choose slim for modern lines or wider trims to cover gaps.
- T‑posts/meeting rails: Split wide spans for stability and balanced panel sizes.
- Tracks for width: Sliding or bi‑fold tracks keep large openings smooth and safe.
- Clearances first: Check handle/winder projections and sill slope before locking in the swing.
Tricky openings: sliding doors, bay windows and corner setups
Large sliders, angled bays and corner glazing need extra planning. Custom plantation shutters can solve these with tracks, T‑posts and purpose corner trims—provided stack position, hinge direction and clearances are set. Decide where panels park, avoid louvre clashes at joins, and use face‑mounts to tame uneven angles.
- Sliding doors: Top‑hung sliding or bi‑fold tracks; stack off the traffic side; clear handles.
- Bay windows: One frame per facet with T‑posts; face‑mount to bridge angles; split tilt.
- Corner setups: Corner post or overlap light‑block; opposite tilt directions; check blade clearance.
Cost guide in Australia: supply-only vs installed
If you’re buying custom plantation shutters online as supply‑only, interior PVC options are advertised from about $216/m². Because shutters are priced by area, a quick estimate is width (m) × height (m) × $/m². For example, a 1.20 m × 1.20 m window is 1.44 m², so supply‑only PVC could be roughly $216 × 1.44 ≈ $312, before delivery.
- Supply‑only costs: PVC from ~$216/m² (advertised). Delivery is often a flat fee (about $25–$60) or free above certain order values. Add for mid‑rails, corner posts, colour upgrades, and any sliding/bi‑fold track hardware.
- Installed packages: Many homeowners see entry pricing around $300–$500 for a standard interior window, with installation charged either hourly or as a fixed fee. Complex openings and track systems cost more.
- Material impact: Timber typically sits above basic PVC; exterior‑grade aluminium (with powder‑coat and stainless fixings) is usually higher again, especially on sliding/bi‑fold formats.
For Adelaide homes, local specialists often bundle measure, manufacture and install, and provide free in‑home quotes—handy for out‑of‑square reveals, bay windows or large sliders.
What drives the price up or down
The cost of custom plantation shutters shifts with material choice, window size (priced by m²), and how complex the opening is. Supply‑only buys stay lean but add delivery; installed packages add measure and labour. Expect extras for track hardware and non‑standard finishes, while larger orders can pull the per‑window price down.
- Material: PVC is most economical; timber costs more; exterior aluminium is highest.
- Area and span: Bigger windows add m² and may need T‑posts or mid‑rails.
- Panel/track setup: Sliding or bi‑fold tracks add hardware and labour.
- Window complexity: Bays, corners and out‑of‑square reveals need extra framing.
- Colour/finish: Standard whites are typical; stains or custom powder‑coat usually add.
- Tilt and features: Hidden tilt, split tilt or larger blades can be upgrades.
- Hardware spec: Coastal‑grade stainless and exterior fixings increase price.
- Delivery and install: Flat delivery or thresholds apply; access/height affects labour.
- Quantity: Multi‑room orders often attract better unit rates.
DIY or professional installation?
The right path depends on your skills, tools, time and how tricky the opening is. Simple, square windows with good reveal depth are very doable as DIY supply‑only. Large sliding doors, bay windows, out‑of‑square reveals or exterior aluminium systems are usually faster and cleaner with professional installation—especially when templating, scribing and track hardware are involved.
- DIY benefits: Save on labour, control timing, and get a tailored fit by following the supplier’s measuring and install guides precisely.
- Pro install benefits: One team owns the measure and fit, handles uneven walls, heights and access, finishes neatly, and streamlines aftercare and any warranty process—handy for Adelaide homes and complex openings.
How to measure for DIY shutters
Accurate measuring determines how well made‑to‑measure shutters fit. Use a steel tape in millimetres, measure every opening separately, and follow your supplier’s worksheet—many want tight “inside frame” sizes and make their own deductions. Note reveal depth for louvre rotation and any winders/handles that may clash. Photograph tricky spots and label each window.
- Reveal fit (inside mount): Measure width at top/middle/bottom (
W1–W3) and record the smallest; measure height left/centre/right (H1–H3) and use the smallest. - Squareness: Check both diagonals; if they differ noticeably, flag it for framing or a face mount.
- Depth and projections: Measure reveal depth at three points; confirm the minimum depth for your louvre size and check handle/winder projection.
- Sill and trims: Note sloped sills, tiles and architraves so the frame profile can cover neatly.
- Mid‑rail/split tilt: If aligning to a mullion or rail, measure from sill to the desired centre and record to the millimetre.
- Face fit (outside mount): Measure overall outside of architrave (or desired wall coverage) for width and height; allow any overlap the supplier specifies.
- Area for quotes: Convert to metres and use
width (m) × height (m)to estimate m²‑based pricing.
How to install DIY plantation shutters: tools and steps
Follow your supplier’s specific guide, but the workflow is similar for most custom plantation shutters. Work methodically: keep frames square, use packers to correct out‑of‑true reveals, and check louvre rotation clears winders. Track sets for sliders/bi‑folds come with their own fixing order—install the head track dead level before hanging panels.
- Tools: Steel tape, pencil, spirit level, square, drill/driver with timber/masonry bits, screws and wall plugs, packers/shims, countersink, stud finder, silicone/paintable caulk (optional), step ladder, safety glasses.
- Unpack and check labels; protect finishes. Dry‑fit frame (sides/top/bottom) to confirm sizing.
- Pre‑drill frame. Position in reveal or face‑mount; level and plumb the hinge side and fix lightly.
- Shim to square, fix remaining sides, recheck diagonals for equal gaps.
- Hang panels on hinges; adjust hinge screws for even margins and smooth swing.
- Fit mid‑rail heights, magnets/strikers and any light‑block strips.
- Clip in frame cover strips/caps; caulk perimeter if face‑fit to tidy gaps.
- Set louvre tension screws (if provided) so blades hold position.
- For sliding/bi‑folds: fix head track level, pack bottom guide, then hang and align panels; confirm clear stacking and smooth travel.
Lead times, delivery and warranties in Australia
Lead times for custom plantation shutters in Australia depend on local manufacture vs import, material, custom colours and any sliding/bi‑fold tracks. Busy pre‑holiday periods can stretch timelines, so request a written lead‑time and indicative install window. For supply‑only, delivery is often a flat fee or threshold—some brands advertise around $25–$60 flat shipping, or free delivery over $499. Warranties differ by supplier; in SA, some publish up to 15‑year shutter coverage—confirm inclusions (finish and hardware) and any DIY vs pro‑install conditions.
Care, cleaning and simple repairs
A light, regular clean keeps custom plantation shutters looking sharp and working smoothly. Dust weekly with a microfibre cloth or soft brush vacuum, then wipe monthly. PVC and aluminium handle a mild, warm soapy solution—rinse and dry. Timber prefers a lightly damp cloth only, then dry immediately; avoid lingering steam. For exterior shutters, hose off salt and grime (especially near the coast) and steer clear of abrasives or harsh solvents. While cleaning, check louvre tension and hinge screws.
- Tighten louvre tension screws so blades hold position.
- Re-align panels at the hinges to even up gaps.
- Replace snapped louvre pins with push-in spares.
- Swap tired magnets/strikers for a firmer close.
- Silicone-spray hinges/tracks for smoother movement.
Cracked stiles, warped panels or damaged tracks usually call for a professional assessment.
Energy efficiency, insulation and light control
Sized correctly, custom plantation shutters add a still-air layer at the glass that slows heat transfer and helps rooms feel steadier through Adelaide’s hot summers and cool winters. Interior shutters fine‑tune glare and privacy while keeping airflow; exterior aluminium options shade the glass and cut heat at the source. Louvres angle daylight up to the ceiling, soften UV on floors and furnishings, and reduce screen glare. They aren’t blackout, but smart framing and light‑block strips can minimise halo light for bedrooms and media spaces.
- Face mount for tighter light seals where reveals are uneven.
- Split tilt for day privacy below and bright sky‑light above.
- Pair with curtains if you want darker rooms and extra acoustic softness.
Room-by-room recommendations for Aussie homes
Match your custom plantation shutters to each space’s moisture, sun and privacy needs. Think about daily use first—sleep, work, entertaining—and then choose material, blade size and mount to suit. In hot Aussie summers, interior shutters fine‑tune light; exterior aluminium options tame heat before it hits the glass.
- Bedrooms: PVC or timber; split tilt for day privacy; face‑mount for tighter light seals.
- Living areas: Larger blades for views and airflow; consider sliding/bi‑fold for wide doors.
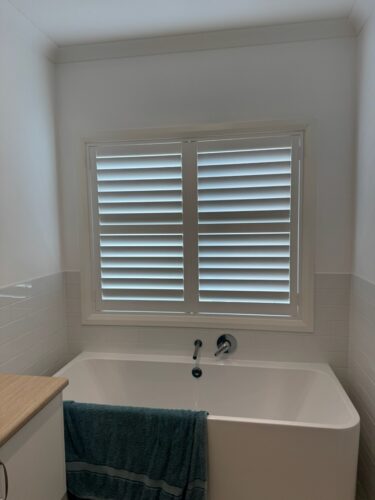
- Bathrooms & ensuites: Moisture‑resistant PVC; hidden tilt; confirm reveal depth around taps and tiles.
- Kitchens & laundries: PVC, easy‑wipe finishes; check winders/handles won’t clash with blade rotation.
- Home office: Mid‑rail or split tilt to cut screen glare while keeping daylight.
- Outdoor/alfresco: Powder‑coated aluminium; sliding or bi‑fold tracks; coastal‑grade fixings near the sea.
Plantation shutters vs blinds, curtains and roller shutters
Choosing between window coverings is about balancing light control, insulation, privacy, security and budget. Custom plantation shutters sit in the middle: an architectural look with adjustable light and a sturdy, low‑maintenance build. In Aussie homes, they pair well with other treatments—each solves a different need.
- Plantation shutters: Adjustable louvres, tidy sightlines and useful insulation; not true blackout; higher upfront than basic blinds.
- Blinds (roller/venetian): Most affordable and fast to install; blockout fabrics can darken rooms; side gaps and cords reduce sealing and longevity.
- Curtains: Softness and acoustic comfort; lined/blockout options achieve near‑dark; need space and regular cleaning; great layered over shutters.
- Roller shutters (exterior): Maximum heat, glare and noise reduction, true blackout and added security; exterior install and higher cost; no view when closed—often paired with interior sheers.
Buying in Adelaide and South Australia: local tips
Buying custom plantation shutters in Adelaide is smoother when you work with a local, factory‑direct team that measures, manufactures and installs. SA houses (think villas, bungalows and stone walls) often have out‑of‑square reveals, coastal air and hot western aspects—so material, frame profile and fixings matter. A showroom visit and an in‑home check usually prevent clearance surprises around winders and tiles.
- Go local: Faster lead times, floor‑plan quotes and easier aftercare.
- See before you buy: Compare PVC, timber and aluminium; feel louvre tension and frames.
- Coastal spec: Choose stainless fixings and powder‑coat; rinse salt regularly.
- Plan exteriors: Ask about tracked systems and wind load fastening.
- Mind the calendar: Pre‑holiday slots book out; get a written lead‑time.
- Delivery vs pickup: Flat fees are common; local pickup reduces transit risk.
- Warranty clarity: Confirm term (some advertise up to 15 years) and who handles claims.
Questions to ask suppliers and mistakes to avoid
Before you sign off on custom plantation shutters, ask targeted questions so you’re comparing like‑for‑like. Clarify what’s included, how the product is built, and who owns aftercare. This is where quality, timelines and total cost (including delivery and install) become clear—especially for tricky openings and exterior aluminium sets.
- What’s the material spec? PVC wall thickness, aluminium‑reinforced blades, timber species and sealing.
- Finish and hardware? Paint/powder‑coat type, hinge/magnet grade, coastal‑rated stainless if needed.
- Depth and deductions? Required reveal depth by louvre size; who makes size deductions and by how much.
- Panel design help? Mid‑rail placement, split‑tilt options, T‑posts on wide spans.
- Tracks and inclusions? What’s included for sliding/bi‑folds; measure, install and rubbish removal.
- Lead time and delivery? Written timeline; flat shipping/thresholds; pickup options.
- Warranty and service? Term and coverage (finish, hardware, moving parts); DIY vs pro‑install conditions; post‑install adjustments.
- Mistakes to avoid: Guessing sizes; ignoring winders/handle projections; choosing louvre sizes that won’t clear; assuming shutters are blackout; under‑specifying exterior fixings near the coast; forgetting stack space on sliders; approving bays/corners without a site check; skipping a showroom sample against your wall colour.
Are plantation shutters outdated? Style and resale
Short answer: no. Custom plantation shutters are widely seen as timeless in Australian homes and aren’t going out of style in 2025. They suit classic villas and modern builds alike, with clean lines, adjustable light and a built‑in, finished look. For resale, buyers tend to view shutters as a premium, low‑maintenance upgrade that boosts first impressions and street appeal—especially in living zones and bedrooms.
- Keep them current: Larger louvres, hidden tilt and slim frames.
- Colour smart: Crisp whites or soft neutrals to match trims; warm timber for texture.
- Layering: Pair with sheers or curtains for softness and night‑time depth.
Key takeaways and next steps
If you take one thing from this guide, make it this: custom plantation shutters work best when they’re designed around your openings, lifestyle and climate. Choose material by room, set louvre size and tilt for how you live, and pick a frame that fits square—or hides what isn’t. Keep pricing simple by using area, and let complexity (tracks, bays, exteriors) guide whether you DIY or get a pro.
- Material by room: PVC wet areas; timber living/bed; aluminium outdoors.
- Measure smart: Record smallest widths/heights; confirm reveal depth.
- Fit for function: Reveal for minimal look; face-fit to fix gaps.
- Know the costs: Priced by m²; tracks and colours add.
- Plan longevity: Ask about hardware grade, finish and warranty.
Ready to plan yours? Book a free measure or send your plans to Classic Roller Shutters Adelaide for local advice, factory‑direct pricing and installation.

