Getting an electric roller shutter installation right matters, not just for the look of your home, but for long-term performance, security, and energy efficiency. Whether you’re upgrading from manual shutters or fitting out a new build, understanding the full process helps you make better decisions and avoid costly mistakes.
This guide breaks down how electric roller shutters are installed, step by step, from initial measurements and wiring through to final testing. We’ll also cover when it makes sense to tackle parts yourself and when you’re better off calling in a professional. Because while some steps seem straightforward, others involve electrical work that requires a licensed tradesperson in South Australia.
At Classic Roller Shutters Adelaide, we’ve been manufacturing and installing roller shutters locally for over 40 years. Our team handles everything from supply and fit to electrical upgrades and repairs, so the advice in this article comes straight from hands-on experience, not guesswork. If at any point you’d prefer a professional to take over, we offer free in-home quotes across Adelaide.
Let’s get into it.
Before you start: planning and safety
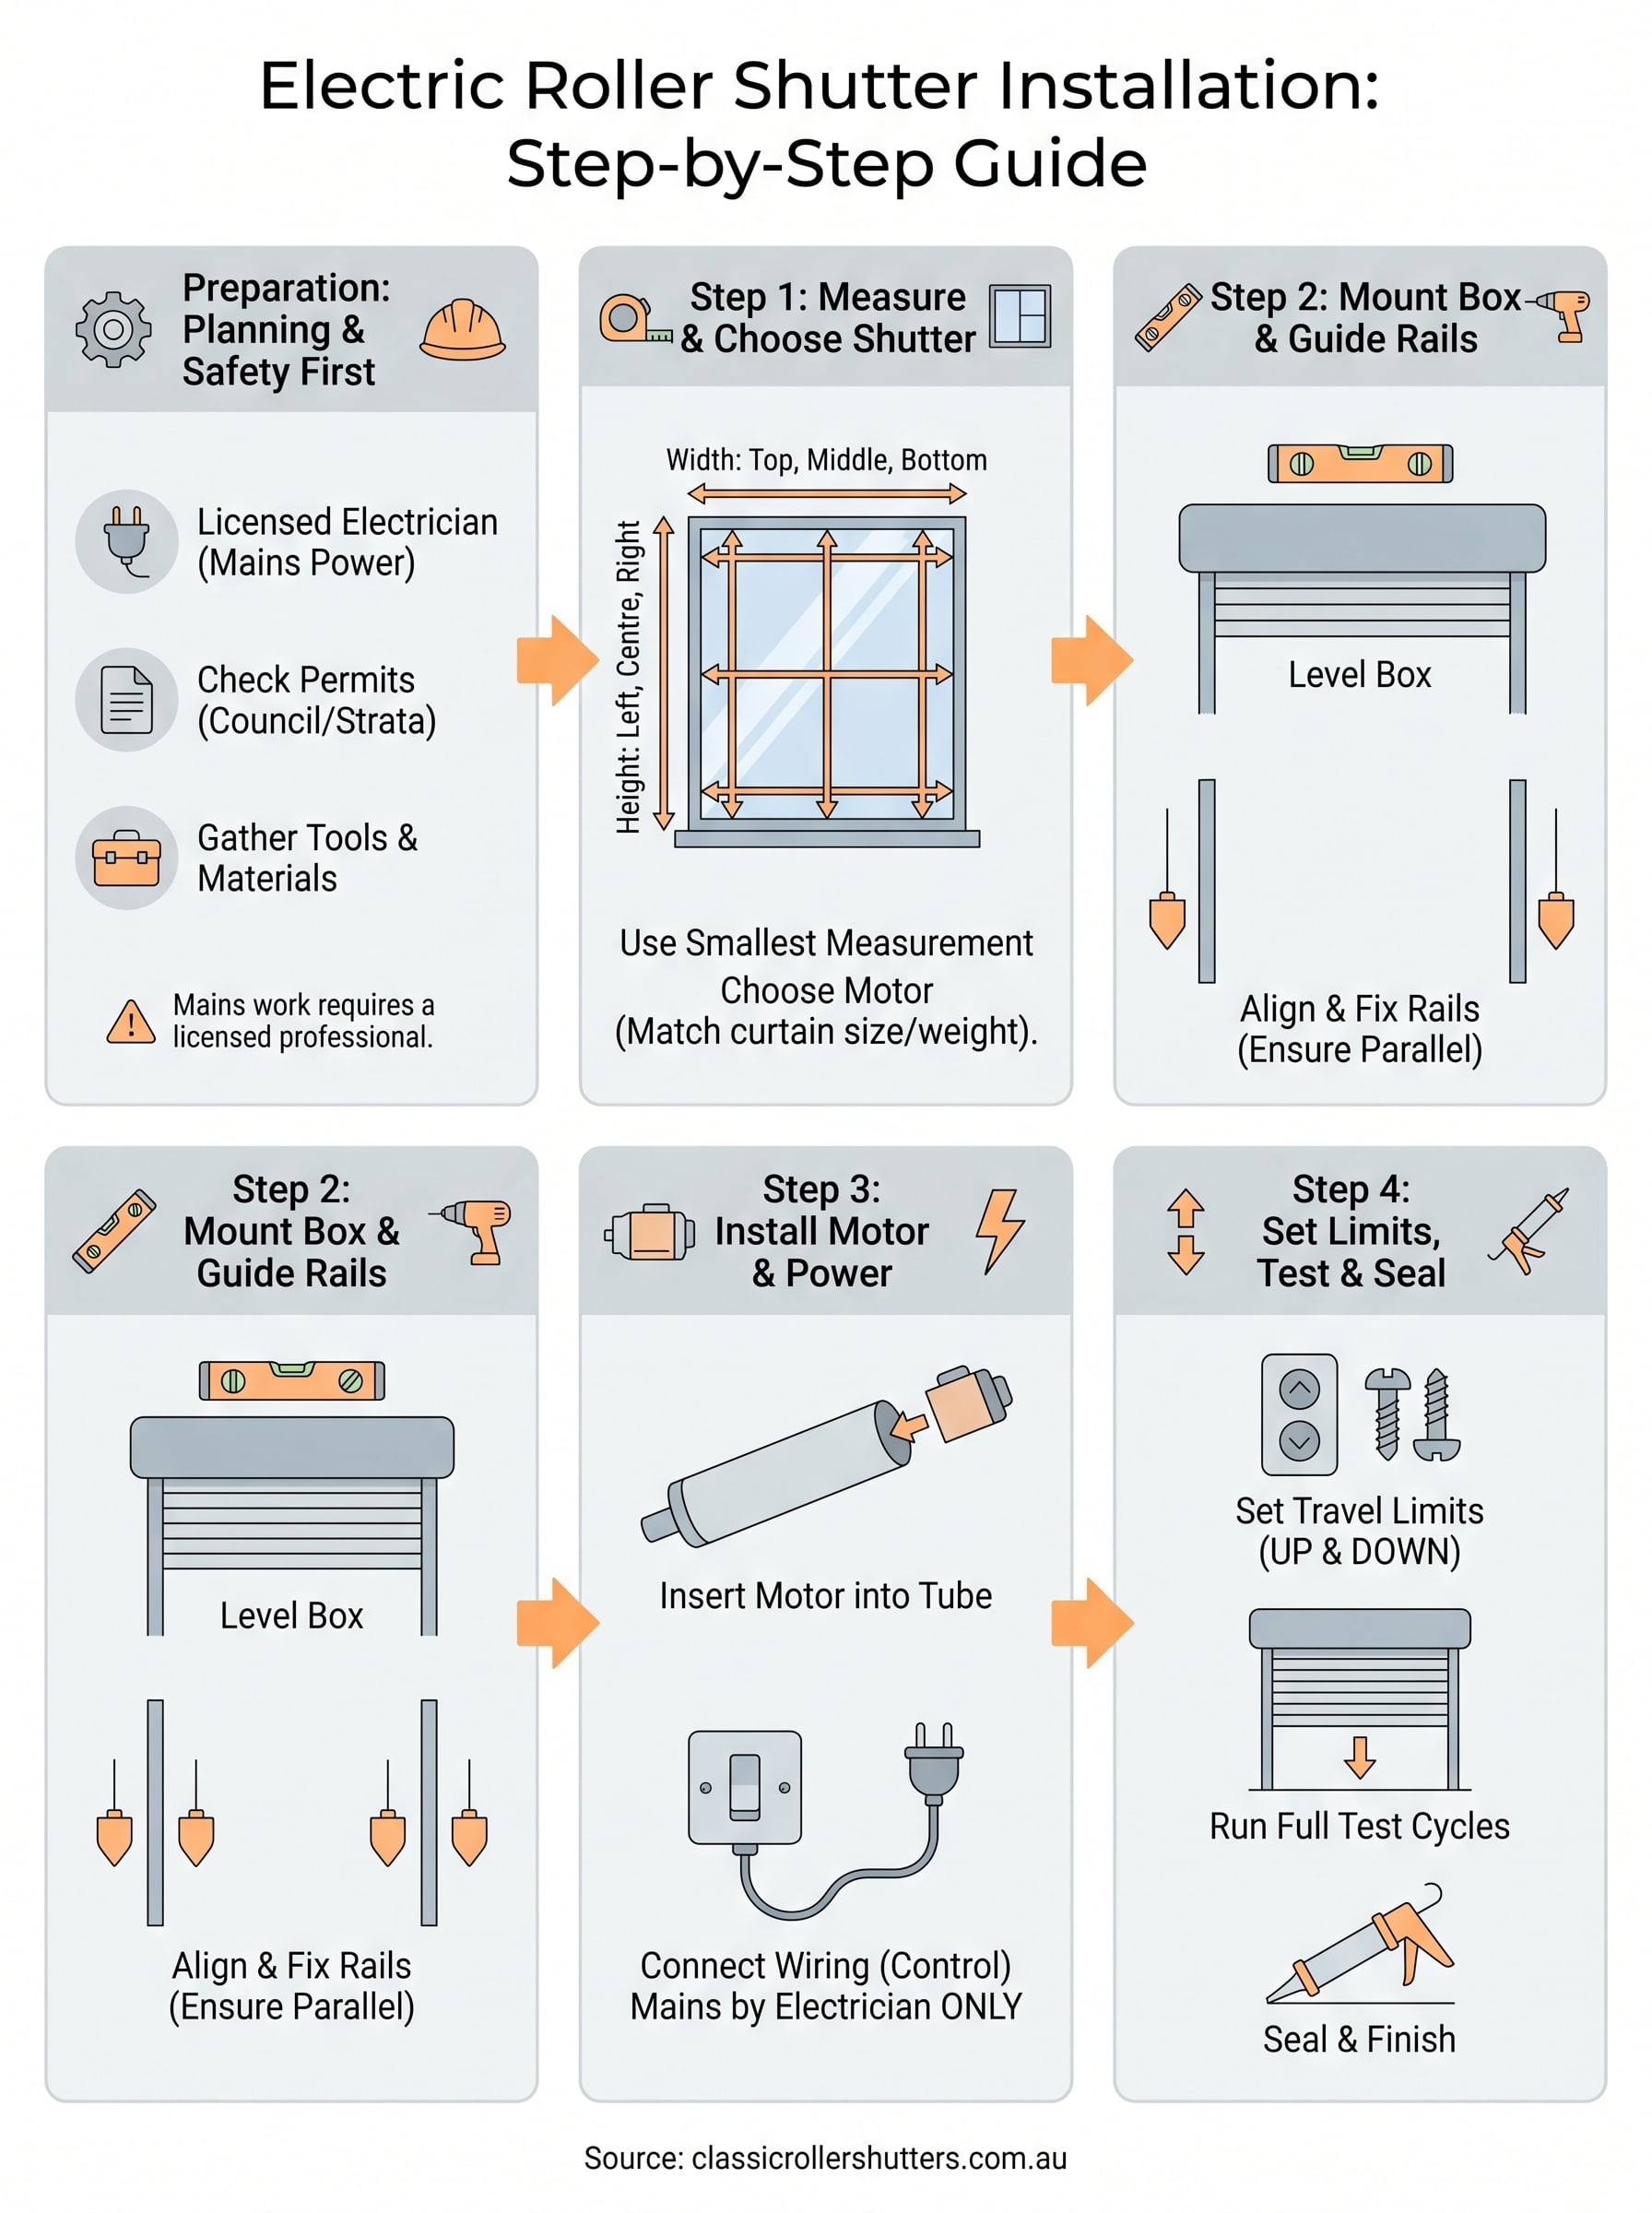
Rushing into any electric roller shutter installation without proper preparation is the fastest way to create problems you’ll spend weeks fixing. Poor planning at this stage leads to incorrect measurements, wrong motor sizing, and wiring that doesn’t comply with Australian standards. Taking an hour to get organised before you pick up a single tool saves significant time and money later.
Check if you need permits and a licensed electrician
In South Australia, any work involving 240V mains wiring must be carried out by a licensed electrician. This isn’t optional. If your electric roller shutter connects directly to your home’s mains power, you’ll need a qualified tradesperson to handle that part of the job, even if you plan to do everything else yourself.
Running mains electrical work without a licence in South Australia is illegal and will void your home insurance if something goes wrong.
Beyond the electrical requirement, check with your local council about whether your installation needs planning approval. This is particularly relevant for heritage-listed homes, strata properties, or properties in areas with specific design overlays. Most standard residential installations won’t require a permit, but it’s worth confirming before you start.
Here’s a quick checklist of what to confirm before you begin:
- Licensed electrician booked (if connecting to mains power)
- Council approval confirmed (if required for your property type)
- Body corporate or strata approval obtained (if applicable)
- Structural wall condition assessed and suitable for bracket mounting
- Motor type selected (240V hardwired, battery-powered, or solar)
Gather your tools and materials
Having the right tools on hand before you start prevents the frustrating stop-start of hunting for equipment mid-installation. For most installations, you’ll need a drill with appropriate masonry or timber bits, a spirit level, a tape measure, a pencil, a screwdriver set, and wire cutters if you’re making any low-voltage wiring connections.
Your materials list will depend on the specific shutter system you’ve purchased, but typically includes the shutter box and curtain, side guide rails, end caps, the motor unit, control wiring, and mounting brackets. Most quality systems come with fixings included, but check the manufacturer’s documentation to confirm before you head to the hardware store.
Assess your wall and opening conditions
Before anything goes up on the wall, inspect the surface where the shutter box and guide rails will be mounted. Brick, rendered masonry, and timber frames all require different fixing methods and anchor types. Weak or crumbling render, rotting timber, or hollow-core walls need to be addressed before installation, or your brackets won’t hold the weight of the shutter under regular operation.
Also check the window or door opening for square before you go any further. Out-of-square openings cause guide rails to bind, which puts extra strain on the motor over time. Use a spirit level and measure diagonally across the opening from corner to corner – both diagonal measurements should match within a few millimetres. If they don’t, you’ll need to account for this when positioning and mounting your rails.
Step 1. Measure and choose the right shutter
Getting your measurements right is the foundation of any successful electric roller shutter installation. A shutter that’s even a few millimetres too wide or too narrow will either refuse to fit the opening or leave gaps that defeat the purpose of installing it in the first place. Take your time here, because once the shutter is manufactured or ordered, there’s no easy fix.
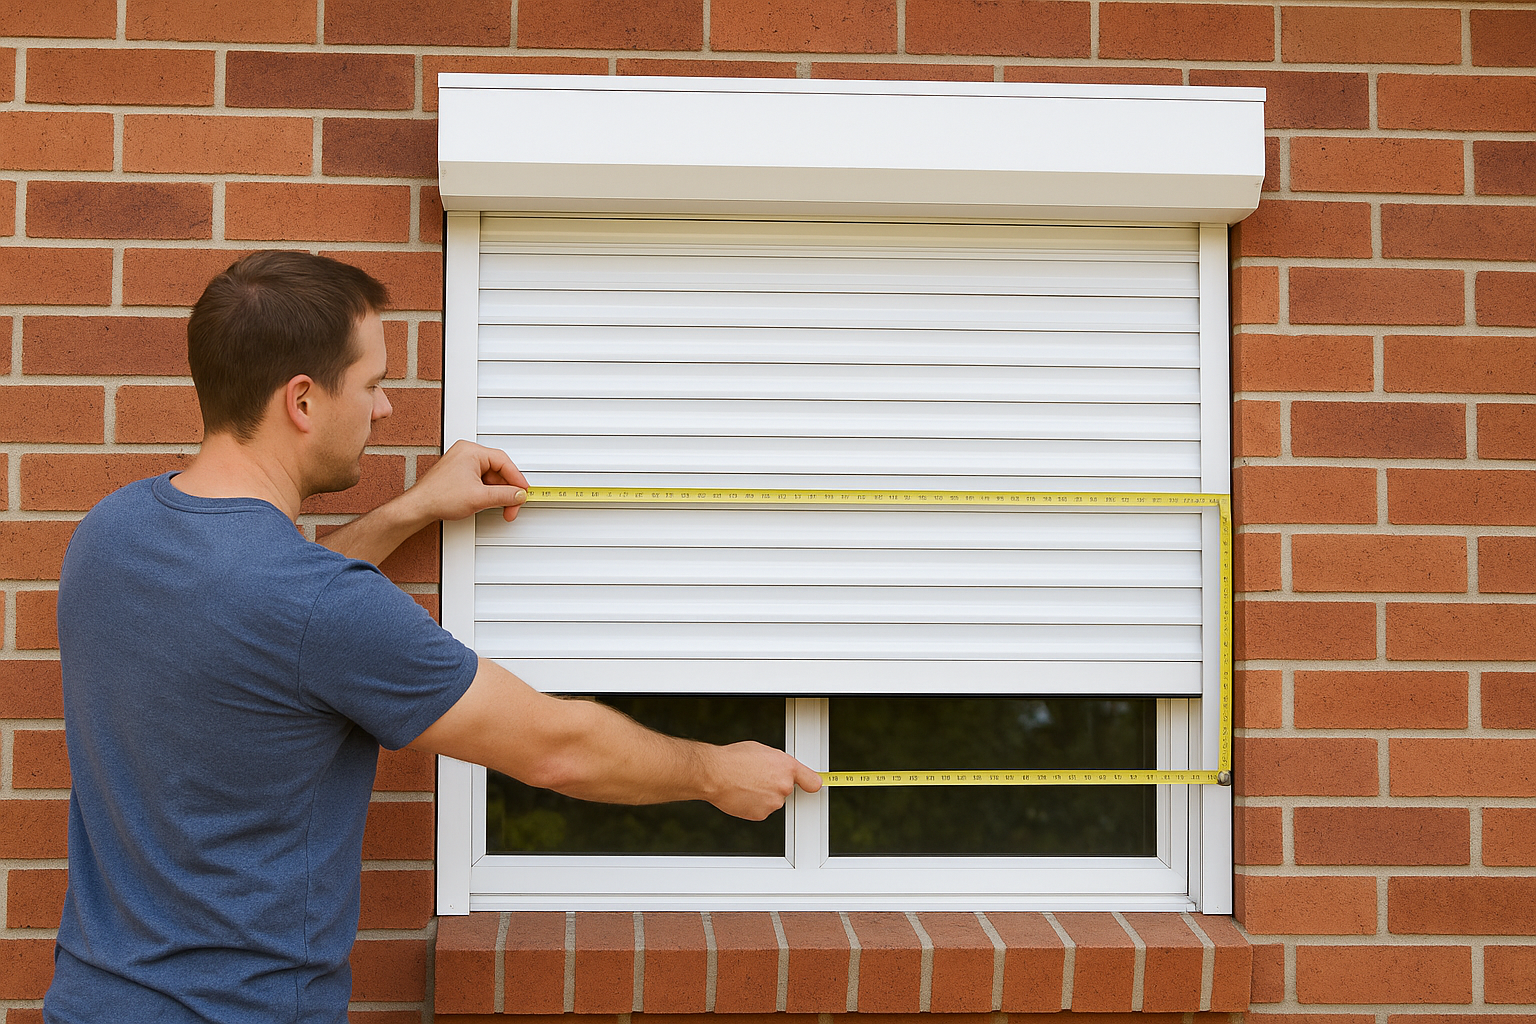
How to measure your opening correctly
Measure the width and height of your window or door opening in three places each: top, middle, and bottom for width; left, centre, and right for height. Use the smallest measurement in each direction. This ensures the shutter fits within the tightest part of the opening rather than binding against it.
Here’s a simple measurement template you can fill in before ordering:
| Measurement point | Width (mm) | Height (mm) |
|---|---|---|
| Left / Top | ||
| Centre | ||
| Right / Bottom | ||
| Smallest value (use this) |
Also note whether you’re face-fitting (shutter box sits in front of the wall, over the opening) or reveal-fitting (box sits inside the recess). Face-fitting is more common for brick veneer homes in Adelaide and gives you more flexibility if your opening isn’t perfectly square.
Always double-check your measurements before placing any order. A shutter that doesn’t fit is expensive to correct and causes significant delays.
Choosing the right motor and shutter size
Your motor selection depends on the size and weight of the shutter curtain. Larger shutters, particularly those wider than 2400mm or taller than 2400mm, need a higher-torque motor to operate smoothly without straining the drive mechanism over time. Most suppliers specify a maximum curtain area for each motor model, so match these figures carefully before purchasing.
For most standard Adelaide homes, a single-phase 240V tubular motor in the 10Nm to 20Nm range handles the majority of window and small door applications comfortably. Double garage or large commercial openings typically require 40Nm or above.
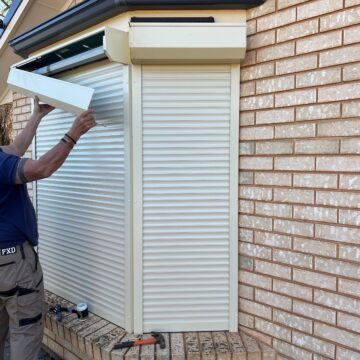
Step 2. Mount the box and guide rails
With your measurements confirmed and materials ready, you can begin the physical installation. This step sets up the structural framework your curtain and motor will depend on, so accuracy at this stage directly affects how well the shutter operates for years to come.
Position and fix the shutter box
Start by marking the position of the shutter box on the wall above the opening. The box needs to sit level, with the bottom face aligned so the curtain drops squarely into the guide rails below. Hold the box in position and use a spirit level to confirm it’s horizontal before marking any fixing points. Even a small tilt creates uneven tension across the curtain width, which puts unnecessary strain on the motor over time.
If your wall is masonry, use appropriately rated masonry anchors that can handle the combined weight of the box, curtain, and motor, as standard screws will work loose under repeated load cycles.
Drill your fixing holes at the marked points, insert your anchors, and secure the box firmly. Once fixed, check the level again before moving forward. Walls aren’t always perfectly flat, and the box can shift slightly as you tighten each fixing.
Fit and align the guide rails
Your guide rails run vertically down each side of the opening, and their alignment determines whether the curtain travels smoothly or binds against the edges. Attach the bottom of each rail to the wall first, using a plumb line or long spirit level to set them vertical, then fix the top. This bottom-up approach gives you more control over the base position before committing to the full length.
Once both rails are fixed, measure the gap between them at the top, middle, and bottom. All three measurements should match within 2mm. If they don’t, loosen the fixings and adjust before tightening fully. This small check is one of the most important quality steps in any electric roller shutter installation, and skipping it is a common source of binding and motor overload problems down the track.
Step 3. Install the motor and power supply
The motor is the working heart of your electric roller shutter installation, and how you fit it determines reliability for years ahead. Before you handle any wiring, confirm the power supply is isolated at the switchboard so there’s no live current running to the circuit you’re working on.
Insert the motor into the curtain tube – all different types of motors
Most tubular motors slide into the roller tube from one end and are held in place by a crown adapter at the drive end and a fixed pin at the idle end. Slide the motor in until the crown engages, then fit the end cap and idle-end bracket to lock it in position. Once the motor is seated, lift the assembled roller tube into the shutter box and clip it into the side brackets. Give the tube a gentle manual rotation to confirm it turns freely without binding before you move to wiring.
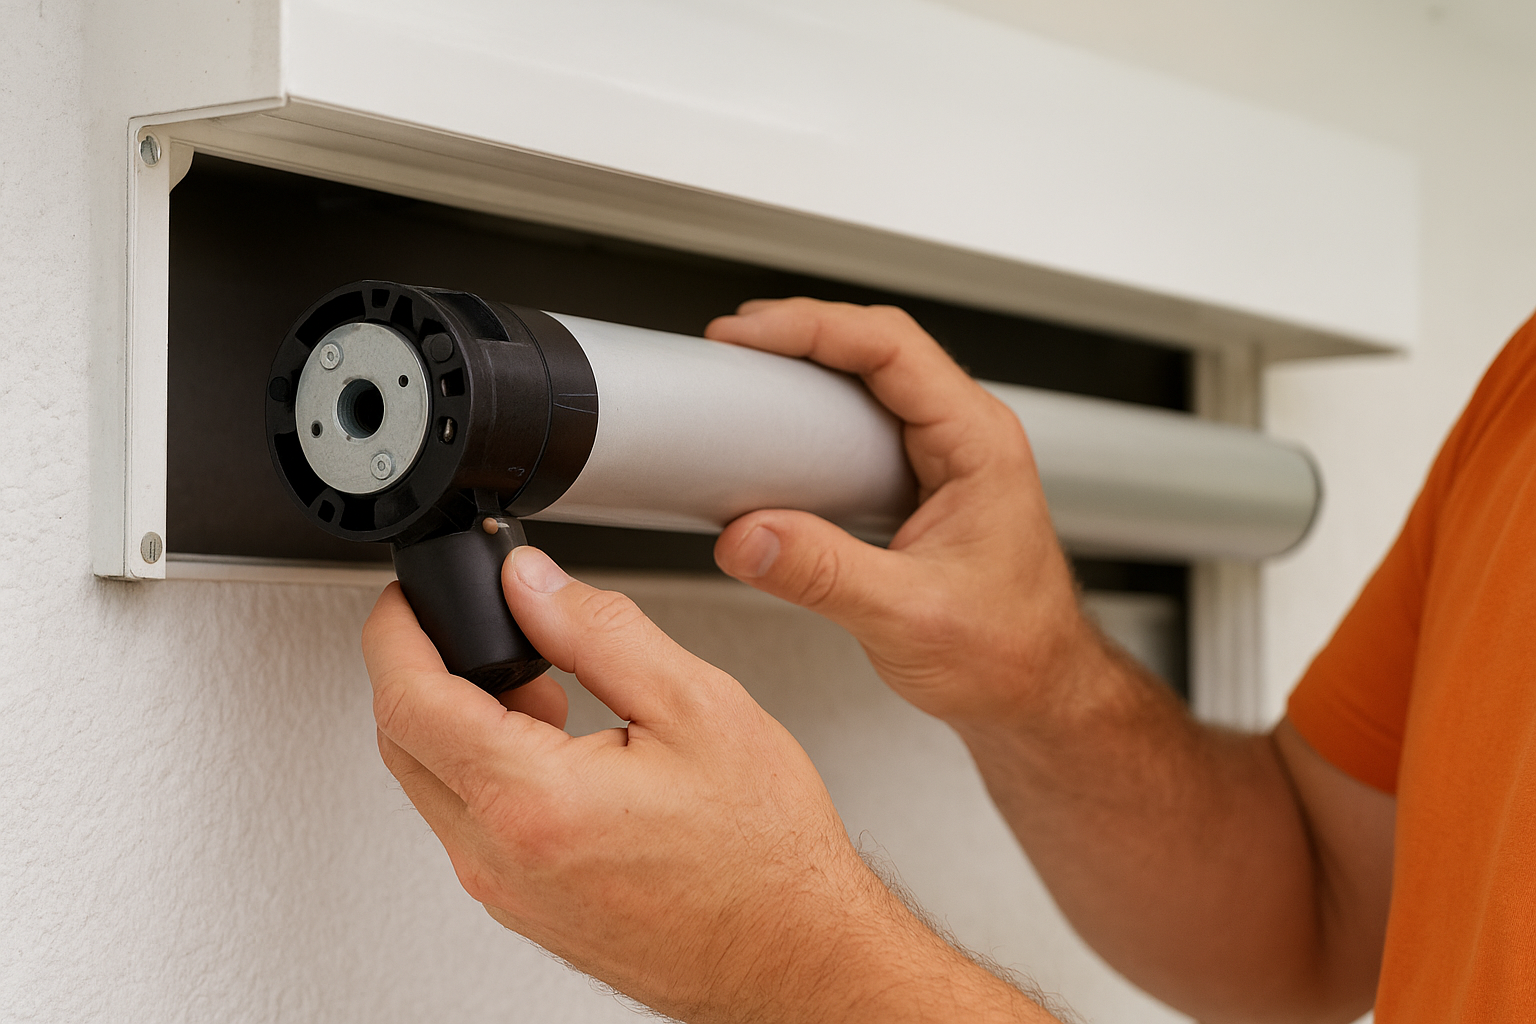
If the tube feels stiff or drags in one spot, check that the idle-end pin is fully seated and that the box brackets are level with each other.
Here’s a quick reference for motor fitting order:
- Fit crown adapter to drive end of tube
- Insert tubular motor until crown engages
- Fit idle-end pin and bracket
- Lift tube into shutter box brackets
- Check for free rotation before wiring
Connect the control wiring and mains power
Your motor will have a control wire (typically 5-core) running from the motor head down through or alongside the guide rail to the wall switch or smart controller. Route this wire neatly and fix it to the wall at regular intervals to keep it secure and out of sight. Connect the control wire to the switch terminals following the manufacturer’s wiring diagram supplied with your motor unit.
For the 240V mains connection, your licensed electrician must make the final hookup at both the motor and the switchboard. Hand this step over to them completely. Once they confirm the circuit is live and safe, you’re ready to move on to setting limits and testing.
Step 4. Set limits, test, and seal
With the motor wired and the curtain in place, your electric roller shutter installation is almost complete. This final step is where you fine-tune how the shutter behaves in operation, and getting your limits set correctly is critical to long-term motor health and smooth daily use.
Set the travel limits
Every tubular motor has adjustable limit switches that tell it exactly where to stop when opening and closing. Set them incorrectly, and the motor either strains against the guide rails at the bottom or over-rolls inside the box at the top. Both cause damage over time. Most motors have two internal limit adjustment screws, typically labelled UP and DOWN, accessible from the end cap once the unit is installed.
Follow this sequence to set your limits accurately:
- Power on the circuit with your electrician present
- Press the UP button and let the shutter open fully
- Adjust the UP limit screw until the curtain stops just inside the box
- Press the DOWN button and let the shutter close fully
- Adjust the DOWN limit screw until the curtain sits flush at the sill without compressing
- Run one full open-close cycle to confirm both limits hold
Write down the number of turns used for each adjustment screw so you can reset quickly if the limits drift after the motor beds in.
Run a full operational test
Once your limits are set, run at least three complete open-close cycles before you consider the installation done. Listen for any grinding, clicking, or uneven movement, as these sounds typically point to a binding rail, a misaligned tube, or a limit set too tight. Check that the curtain travels at consistent speed throughout its full range, with no jerking or pausing at any point.
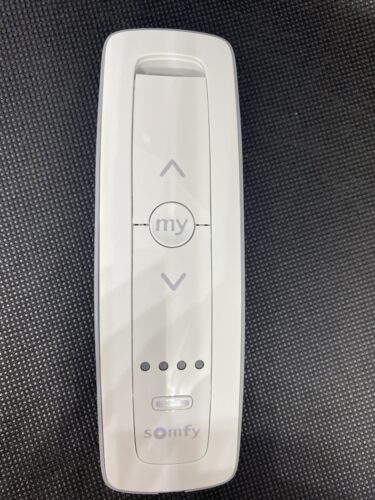
Also test your wall switch and any remote or smart controller during this phase to confirm all controls respond correctly and that each button triggers the intended direction of travel.
Seal and finish the installation
Once testing is complete, apply a bead of paintable exterior sealant around the shutter box and rail fixings to keep moisture out of the wall cavity. Use a colour-matched sealant where the box meets the render or brickwork, and press end caps firmly into place on the guide rails to prevent debris from entering the curtain channel.
Final checks and next steps
A completed electric roller shutter installation deserves one last round of checks before you call the job done. Confirm that all external fixings and sealant lines are clean and weatherproof, that every end cap is fully seated, and that no loose wiring is exposed along the guide rails. Run the shutter through a final open-close cycle the following day, after the motor has had time to settle, and verify that both limits still hold accurately.
If anything feels off during that final test, such as unusual noise, slow travel, or a limit that’s shifted, address it immediately rather than leaving it to worsen over time. Most early issues are minor adjustments rather than major problems.
For professional advice, a free measure, or a quote on supply and installation, get in touch with Classic Roller Shutters Adelaide. Our team handles everything from new installations to motor upgrades, across Adelaide and surrounding areas.