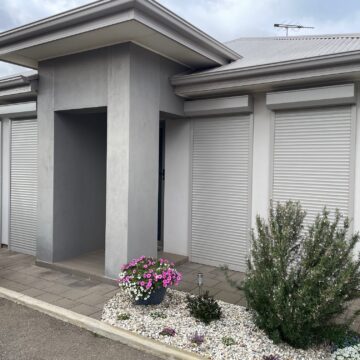
A residential roller shutter motor upgrade simply means swapping a tired tube motor for a new one or converting a manual strap/crank to powered operation. The result is smoother, quieter lifts at the press of a button—often with safer manual override and the choice of 240 V hard‑wired, battery or solar power. It can modernise your controls too, from a basic wall switch to handheld remotes or smart‑home integration, without replacing the entire shutter.
In this guide, you’ll learn when an upgrade makes sense, how to check your existing shutter for compatibility, and how to choose the right power source, torque and controls. We’ll break down Australian costs with Adelaide‑based examples, compare DIY and professional routes, cover safety and compliance (AS/NZS 3000 and COC), map out timelines, brands and maintenance, and flag common pitfalls—plus simple ways to save without cutting corners.
Signs it’s time to upgrade your roller shutter motor
Failing motors telegraph issues that get pricier if ignored. A residential roller shutter motor upgrade prevents jams, broken slats and repeat call‑outs.
- Loud grinding or clunking replaces formerly quiet running.
- Sluggish lift or stopping halfway under light load.
- Hums but the curtain doesn’t move (drive not engaging).
- Headbox hot to touch or a burning smell during/after use.
- Water inside the pelmet, repeated RCD trips, or age 8–15 years with frequent repairs.
Can your existing shutter be upgraded? Compatibility checklist
Before you buy a motor, confirm your shutter can take it. The good news: more than 90% of Australian domestic units with 40–60 mm octagonal axles can be retro‑fitted. Use this quick checklist to avoid surprises and unnecessary electrician call‑outs.
- Curtain condition: No bent slats, swollen foam or rusty end locks.
- Axle: Octagonal, hollow and free‑spinning; stays level in the side guides.
- Headbox space: 150 mm clears most 45 mm motors; 180 mm for 60 mm units.
- Power & compliance: Nearby feed and RCD protection; 240 V work by a licensed electrician. Consider battery/solar if access is poor.
- Axle size & adapters: Confirm 40 or 60 mm; matching crown/drive wheels are essential.
- Brackets & access: Sound side plates for the motor bracket and a safe, clear work area for installation.
Choose your power source: hard-wired, battery or solar
Your power choice sets the tone for cost, convenience and performance. Most Australian homes pick 240 V hard‑wired motors for everyday reliability, but battery and solar kits shine where cabling is tricky. Weigh access, shutter size and how often you’ll cycle them as you plan your residential roller shutter motor upgrade.
- Hard‑wired (240 V): Highest torque and unlimited daily cycles; ideal for large/wide shutters. Requires a licensed electrician and cabling, but minimal upkeep and low running cost (around $3/year of power).
- Battery (12/24 V): No new wiring; great for second‑storey or finished walls. A single charge typically lasts 9–12 months on a bedroom window; expect battery pack replacement every 3–5 years.
- Solar: Battery convenience without manual charging. Mount the panel facing north at roughly 30°; performance depends on sun exposure—best where mains access is limited.
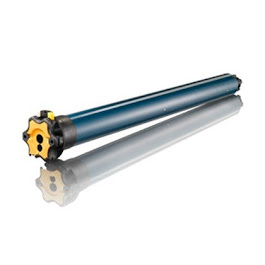
Size the motor correctly: torque, axle and shutter weight
Right‑sizing is the difference between a whisper‑quiet upgrade and a motor that strains or stalls. Start with the curtain’s weight and axle radius, then match the drive to your 40 mm or 60 mm octagonal tube with the correct crown and adaptor. Use this simple rule, then sanity‑check against width “quick picks”.
Torque (Nm) = (curtain weight kg × axle radius m) ÷ 0.8
- Quick picks: < 900 mm wide ≈ 10 Nm; 900–1800 mm ≈ 20 Nm; 1800–2400 mm or heavy extruded slats ≈ 40 Nm+.
- Match the axle: Confirm 40 mm or 60 mm and fit the matching crown/drive set to prevent slippage.
- Err wisely: Underspecifying shortens motor life (8–15 years typical); overspecifying wastes money without real benefit.
- Check compatibility: Ensure the motor physically fits the headbox and turns the axle freely before wiring.
Pick your controls: wall switch, remote or smart home
Controls shape how you’ll use the shutter every day, so keep them simple and dependable. For most residential roller shutter motor upgrades, start with a basic local control, then add convenience layers (remotes or a hub) if you want grouping, timers or hands‑free operation.
- Wall switch: Lowest cost, hard‑wired reliability, often included in motor kits.
- Remote control: Add a receiver (
$80 AUD) and a single/multi‑channel handset ($80–$120) for room‑by‑room or group control. - Smart home: A Wi‑Fi/Zigbee gateway ($250–$400) brings app scheduling and voice control; confirm compatibility with your chosen motor. Many homes opt for both switch + remote for backup.
What it costs in Australia (with Adelaide examples)
In Australia, a residential roller shutter motor upgrade typically lands between $650 and $900 fully installed, with Adelaide jobs commonly $650–$820 per shutter. A representative Adelaide breakdown comes to about $770 (parts + labour), and straight motor replacements can start from $550. Supply‑only is cheaper, but factor freight and any electrician time if you’re converting from manual.
- Supply‑only motors: generic $120–$220; Ozroll/JAI $230–$330; Somfy/ASA $340–$475; freight $20–$40.
- Typical Adelaide example: parts ≈ $380 + labour ≈ $390 = ~$770 fully installed.
- City ranges: Sydney $700–$900; Perth $680–$860.
- Manual‑to‑wired cabling: allow an extra $120–$180 labour.
- Control add‑ons: remote/receiver ~$80–$120; smart gateway $250–$400.
DIY or professional installation? Costs, safety and warranties
Choosing between DIY and a professional install for your residential roller shutter motor upgrade comes down to true cost after tools, safety, and warranty. Supply‑only parts can be roughly $480, but you’ll still need a licensed electrician for any 240 V work ($150–$250), which narrows the gap to a $650–$820 turnkey Adelaide install that typically includes compliance and callbacks.
- DIY (best for battery/solar): Lower upfront and flexible timing. But no fixed 240 V wiring unless a sparkie signs off, higher risk of mistakes, fall/pinch hazards, and many brands halve or void warranties if not fitted by an authorised technician.
- Professional install: Licensed wiring with a compliance certificate, correct torque sizing and setup, faster turnaround (about 45–90 minutes per shutter), and stronger after‑sales support—often 5–7 years parts plus around 12 months labour. Higher upfront, but fewer surprises later.
Safety and compliance in South Australia (AS/NZS 3000, COC)
In South Australia, any fixed 240 V work on a residential roller shutter motor upgrade must be completed by a licensed electrician under AS/NZS 3000 (the Wiring Rules). Expect your installer to connect the motor to an RCD‑protected circuit and issue a Certificate of Compliance (COC). DIY mains cabling risks fines, voided insurance and poor reliability. Battery and solar kits avoid hard‑wiring, but still need safe cable routing, strain relief and weather protection.
- Licensed wiring & COC: Electrician connects/terminates and provides a COC at handover.
- Isolation & protection: RCD‑protected circuit, correct earthing and an accessible isolator or plug base.
- Cable routing: Conduit where cables exit masonry, grommets, proper bend radius and strain relief.
- Testing documented: Insulation resistance, polarity and RCD trip times recorded; compliance label in the pelmet.
- Weatherproofing: Sealed penetrations and appropriate IP‑rated components where exposed.
- User pack: COC, operation instructions and warranty terms retained with your receipts.
Plan your project: timelines, access and quoting
A smooth residential roller shutter motor upgrade starts with clear info and tidy access. Snap photos of the headbox, axle and switch location, note axle size (40/60 mm), choose power/control preferences, and group shutters where possible to trim labour. Then request itemised, like‑for‑like quotes.
- Timelines: Allow 45–90 minutes per shutter on the day; complex access can add time.
- Access prep: Clear 1–2 m around windows; confirm safe ladder access and RCD‑protected circuit.
- Cost variables: Access/cabling/wall repairs can add $0–$250; manual‑to‑wired cabling $120–$180 extra.
- Quoting must‑haves: Brand/model, torque (Nm), parts/labour warranty, COC, call‑out/return fees, multi‑shutter discount (10–20%), travel loading beyond 30 km (~$1.20/km), and control add‑ons priced.
What to expect on installation day
Expect a punctual arrival, a quick walk‑through and safety check, then about 45–90 minutes per shutter. The installer will isolate power, open the pelmet, remove the old winder, fit the bracket and slide in the motor with the correct crown/adaptor. Cables are run or a battery/solar pack connected; a licensed electrician completes any 240 V wiring to an RCD‑protected circuit. Limits are programmed, operation tested (including obstacle response), penetrations sealed, the pelmet refitted, and you’ll get a demo, remotes, warranty info and a COC for your residential roller shutter motor upgrade. Allow extra time for difficult cabling or high access.
Brands and quality considerations in Australia
Brand choice sets expectations for noise, reliability, spares and smart control. For a residential roller shutter motor upgrade, prioritize correct torque, matching crown/adaptors, local after‑sales support and a solid parts warranty (often 5–7 years, shorter if self‑installed). Premium motors tend to be quieter and integrate cleanly with remotes/hubs, while mid‑range units win on value and local parts.
- Budget: Generic imports ~$120–$220; fit most older barrels but can hum.
- Mid‑range: Ozroll/JAI ~$230–$330; strong availability of local spares.
- Premium: Somfy/ASA ~$340–$475; low‑noise, slick controls/app support.
Maintenance, lifespan and running costs
Treat your upgraded shutter like a small appliance: light, regular care keeps it quiet and extends life. Quality tube motors typically last 8–15 years, with 5–7‑year parts warranties common (often shorter if self‑installed). Hard‑wired units are cheap to run—around $3 a year in electricity at typical usage—while battery or solar options trade wiring for periodic battery upkeep. A little preventive maintenance protects your investment and avoids nuisance call‑outs.
- Routine care (6‑monthly): Lightly clean slats and spray silicone into guides to reduce drag and noise.
- Exercise it: Run shutters fully up/down weekly to keep limits and gears healthy.
- Pro service: Book a check every ~3 years; re‑programming or lubrication visits typically cost $120–$180.
- Battery upkeep: Expect pack replacement every 3–5 years ($60–$90) on 12/24 V systems.
- Weatherproofing: Keep pelmet seals intact and cable penetrations silicone to prevent water ingress that shortens motor life.
Common issues after upgrading and how to avoid them
Most upgrades run smoothly, but a few issues cause most callbacks. Prevent them by matching crowns/adaptors, sealing penetrations, tidy cabling and precise limit programming during your residential roller shutter motor upgrade.
- Hums/no lift — re‑seat drive wheel; tighten axle screw.
- Stops mid‑travel — re‑teach limits; clear guide debris.
- Weak remote — new coin cell; move receiver from foil.
- RCD trips/hot box — check for water; electrician test and reseal.
- Crush at ends — back off limits 5–10 mm; test obstacle response.
Budget tips to save without cutting corners
Smart planning can trim hundreds from a residential roller shutter motor upgrade without denting reliability or warranty. Focus on labour, timing and scope, keep specs realistic, and make the site easy to work in—your quote will reflect it.
- Bundle shutters: Group 3+ to save roughly 10–20% on labour.
- Time it right: Avoid after‑hours (often +25%); shop EOFY/Boxing Day.
- Go factory‑direct: Classic often trims wholesaler mark‑ups.
- Keep controls simple: Start with a wall switch; add remote/hub later.
- Prep for quoting: Share photos, axle size (40/60 mm) and access notes to avoid $0–$250 “extras”.
- Watch add‑ons: Confirm travel loading beyond 30 km (~$1.20/km) and ask about old‑motor trade‑in/recycling.
Quick answers to common questions
Pressed for time? Here are straight answers to the questions we’re asked most when planning a residential roller shutter motor upgrade—covering cost, timing, compliance, lifespan and controls. Use this as a quick sense‑check before you lock in quotes or choose parts.
- Cost & time: Adelaide $650–$820 installed; allow 45–90 minutes per shutter.
- Electrician: 240 V requires a licensed sparkie and COC; battery/solar avoids mains wiring.
- Lifespan/warranty: motors 8–15 years; parts 5–7 years (shorter DIY).
- Controls & running: remote $80–$120; hub $250–$400; mains ~$3/year.
Conclusion
A smooth motor upgrade comes from good planning: confirm compatibility, size the torque properly, choose the right power source and controls, and insist on licensed wiring with a COC. With realistic budgets and tidy access, you’ll get quieter, safer shutters that last longer and cost less to own.
Ready for clear pricing and fast installation? Book a free, factory‑direct measure and quote with Classic Roller Shutters Adelaide. Our technicians size, supply, install and certify in one visit—backed by local parts and service. Start here: Classic Roller Shutters Adelaide.