Picture this: you tap a button and—almost instantly—your windows transform, shutting out the glare, muting the street noise, and adding a layer of security to your home. Electric roller shutters make this daily convenience possible, blending modern technology with practical benefits that go far beyond aesthetics. But have you ever paused to wonder what’s happening behind the scenes? Understanding how electric roller shutters work isn’t just a matter of curiosity—it’s a smart move for anyone keen on DIY fixes, planning an upgrade, or simply wanting to make informed choices for their property. Need help with this, contact us on 83692266
Electric roller shutters have become the go-to choice for Adelaide homeowners and businesses, offering an effortless way to control light, privacy, insulation, and security. Their appeal lies in more than just their sleek appearance or remote-controlled operation; it’s about the peace of mind and efficiency they bring to everyday living. Knowing what powers these shutters, and how each component functions, empowers you to troubleshoot minor issues, maintain your investment, and confidently select the right system for your needs.
In this comprehensive guide, you’ll discover exactly how electric roller shutters operate—from the anatomy of their key components and the mechanics of their motors, to the variety of control options and built-in safety features. We’ll walk through installation requirements, energy efficiency advantages, troubleshooting tips, and essential care routines. By the end, you’ll be equipped to choose the best solution for your property, whether you’re upgrading from manual shutters or starting fresh. Let’s step inside the world of electric roller shutters and see what makes them tick.
What Are Electric Roller Shutters? Fundamental Definition and Key Differences
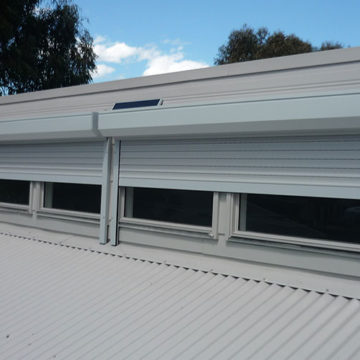
Electric roller shutters are motorised window coverings made up of interlocking slats that coil neatly into a discreet headbox above your opening. At their core, they’re a robust barrier—much like a solid curtain—that can be raised or lowered at the touch of a button. Guided by side rails, the curtain forms a tight seal when closed, delivering instant privacy, security and climate control without any visible hardware.
In contrast, manual roller shutters depend on a winder handle, strap or crank—methods that demand physical effort and can be cumbersome on large or hard-to-reach windows. Electric operation removes that barrier: even wide patio doors or second-storey windows become effortlessly accessible. The tubular motor, housed inside the roller tube, does all the work, so there’s no dangling cord or bulky handle to spoil your view.
Core advantages of choosing electric over manual shutters include:
- One-touch control: Operate a single shutter—or your entire home’s shutters—in one command.
- Smart-home compatibility: Integrate with systems like Google Home or Alexa for voice-activated operation and scheduling.
- Sleek aesthetic: A clean exterior finish with no manual hardware on display.
- Enhanced functionality: Timer programmes and light-sensor options boost security, comfort and energy savings.
Explore our full range of electric roller shutters and discover how they can effortlessly transform your home’s security, insulation and style: Classic Roller Shutters – Roller Shutters.
Core Components of Electric Roller Shutters: Anatomy of the System
Every electric roller shutter is more than a simple curtain of aluminium—it’s a finely tuned assembly of parts that work in harmony to deliver security, insulation and ease of use. From the slats that form the shutter curtain to the hidden motor winding everything into place, each component plays a distinct role in performance and longevity. Knowing the anatomy of your shutters helps you maintain them and select the right options for your home.
Roller Curtain Slats
The curtain slats are the visible face of your shutter, formed by interlocking aluminium profiles.
- Solid slats: Provide the highest level of security and complete blackout when closed.
- Perforated slats: Feature small holes or slots that let in filtered light and air, ideal for shopfronts or shaded patios.
- Foam-filled slats: Injected with insulating foam to boost thermal performance and dampen external noise.
Choice of slat profile affects weight, insulation value and visual appeal. Foam-filled options, for instance, can shave several degrees off interior temperatures, while perforated designs preserve sight lines without compromising on safety.
Roller Tube and Barrel Assembly
At the heart of the system lies the roller tube—a sturdy steel or aluminium barrel around which the slats coil.
- Material: Galvanised steel offers exceptional strength for large spans, whereas lightweight aluminium simplifies installation on smaller windows.
- Diameter: Larger tubes reduce bending stress and extend motor life, especially on wide openings.
- Assembly: The tube houses both the slat curtain and the tubular motor, keeping everything compact and protected.
A precision-engineered barrel ensures smooth, consistent rolling action. When slats spiral neatly around it, they avoid jamming or uneven wear.
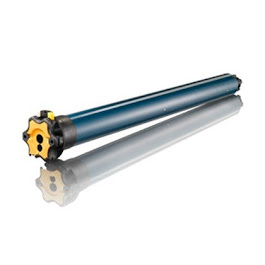
Tubular Electric Motor
A purpose-designed tubular motor sits inside the roller tube, driving the entire curtain up and down.
- AC vs DC: 240 V AC motors connect directly to mains power for split-second response, while low-voltage DC units offer battery-backup options.
- Torque ratings: Measured in newton-metres (Nm), torque must match the total weight of slats plus wind load allowances.
- Lifespan: Quality motors are rated for tens of thousands of cycles—translating to decades of regular use.
Mounting the motor inside the tube not only conceals wiring and moving parts, it also reduces noise by absorbing vibration.
Guide Rails
Guide rails (or side tracks) keep the shutter curtain aligned and prevent wind-driven rattling.
- Construction: Extruded aluminium or galvanised steel channels withstand impacts and harsh weather.
- Sealing brushes: Soft bristles along each edge block dust and insects, while light-blocking brushes eliminate gaps.
- Installation: Precision-set into the wall or frame, rails must be perfectly vertical to avoid binding.
Well-fitted guides deliver silky-smooth movement and extend the life of your slats by preventing scraping. If you run into issues like a troubleshooting a noisy guide rail, our detailed guide can help you diagnose and fix common problems.
Bottom Bar
The bottom bar closes the curtain’s loop, adding rigidity and locking capability.
- Shape: Often T- or L-shaped for maximum strength and an even seal against the sill.
- Locking: Integrated shoot-bolt or slam-lock options secure the shutter in place once lowered.
- Weather seal: A rubber gasket beneath the bar keeps out draughts, rain and small debris.
This component bears the brunt of wind pressure when the shutter is closed and must be both robust and precisely engineered.
Canopy and Bracketry
Housed in a neat headbox or canopy above the window, the roller tube, motor and cheek plates stay hidden from view.
- Canopy: Powder-coated steel or aluminium box that matches your façade.
- Accessibility: Removable panels allow for easy motor servicing and slat replacement.
A well-designed canopy delivers a clean exterior look while simplifying future maintenance work.
Safety Brake and Sensors
Built-in safety features protect people, pets and property from runaway shutters on some models of motors.
- Centrifugal brake: Automatically engages if the motor spins too fast, preventing uncontrolled descent.
- Thermal fuse: Shuts down the motor if it overheats, guarding against burnout and fire risk.
- Obstacle sensors: Electronic current or infrared photocells detect blockages, reversing the shutter to avoid damage.
These mechanisms are critical in Australia’s climate and ensure that your system is both reliable and compliant with safety standards.
The Motor Mechanism Explained: How the Tubular Motor Drives Your Shutters
Behind the smooth, silent rise and fall of your electric roller shutters is a specialised tubular motor, an ingenious blend of compact design and robust performance. Nestled within the roller tube itself, this motor converts electrical energy into the twisting action that coils and uncoils the slatted curtain. Understanding its placement, electrical requirements and performance metrics helps you appreciate the engineering at work—and makes troubleshooting or upgrading far less daunting.
Motor Placement within the Barrel
The tubular motor sits coaxially inside the roller tube, hidden from view and protected by the headbox canopy. By integrating the motor into the barrel assembly, there’s no unsightly protrusion, and noise is dampened by the surrounding steel or aluminium cylinder.
When the slats roll up, they wind neatly around the roller tube, which in turn turns the motor shaft. This concentric arrangement minimises vibration and keeps the entire system balanced—even on wider windows where torque demands are higher. Removable end caps on the headbox allow an installer to access the motor for maintenance or manual override adjustments without dismantling the entire shutter.
Electrical Power and Wiring
Electric roller shutter motors typically run on standard Australian mains supply (240 V AC), hardwired back to a dedicated circuit. A weatherproof cable routes through the wall or soffit into the canopy, then connects to the motor terminals.
All wiring must comply with AS/NZS 3000: wiring rules, ensuring correct earthing and circuit protection. In practice, a licensed electrician will install a switch or controller nearby—often inside a cupboard or garage—fed from a switched fuse or circuit breaker. Proper cable strain relief prevents tugging on terminal connections, and any exposed cable ends are sealed to stop dust or moisture ingress.
Torque, Speed and Force Calculations
Choosing the right motor boils down to matching its torque rating to the weight and width of your shutter curtain, plus a safety margin for wind loads. Torque (τ) is the twisting force the motor generates, calculated as:
τ = F × r
where F is the force (in newtons) required to lift the slats and r is the radius (in metres) of the roller tube. For example, a 2 m × 1.5 m window using foam-filled slats might weigh 15 kg (≈ 147 N). With a drum radius of 0.075 m, the minimum torque needed is:
τ = 147 N × 0.075 m = 11 Nm
Selecting a 15 Nm or 20 Nm motor ensures smooth operation, even in breezy conditions. Speed is measured in revolutions per minute (RPM), typically calibrated so that a standard-size shutter opens or closes in 10–15 seconds. Motors are also rated for cycle life—often 10,000 to 30,000 full raises and lowers—so quality units deliver decades of reliable use.
Control Circuit Integration
The motor’s control circuit links to wall-mounted switches, remotes or smart-home hubs. A basic setup uses a single-pole switch: one press winds the motor up, another winds it down. For multi-point control, a double-pole switch isolates live and neutral feeds.
More advanced systems include radio-frequency (RF) receivers tucked inside the headbox, paired with handheld remotes or smartphone modules. Integration with platforms like Google Home or Alexa requires a Wi-Fi bridge, which communicates via the motor’s existing control terminals. In all cases, limit switches inside the motor assembly stop the shutter precisely at the top and bottom, preventing overrun and ensuring consistent travel distances.
By grasping how the tubular motor is sited, powered and specified, you’ll feel confident in both routine maintenance and informed upgrades. Next, we’ll explore the variety of control and customisation options available for your electric shutters.
Control and Customisation Options: Switches, Remotes and Colour Choices
Electric roller shutters are as adaptable inside the home as they are discreet outside. Beyond the hidden motor and neat headbox, you can choose from a variety of control methods and tailor the finish to suit your décor. Whether you prefer a traditional wall switch, the convenience of a remote or even voice control, there’s an option to match your lifestyle—plus a palette of colours and trims to make your shutters look part of the architecture.
Wall Switch and Wired Controllers
The most straightforward way to operate your electric shutters is via a wall-mounted switch. Typically installed near entry points—by the door or inside a cupboard—these hardwired controllers come in single-pole or double-pole configurations:
- Single-pole switches let you raise or lower one shutter from that location.
- Double-pole units can control two separate shutters or isolate both live and neutral feeds, meeting strict electrical standards.
A licensed electrician will connect the switch back to a dedicated 240 V AC circuit, fitting it neatly into a standard wall box. With no batteries to worry about, wired controllers deliver instant response and reliable performance.
Remote Controls and Smart Home Integration
For ultimate flexibility, RF remotes are a popular upgrade. Handsets can manage individual shutters, zones of shutters or your entire home’s inventory from up to 50 metres away. Multi-channel models let you assign each button to a different window, while mini-remotes suit keyrings or bedside tables.
Pairing your shutters with a smart-home hub adds another layer of convenience:
- Use a smartphone app to open or close shutters on a schedule, even when you’re away.
- Sync with Tahoma, Google Home or Amazon Alexa for voice commands like “close the living-room shutter.”
- Link to light sensors or home-automation scenes—for example, shutters can drop automatically when the afternoon sun hits your lounge.
Adding an RF receiver or Wi-Fi bridge is a simple, non-invasive upgrade that slots into the canopy behind the headbox.
Manual Override for Emergencies
Despite all the hi-tech bells and whistles, power failures or motor faults can still happen. That’s why some electric system includes a manual-override option:
- A small crank point or “override eyelet” on the side of the headbox lets you attach a hand crank.
- Turning the crank by hand raises or lowers the curtain, guaranteeing access even if the power’s out.
- Some motors also offer key-lock overrides, which combine security and manual operation in one sleek fitting.
Your installer will show you exactly where the override sits and how to engage it, ensuring you’re never left locked in or out.
Colour and Finish Options
Your shutters should complement your home’s style, not stick out like a sore thumb. That’s why Classic Roller Shutters offers a range of standard and custom powder-coat finishes that blend seamlessly with brickwork, render or cladding. From classic neutrals to bold feature colours, you can pick trims and canopy panels to match or contrast your façade.
Explore our full controls and colour options to find the perfect shade and hardware finish for your next project.
Safety Features and Emergency Manual Override
Electric roller shutters are designed not only for convenience but also to protect people and property. From built-in braking systems that prevent a runaway curtain to emergency manual overrides that keep you in control during power failures, these safety features ensure your shutters operate reliably and securely in any situation. But not every company use high quality motors.
Automatic Braking Systems
To guard against uncontrolled descent, some electric shutters include two key braking mechanisms:
- Centrifugal brake: If the shutter begins to spin too quickly—perhaps due to a slipping motor belt or excessive weight—the centrifugal brake automatically engages, halting the roller in its tracks.
- Thermal cut-out: Should the motor’s temperature rise beyond safe limits (for example, after repeated operation or motor strain), a thermal fuse interrupts power to the motor windings. Once the motor cools, the circuit resets, preventing overheating and reducing fire risk.
These safeguards work silently behind the scenes, ensuring that, even under load or in high-cycle applications, your shutter won’t free-fall or sustain motor damage. Regular servicing keeps these components in top form, so any signs of slipping or overheating should prompt a call to your service provider.
Obstruction Sensors and Reversing Mechanisms
Some Modern electric shutters also include sensors that detect blockages in the shutter’s path:
- Current-sensing: The motor monitors the electrical current draw as the curtain moves. A sudden spike—caused by jammed slats or debris—triggers an immediate stop and reversal.
- Photocell or infrared sensors (optional): Installed within the headbox or along the guide rails, these light-beam detectors spot objects or people in the way, automatically reversing the shutter to prevent injury or damage.
By integrating obstruction detection, these systems meet strict Australian safety standards and reduce the risk of accidents. If your shutters repeatedly reverse or stop mid-travel, check for small objects in the guides or worn bearings before scheduling professional maintenance.
Manual Override Procedures
Power interruptions or motor faults needn’t leave you locked in or out. Some electric roller shutter motors offers a manual-override option—here’s how to use it:
- Locate the override point: Open the access panel on the canopy (headbox) to reveal a small eyelet or crank socket, usually on the motor end.
- Insert the hand crank or override key: Fit the supplied crank handle or hex key into the eyelet. It should click into place securely.
- Turn to operate:
- Clockwise to raise the shutter.
- Anti-clockwise to lower it.
Apply steady, even pressure—avoid jerky movements to prevent slat misalignment.
- Stow the crank: Once you’ve moved the shutter to your desired position, remove the crank and replace the canopy panel.
- Reset the motor: After power is restored, operate the wall switch or remote once to re-engage the motor drive. The built-in limit switches will recalibrate top and bottom positions.
Familiarizing yourself with this process ensures you’ll always have access to and from your home, even during a blackout or motor service. If you’re unsure about any step, your installer can demonstrate the override during your next service call.
Together, these safety systems and emergency overrides deliver peace of mind, keeping your electric roller shutters both secure and dependable—no matter what life throws their way.
Energy Efficiency and Passive Design Benefits: Shading and Insulation
Australia’s harsh sun and fluctuating temperatures make thoughtful shading essential for comfortable, cost-effective living. Electric roller shutters serve as a key element in passive design, helping you modulate heat gain, retain warmth and even quieten external noise—all while reducing reliance on mechanical heating and cooling. According to Your Home, “Appropriate shading can block up to 90% of heat from direct sunlight,” underscoring the impact that well-designed window coverings can have on energy consumption.
Controlling Solar Heat Gain
In summer, lowering your roller shutters before the afternoon sun hits can dramatically cut solar heat entering your home. When fully closed, the slatted curtain reflects and absorbs solar radiation, preventing it from warming internal spaces. By doing so, you ease the workload on air-conditioning systems—often reducing peak cooling loads by up to 30%—and lower energy bills. For dynamic performance, pair shutters with light sensors that trigger automatic closure as sunlight intensifies.
Thermal Insulation in Winter
As temperatures drop, closed roller shutters form an insulating layer of trapped air between the slats and your glass windows. This air cushion acts like a thermal blanket, significantly reducing conductive heat loss overnight and helping maintain a stable indoor climate. Foam-filled slats boost this effect further, offering up to R-values of 0.7 m²·K/W in some profiles. The result? A cozier home with less demand on heating systems and a smaller carbon footprint.
Noise Reduction and Weather Protection
Beyond temperature control, roller shutters deliver excellent acoustic benefits, dampening street noise and household disturbances. The combination of dense aluminium slats, guide-rail seals and foam infill can cut up to 40 dB of external sound—ideal for homes near busy roads or flight paths. Moreover, when fully lowered, shutters shield windows from wind-driven rain, hail or flying debris during storms, safeguarding glass panes and reducing drafts. For deeper insight into passive shading strategies and best practice designs, explore Your Home’s guide: https://www.yourhome.gov.au/passive-design/shading
By integrating electric roller shutters into your passive design approach, you’ll enjoy year-round comfort, quieter rooms and lower energy costs—all without compromising on style or convenience.
Installation Requirements and Electrical Safety Standards
Installing electric roller shutters isn’t simply a matter of mounting a headbox and flicking a switch. It involves careful coordination of structural preparation, electrical work and strict adherence to safety regulations. Ensuring a compliant installation not only protects your home and family but also guarantees your shutters perform reliably for decades. Below are the key requirements and best practices you need to know.
Licensing and Professional Installation Procedures
Electric roller shutters must be wired into your home’s 240 V AC supply, which means engaging a licensed electrician is non-negotiable. Under Australian law, any fixed wiring, switch installation or modification to existing circuits falls squarely within the scope of a qualified tradesperson. When you book your installation:
- Confirm your electrician holds a current A-grade electrical licence and is covered by suitable insurance.
- Ask for evidence of compliance with AS/NZS 3000 (the Wiring Rules), which govern everything from conductor sizing to circuit protection.
- Ensure the installer runs a dedicated circuit back to your switchboard, complete with an appropriately rated circuit breaker or fused switch-disconnector.
- Request a certificate of compliance on completion—this legal document verifies that all work meets national safety and quality standards.
Lockout/Tagout and De-Energising Procedures
Working on live electrical gear is inherently risky. To protect the electrician—and your home—the circuit powering the roller shutter motor must be isolated and locked out before any wiring begins. SafeWork SA’s guidelines on working near electrical installations stress the importance of a formal lockout/tagout process:
- De-energise the relevant circuit at the switchboard and attach a lock and tag to prevent accidental re-energisation.
- Complete a Safe Work Method Statement (SWMS) that details the steps taken to isolate the shutter circuit, including visual inspections of cables and terminations.
- Verify zero voltage at the motor terminals before handling wiring.
- Only after lockout/tagout is confirmed should the installer open the headbox canopy to access the motor and control wiring.
For full safety protocols, refer to SafeWork SA’s recommendations: https://safework.sa.gov.au/workplaces/electrical/working-on-or-near-electrical-installations-or-services
Structural and Site Preparation
Before any electrical work starts, the shutter opening must be measured and prepared to ensure a snug fit and long-term stability. Good site preparation involves:
- Precise measurement of the opening—height, width and depth—to confirm the chosen headbox and guide-rail dimensions will fit without on-site cutting.
- Checking lintel strength and wall substrate: the canopy brackets must anchor into solid brick, concrete or compliant steel framing. Weak or hollow substrates can lead to sagging and misalignment over time.
- Verifying adequate clearance above the opening for the headbox (typically 250 – 350 mm) and side-rail channels (around 100 mm each side).
- Ensuring access for maintenance: installers need room to remove canopy panels and service the motor without dismantling drywall or external finishes.
By combining professional electrical installation, rigorous lockout/tagout procedures and thorough structural prep, your electric roller shutters will meet all legal requirements and deliver the smooth, safe operation you expect.
Upgrading Manual Shutters to Electric Operation: Process, Benefits and Timeline
If you already have manual roller shutters in place, converting them to electric operation unlocks a host of advantages—from effortless one-touch control and smarter home integration to better security and energy savings. Rather than replacing your entire system, a retrofit lets you retain the existing slats and guides, while adding the convenience and reliability of a tubular motor. Below, we outline how our upgrade service works, the benefits you can expect and how quickly you can be up and running.
Assessment and Quotation
Our process begins with a no-obligation assessment. This can easily be done over the phone with a few simple questions. our technician will:
- Examine your current shutter condition—including slat wear, guide-rail alignment and headbox clearance
- Measure the opening to determine the correct motor torque rating and tube diameter
- Discuss control options, from simple wall switches to smartphone-linked remotes
Once we’ve gathered the details, you’ll receive a transparent, itemised quotation with installation costs, motor specifications.
Conversion Steps by Licensed Electricians
All retrofits are completed by our fully licensed electricians to ensure compliance with Australian electrical standards. The basic steps are:
- Remove the existing winder or crank assembly and disconnect any manual straps.
- Install the tubular motor inside the roller tube and secure it to the headbox bracketry.
- Run 240 V AC wiring from the motor to a new or existing wall-mounted switch, housed in a standard wall box.
- Set the upper and lower limit switches on the motor for precise, repeatable stops.
- Test operation, calibrate speed and confirm emergency manual-override functionality.
By leveraging your current slats and guides, we keep waste down and turnaround times short.
Optional Remote Control Upgrades
If you’d like to control multiple shutters at once or integrate them into a home-automation system, we can fit an RF receiver or Wi-Fi bridge during the same visit. Options include:
- Handheld remotes with multi-channel functionality
- Smartphone apps for on-the-go operation and scheduling
- Voice-control modules compatible with Google Home or Alexa
Pairing is quick—your new remote or hub will be ready to use by the time we pack up our tools.
Project Timeline and Warranty
Typical retrofit installations take just one to two business days, depending on the number of shutters and site complexity. From your initial enquiry to final handover, most customers enjoy electric operation within two days. Every upgrade carries our standard 5-year warranty on the motor and a 1year guarantee on our workmanship. That means you’ll have peace of mind knowing your shutters are backed by both local expertise and reliable aftercare.
Ready to leave manual cranks behind? Start with a free assessment today and discover how easily electric operation can transform your shutters: https://classicrollershutters.com.au/change-a-roller-shutter-to-an-electric-motor/
Common Troubleshooting Scenarios and Fixes
Even the most reliable electric roller shutters can encounter minor glitches over time. Many issues stem from simple causes like power interruptions, debris in the tracks or a tripped thermal fuse. Before booking a service call, run through these checks—you might resolve the problem in minutes and avoid unnecessary repair fees.
Shutter Not Rising or Falling
When your shutter stays stubbornly still, first confirm there’s power to the motor. Check that the circuit breaker hasn’t tripped and the wall switch or remote batteries are functioning. Next, inspect the guide rails for dirt, leaves or cobwebs; a gentle brush or hose-down can often clear obstructions. Finally, press the switch or remote and listen for any hum or click. Total silence usually points to an electrical fault—loose wiring or a defective motor—while a struggling motor suggests mechanical binding.
Motor Stopping Mid-Travel
If the shutter cuts out halfway through its cycle, the thermal cut-out may have activated to protect an overworked motor. Allow the system to cool for about 15 minutes, then try again. Should it still halt prematurely, look for misaligned or bent slats catching in the guides—this extra friction can trigger the safety device. Repeated mid-travel stops put strain on the motor, so if realignment doesn’t help, it’s best to seek professional inspection.
Unusual Noises During Operation
Grinding, rattling or creaking sounds indicate parts under stress. Start by cleaning and lubricating the guide rails with a dry silicone spray—avoid oil-based greases that attract dust. Inspect the bottom bar and slat joints for wear or looseness, tightening any screws or bracketry you find. Corroded bearings or damaged slats may need replacing; persistent noise after basic maintenance usually calls for expert attention.
Slow or Uneven Movement
When your shutter moves sluggishly or drifts off-level, check the guide rails for tight sealing brushes or trapped debris causing drag. If the tracks are clear but the problem remains, assess whether the motor’s torque setting matches the weight of your slats—foam-filled profiles are heavier and demand more force. Adjusting the torque or upgrading to a higher-capacity motor can restore a smooth, uniform travel. For complex recalibrations or component replacements, our dedicated repair team is ready to help: https://classicrollershutters.com.au/roller-shutter-repairs/.
Maintenance and Care Best Practices
Regular upkeep ensures your electric roller shutters continue to operate smoothly and maintain their aesthetic appeal. By adopting a routine that covers cleaning, lubrication and visual checks, you’ll nip most small issues in the bud and prolong the life of your system. Below are the key steps to keep your shutters in top condition—and pointers on when to call in the professionals.
Regular Cleaning and Debris Removal
Dust, cobwebs and leaf litter can build up in guide rails and between slats, leading to noise or jamming. At least once every few months, give your shutters a quick clean:
- Use a soft-bristled brush or a gentle hose-down to dislodge loose dirt from tracks and slats.
- Wipe slat surfaces with a damp cloth and mild detergent to remove stubborn grime.
- Inspect the headbox canopy vents for debris that might restrict airflow and cause the motor to overheat.
A clear system not only looks better but also reduces friction and motor strain, keeping every cycle smooth and silent.
Lubrication of Moving Parts
Even the most precision-engineered shutters benefit from occasional lubrication. Aim for a light service once or twice a year:
- Spray a dry silicone lubricant along the interior of the guide rails—this avoids sticky residues that attract dust.
- Apply a small amount of light machine oil or shutter-specific lubricant to pivot points, bearings and the bottom bar hinge.
- Steer clear of heavy greases or aerosol oils, which can trap grit and accelerate wear.
After applying lubricant, cycle the shutter a few times to distribute it evenly, then wipe away any excess.
Inspecting Seals, Slats and Guides
A visual check every six months (or after severe weather) can catch minor faults before they escalate:
- Scan slats for bends, cracks or chips; damaged slats can snag against the guides.
- Examine rubber seals at the bottom bar and along the guides—hardened or torn seals reduce insulation and let in drafts.
- Ensure guide rails are firmly anchored and free of warping; tighten loose brackets to prevent rattling.
- Look over canopy bracketry and cheek plates for corrosion or movement.
Keeping a simple checklist helps you track any changes and tackle them promptly.
When to Call for Professional Servicing
Some issues are best left to trained technicians. Schedule expert servicing if you notice:
- Persistent grinding, creaking or rattling noises after routine cleaning and lubrication.
- Erratic, slow or stalled movement mid-travel, which may point to motor wear or electrical faults.
- Unresponsive wall switches, remote-control pairing failures or other control malfunctions.
- Frequent thermal cut-outs or signs of overheating, indicating the motor is under undue stress.
Professional servicing ensures torque settings are recalibrated, worn parts replaced, and your shutters continue delivering reliable security, insulation and convenience for years to come.
Comparing Electric Roller Shutters with Other Window Coverings
Electric roller shutters deliver unique advantages in security, insulation and automation—but they’re not the only option for taming light and enhancing comfort. Below, we compare them with alternative window coverings so you can match performance to your priorities.
Electric roller shutters excel in high-security, weather-resistant applications and offer seamless one-touch control. Yet other coverings bring their own strengths in décor, cost and ease of installation. Read on to see how each solution stacks up.
Curtains: Aesthetic Variety vs Functional Limitations
Curtains instantly transform a room with endless fabric, texture and pattern options. They’re cost-effective and easy to swap out seasonally, but they offer limited thermal or acoustic insulation. Thick blackout drapes can block light, yet they don’t create a rigid barrier against intruders or severe weather. Explore our curtains for a soft, decorative touch—just remember the trade-off in performance.
Indoor Blinds: Flexibility and Design Options
Indoor blinds—be they roller, Venetian or vertical—let you fine-tune light and privacy. Adjustable slats or tensioned fabrics filter glare and cast striking shadows, yet most indoor blinds won’t match the noise-reduction or heat-blocking of foam-filled roller shutter slats. If you want a lightweight, fabric-driven solution that suits smaller openings, browse our indoor blinds range.
Outdoor Blinds: Patio Protection and Ventilation
Outdoor blinds like Zip Trak and shade screens extend living areas by shielding patios from sun and rain while maintaining airflow. They’re perfect for alfresco zones, but they don’t deliver the same level of security or complete blackout as roller shutters. Consider outdoor blinds when you prioritise comfort and ventilation over heavy-duty protection.
Plantation Shutters: Elegance with Moderate Insulation
Plantation shutters lend a classic, tailored look with their fixed louvres and hardwood or PVC frames. They outperform curtains in insulation and security, yet can’t fully seal out light or noise like motorised roller shutters. Lacking remote operation, they require manual adjustment. For a refined interior feature, view our plantation shutters collection—ideal where style is as important as function.
Roller Doors: High-Security Garage Applications
Roller doors are built for large openings, using heavy-gauge slats and powerful motors to secure garages and commercial spaces. Their robust construction handles substantial loads, but their bulk makes them impractical for standard windows and doors. If you need maximum security for vehicular access or loading bays, see our roller doors solutions—bearing in mind that electric roller shutters are better suited to everyday window applications.
Ultimately, choosing the right window covering means weighing style, insulation, security and automation. While electric roller shutters often involve a higher initial outlay, their blend of energy savings, weather protection and effortless control tends to deliver the best long-term value for both homes and businesses.
Choosing the Right Electric Roller Shutters for Your Property
Selecting the perfect electric roller shutters involves more than picking a colour or a control option. You’ll want to match performance with your home’s specific needs—whether that’s maximum security for street-facing windows, superior insulation for winter evenings or a custom shape to suit a bay window. A well-chosen system not only enhances comfort and curb appeal but also delivers better energy savings and a stronger return on investment over its lifetime.
When deciding on the right shutters, think about how you use each room, the exposure of your windows and the level of automation you’d like. Below, we break down the key considerations—from slat materials and motor power to bespoke sizes and budget planning—so you can confidently specify a solution that ticks every box.
Matching Material and Slat Profiles to Your Needs
The slat profile you choose has a direct impact on security, insulation and visual character. Solid aluminium slats offer the tightest barrier against intruders and complete light blockage, making them ideal for ground-floor bedrooms or street-front shop windows. If you’d like filtered light or passive ventilation, perforated slats provide a balance of airflow and privacy without compromising on safety.
For homes in Adelaide’s temperature extremes, foam-filled slats are hard to beat. The injected insulation improves thermal performance—helping to keep summer heat at bay and winter warmth inside—and also dampens up to 40 dB of external noise. Consider matching slat thickness and foam density to the orientation of your windows, prioritising highest R-values on west-facing rooms and quieter profiles in bedrooms.
Motor Specifications and Performance Requirements
Getting the right motor is crucial for smooth operation and long-term reliability. Motor torque—measured in newton-metres (Nm)—must comfortably exceed the total weight of your slat curtain plus a safety margin for wind loads. For instance, a wide patio door with foam-filled slats might need a 20 Nm or 25 Nm tubular motor to cycle effortlessly without strain.
Speed ratings determine how quickly your shutters open and close—typically between 10 and 15 seconds for most windows. If you plan on frequent daily adjustments or grouping multiple shutters into a single command, choose a motor rated for high cycle counts (often 15,000+ cycles) to ensure decades of dependable service. Discuss your usage patterns with your installer to strike the right balance between speed, torque and motor lifespan.
Custom Sizes, Shapes and Colour Preferences
Standard roller shutters fit most rectangular openings, but one-off architectural elements demand a bespoke approach. Whether you have arched windows, angled clerestories or uninterrupted glass walls, modern manufacturing techniques allow us to craft slats and headboxes to any shape. Precise on-site measurements and factory-precision bending deliver a seamless fit that’s every bit as secure and insulated as a regular shutter.
Finish choices are equally flexible. Classic Roller Shutters provides a palette of Dulux-approved powder-coat colours and textures, from Heritage White to Monument Grey. You can match your window frames, highlight a feature wall or create a subtle contrast against brickwork—either way, the canopy, guide rails and bottom bar will blend harmoniously with your exterior design. Explore the full controls and colour options to find the perfect match.
Budgeting and Long-Term Value
While electric roller shutters represent a higher initial investment compared to basic blinds or curtains, their lifespan and energy-saving potential make them a savvy long-term choice. When drafting your budget, factor in:
- Upfront costs for quality motors and durable slats
- Expected reductions in heating and cooling bills (often 20–30%)
- Minimal maintenance requirements, especially when serviced annually
- Manufacturer warranties (typically 5 years on motors and lifetime workmanship guarantees)
By balancing these elements, you’ll appreciate how an efficient, well-specified roller shutter system pays for itself over time—through lower energy bills, improved comfort and increased property value. Set up a free in-home consultation to review your requirements and receive a tailored quote that aligns with your budget and performance aspirations.
Moving Forward with Electric Roller Shutters
Electric roller shutters combine effortless control with robust security, year-round energy savings and tailored style. From the hidden power of tubular motors to the insulating qualities of foam-filled slats, you now have the insight needed to specify a system that matches your home’s unique needs. Whether you’re aiming to block out the afternoon heat, dampen street noise or automate shutter schedules, these versatile fittings deliver a seamless blend of functionality and flair.
Ready to make the switch or simply gather more details? Take a moment to assess your window sizes, desired slat profiles and control preferences. Our team at Classic Roller Shutters is on hand to guide you through every step—from precise measurements and colour selection to professional installation and aftercare. With local manufacturing in Adelaide and over four decades of expertise, we tailor solutions that strike the perfect balance between performance and elegance.
Get started today with a free, on the phone, quotation. Whether you’re upgrading manual units or fitting shutters on a new build, our friendly experts will provide clear advice, accurate plans and competitive pricing, ensuring you enjoy all the benefits of electric roller shutters without the guesswork. Visit our homepage to book your appointment and see how effortlessly comfort, security and energy efficiency can be integrated into your property.