Your garage roller door is one of the largest moving parts on your property, and it cops a beating from Adelaide’s weather year-round. Without regular attention, small issues like stiff tracks or worn seals turn into costly repairs, or worse, a safety hazard. The good news? A handful of straightforward roller door maintenance tips can keep everything running smoothly and extend the life of your door by years.
At Classic Roller Shutters Adelaide, we’ve spent over 40 years installing and repairing roller doors across the metro area. Our repair team sees the same preventable problems come through again and again, seized motors, corroded guides, and snapped springs that could have been avoided with a bit of routine care. We put this guide together based on what we actually see in the field, not guesswork.
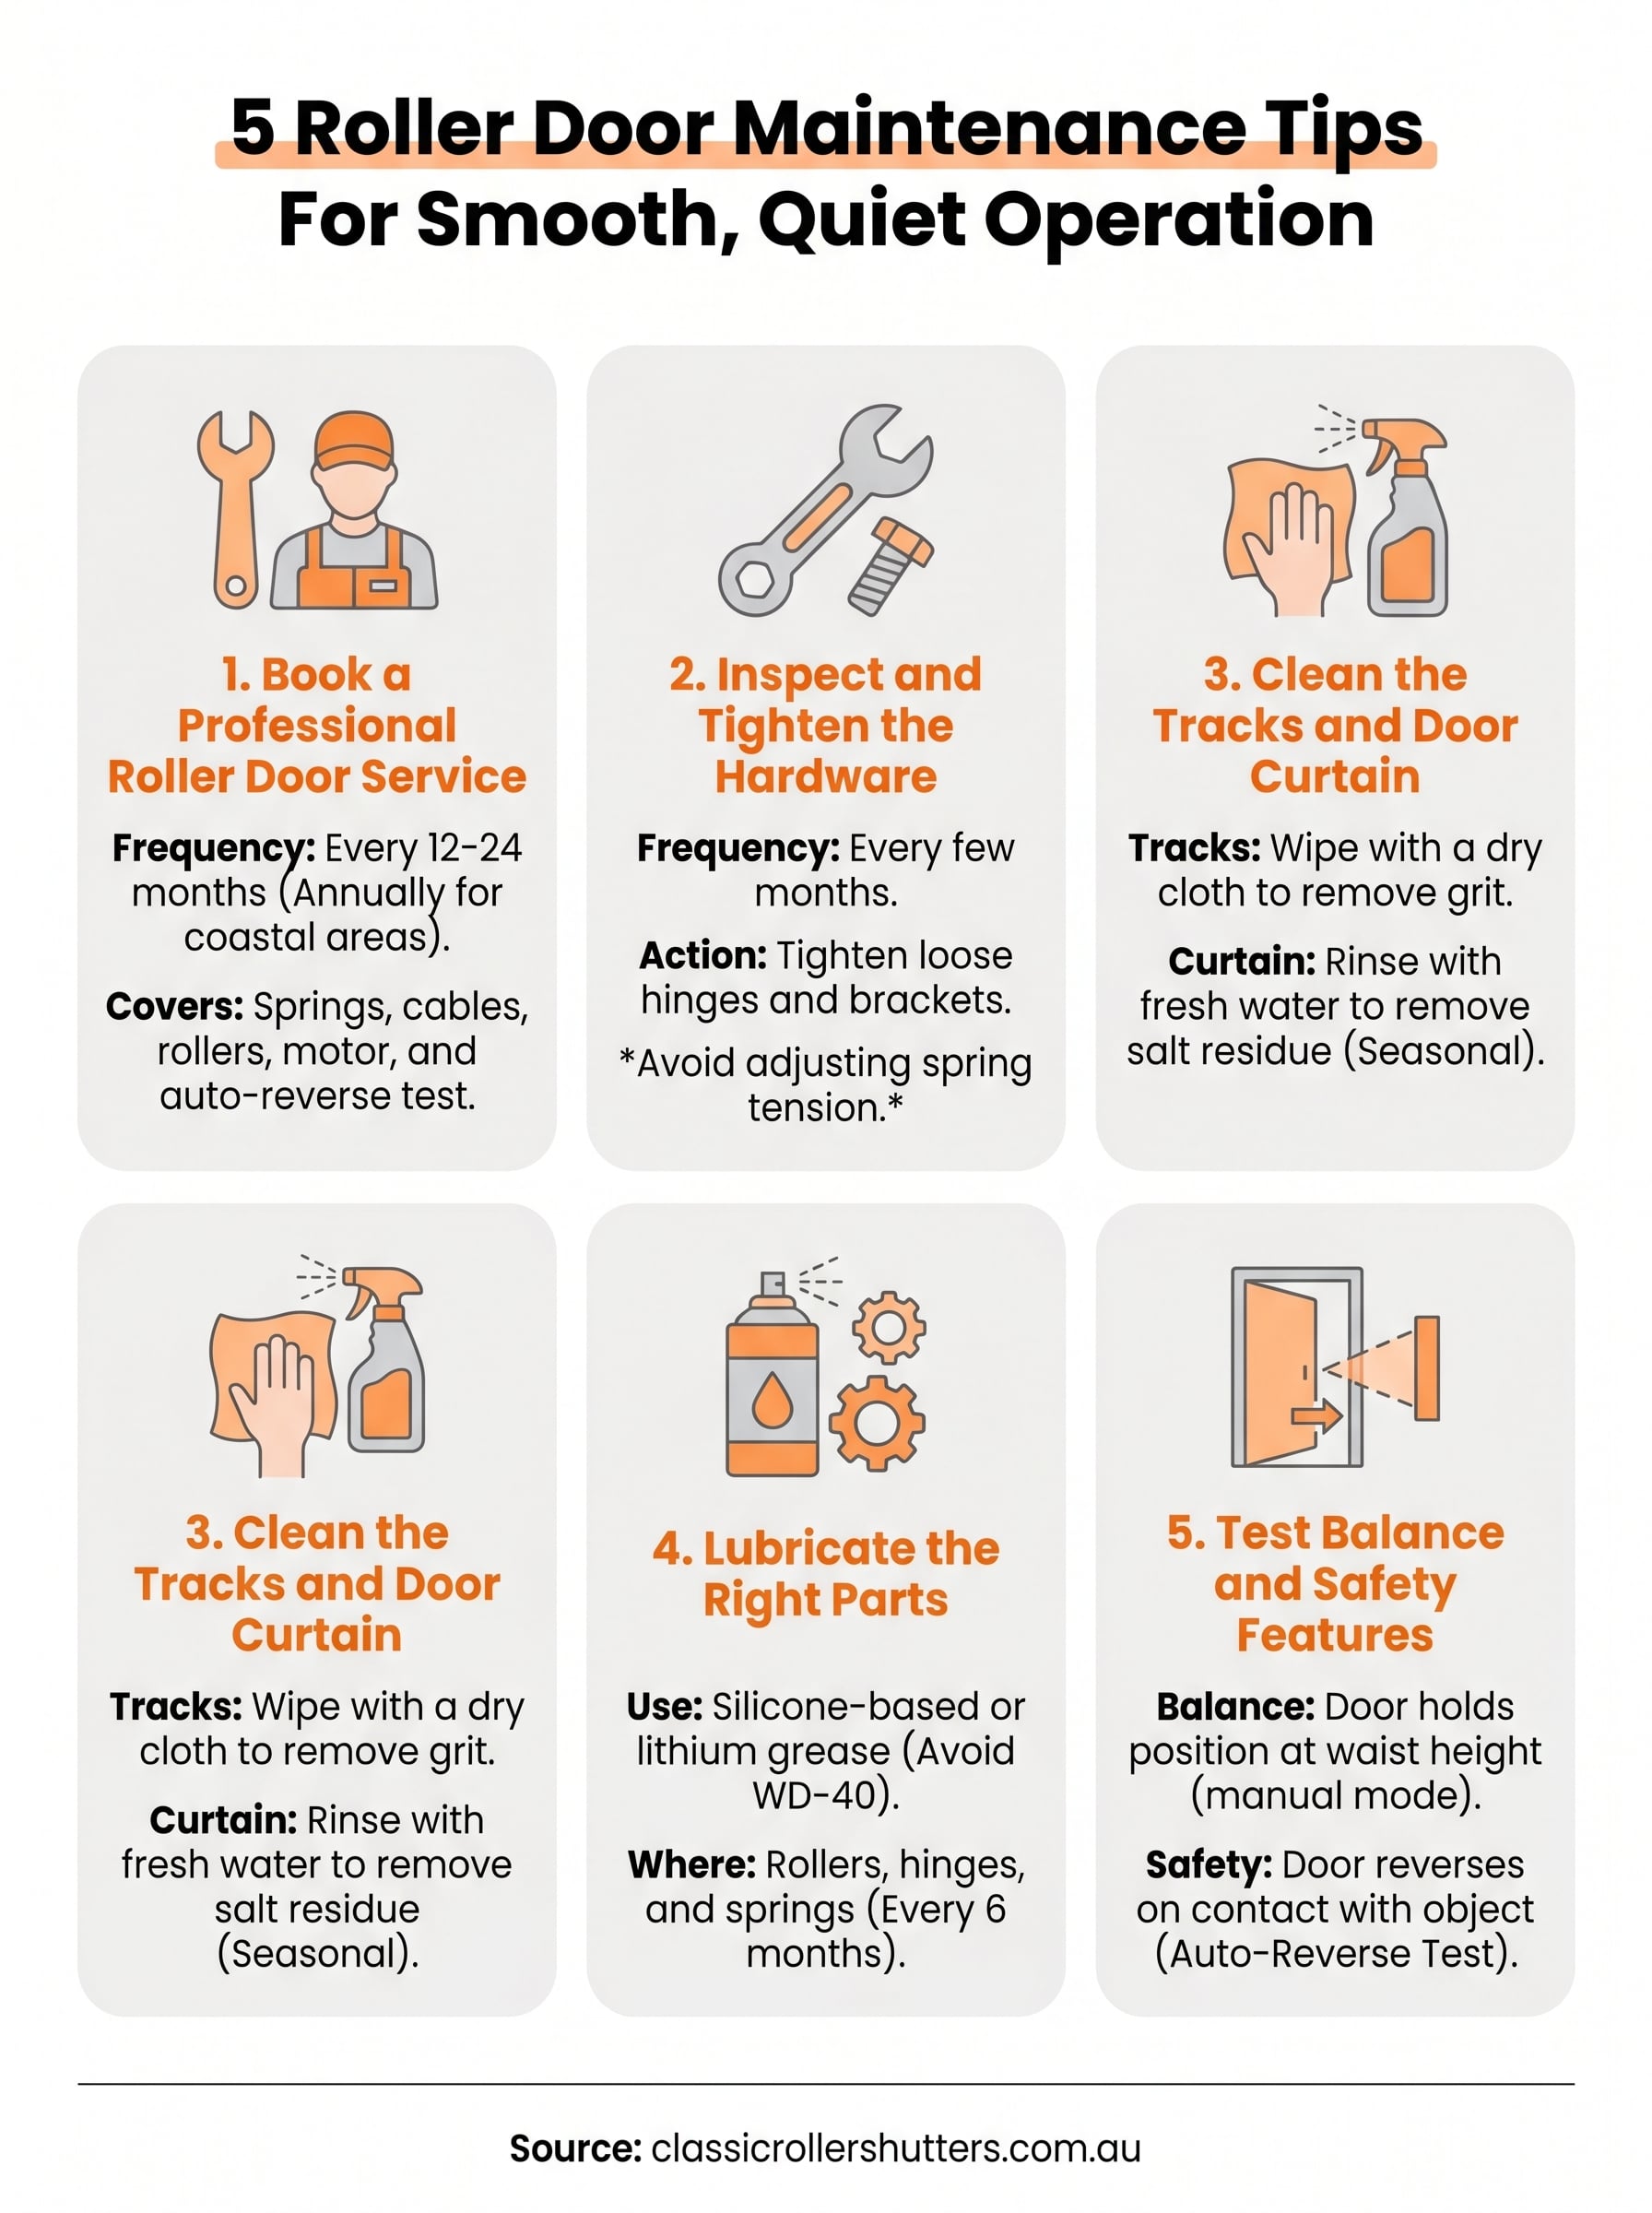
Below, you’ll find five practical maintenance steps you can tackle yourself, no special tools required. We’ll walk you through inspecting, cleaning, lubricating, and testing your roller door so it stays quiet, safe, and reliable for the long haul. Let’s get into it.
1. Book a Professional Roller Door Service
DIY maintenance goes a long way, but it has limits. A licensed technician can spot issues you simply cannot see with the naked eye, and a regular professional service is the foundation of any solid roller door maintenance routine.
What a professional service covers
A qualified technician will check your springs, cables, rollers, brackets, and motor during a full service. They’ll adjust the door’s tension, test the auto-reverse function, and inspect the bottom seal. These aren’t tasks you can rush through on a Saturday afternoon.
Most services also include minor lubrication of all moving parts, so your door comes out running smoother than it went in.
How often to service a roller door in Australia
For residential roller doors used daily, aim for a professional service every 12 to 24 months. Adelaide’s coastal air speeds up corrosion, so annual servicing makes sense if you’re close to the coast.
Properties further inland can generally stretch to every two years, provided you keep up with the DIY checks in the rest of this guide.
What to do before the technician arrives
Clear the area around your garage door and motor before they arrive. Write down any issues you’ve noticed, such as unusual noises, slow operation, or uneven movement, and have the list ready when they show up.
Knowing your door’s brand and approximate age also helps the technician arrive prepared with the right spare parts, saving you from a second visit.
When DIY maintenance is not enough
If your door is grinding, jerking, or refusing to open, stop using it immediately. Continued operation with damaged springs or cables puts extra strain on the motor and creates a genuine safety risk for anyone nearby.
A broken spring holds the equivalent of the door’s full weight under tension, which makes this strictly a job for a licensed technician.
2. Inspect and Tighten the Hardware
Hardware loosens naturally over thousands of open and close cycles. Running through a quick inspection every few months is one of the most overlooked roller door maintenance tips, and it takes less than ten minutes from start to finish.
What to Check With the Door Closed and Unplugged
Before you touch anything, close the door fully and disconnect power to the opener. Work through the hinges, brackets, and rollers from top to bottom, looking for any parts that wobble, rattle, or sit at an odd angle.
What You Can Tighten Safely and What to Leave Alone
Use a socket set or spanner to snug up any loose bolts on the track brackets and hinges. Spring hardware is strictly off-limits. Spring tension stores a significant amount of energy and requires a licensed technician to adjust safely.
Never adjust or remove spring components yourself, regardless of how accessible they look.
Warning Signs of Wear That Need Repair
Watch for cracked rollers, frayed cables, or bent tracks, as these all point to components that need replacing rather than tightening. If you spot rust forming on the cables, flag it immediately for a technician.
Quick Checks for the Opener and Mounting Points
Confirm that the motor unit sits level and that its mounting bolts are firm. A loose opener transfers vibration through the whole door system, which accelerates wear on every moving part.
3. Clean the Tracks and Door Curtain
Dirt, salt, and debris are primary causes of sticking, grinding, and early wear on any roller door. Keeping both the tracks and door curtain clean is one of the most overlooked roller door maintenance tips, yet it takes very little time to do properly.
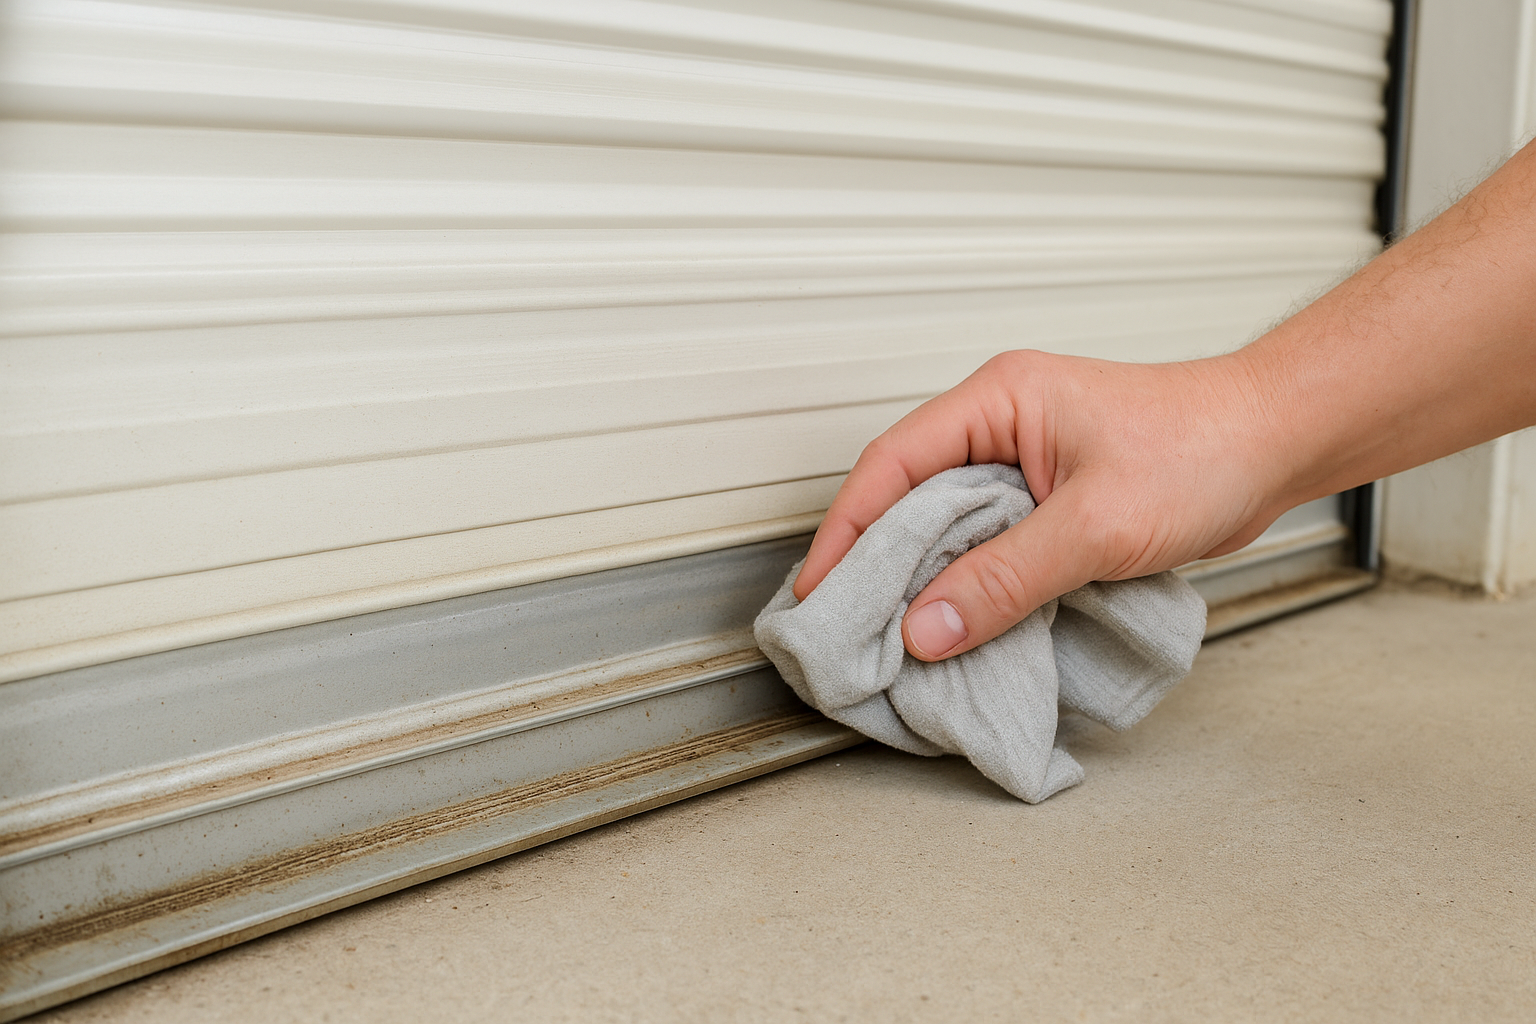
How to Clean the Tracks Without Causing Sticking
Wipe the guide tracks with a dry cloth to remove loose grit and dust. Avoid these common mistakes:
- Using a wet cloth inside the tracks, which can cause swelling
- Blasting with a hose, which pushes debris deeper into the guides
- Using solvent-based cleaners that strip the track lining
How to Wash the Door Surface and Remove Salt Build-Up
Rinse the door curtain with fresh water every few months to remove salt residue. Adelaide’s coastal suburbs are particularly prone to oxidation caused by airborne salt.
Salt left on aluminium panels speeds up corrosion significantly, so a seasonal rinse makes a real difference to your door’s lifespan.
What to Do if You Spot Rust, Dents, or Peeling Paint
Address small rust spots immediately with a metal primer rated for exterior use. Leave larger dents or peeling sections to a professional, as structural damage worsens quickly without proper repair.
Mistakes That Create More Noise and Wear
Spraying water into the motor housing or using harsh chemicals on plastic components strips protective coatings. Both habits leave your door noisier and far more prone to premature failure.
4. Lubricate the Right Parts With the Right Spray
Lubrication is one of the most impactful roller door maintenance tips you can act on yourself. Done correctly, it reduces friction, dampens noise, and protects metal components from premature wear. Done incorrectly, it attracts grit and makes the problem significantly worse.
What to Lubricate on a Roller Door vs a Sectional Door
Roller doors and sectional doors share some components but have different lubrication points. On a roller door, focus on the barrel, guide tracks, and any exposed hinges. Sectional doors have additional hinge points at each panel joint, so work through each one methodically.
Best Lubricant Types and What to Avoid
Use a silicone-based or lithium grease spray for most roller door components. These products stay clean, resist water, and won’t attract dust the way WD-40 does.
WD-40 is a water displacer, not a lubricant, and using it on roller door parts causes rapid dirt build-up.
Avoid thick grease on tracks, as it clogs the channel and causes sticking.
How Much Lubricant to Use and Where It Goes
Apply a light, even coat rather than soaking the component. Target the rollers, hinges, and springs specifically, then wipe away any excess immediately with a clean cloth.
A Simple Lubrication Schedule That Prevents Squeaks
Lubricate your door every six months as a baseline. If you notice squeaking or increased resistance between sessions, address it straight away to prevent the issue from compounding.
5. Test Balance and Safety Features
Testing your door’s balance and safety functions rounds out any solid set of roller door maintenance tips. These checks take less than five minutes but reveal problems that a visual inspection alone will miss.
How to Do a Balance Test Using the Manual Release
Pull the manual release cord to disconnect the door from the opener, then lift it by hand to waist height and let go. A well-balanced door holds its position without rising or dropping on its own. Any movement means the springs need professional adjustment.
How to Test Auto-Reverse Safely
Place a flat piece of timber on the ground under the door and close it using the opener. The door should reverse immediately on contact with the timber. If it doesn’t, stop using the opener until a technician recalibrates the force settings.
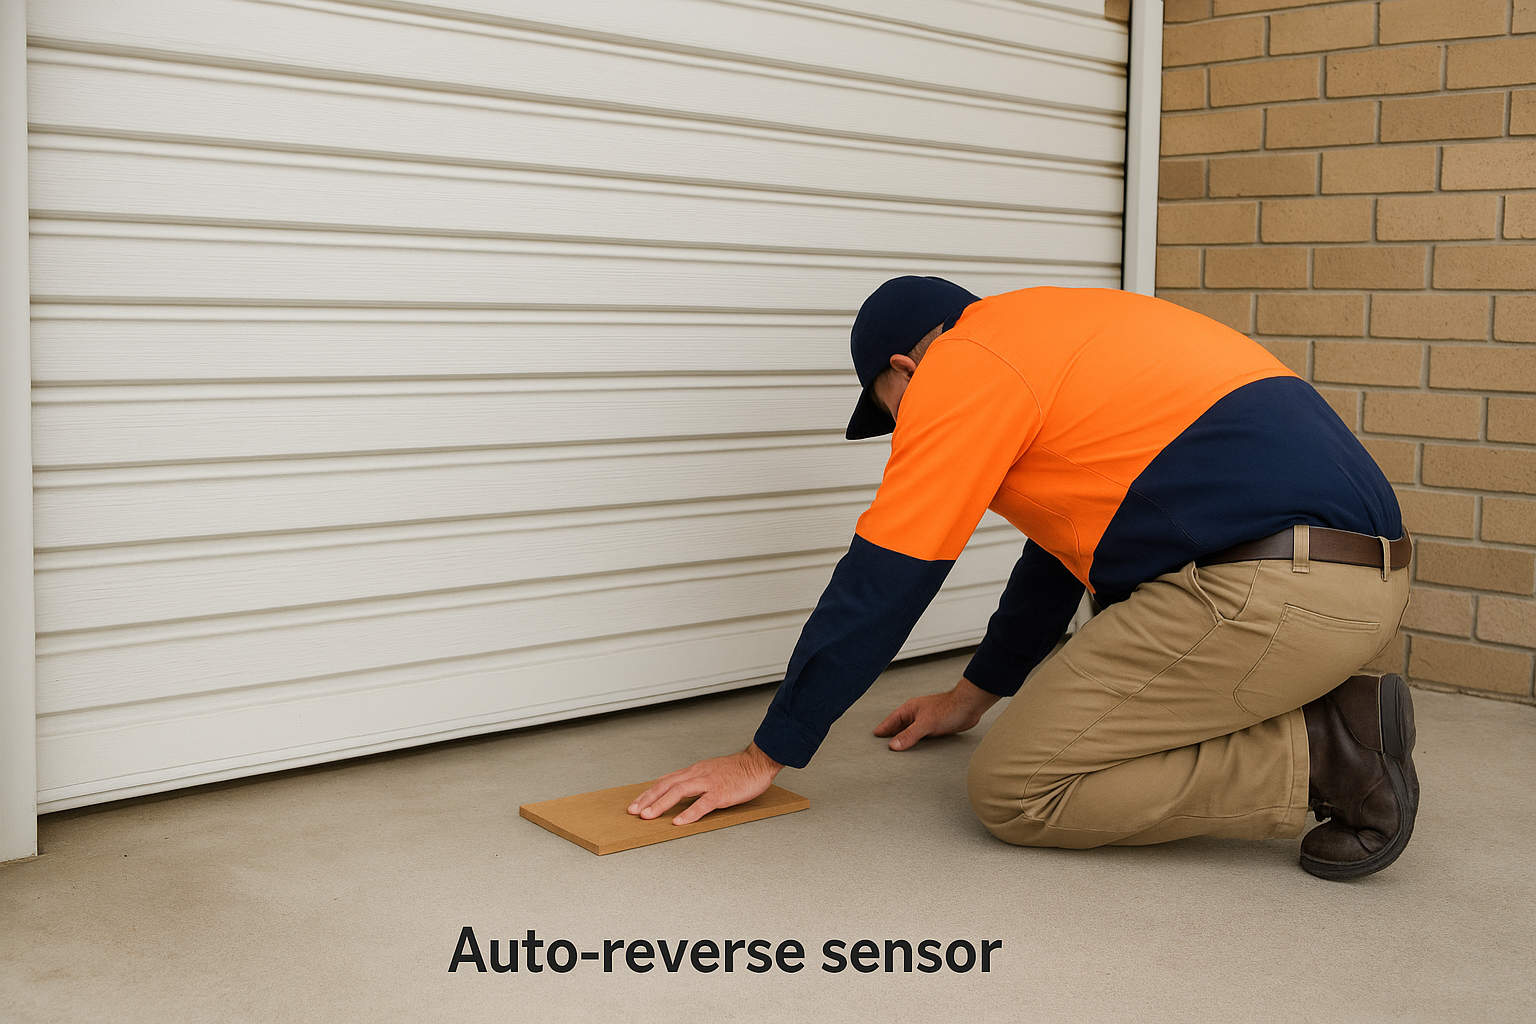
An auto-reverse that fails this test is a serious safety issue, not a minor inconvenience.
How to Check Photo Eyes and Other Safety Sensors
Wipe the sensor lenses on both sides of the door frame with a clean, dry cloth. Pass your hand through the beam while the door closes; the door should stop and reverse immediately when the beam breaks.
What Failed Tests Mean and What to Do Next
Any failed safety test means your door is unsafe to continue using. Book a licensed repair service straight away rather than working around the problem.
A Quick Maintenance Routine to Follow
These five roller door maintenance tips work best when you treat them as an ongoing routine rather than a one-off task. Set a calendar reminder every six months to clean the tracks, lubricate the moving parts, and run through both the balance and safety tests. Tighten any loose hardware at the same time, and book a professional service every 12 to 24 months depending on how close you live to the coast.
Catching small problems early keeps your door running quietly and safely for years without unexpected repair bills landing in your inbox. If any of your checks reveal worn springs, frayed cables, or failed safety features, stop using the door straight away rather than working around the problem. The team at Classic Roller Shutters Adelaide handles roller door repairs, motor replacements, and full services across Adelaide, so your door gets the care it needs from people who know the work inside out.