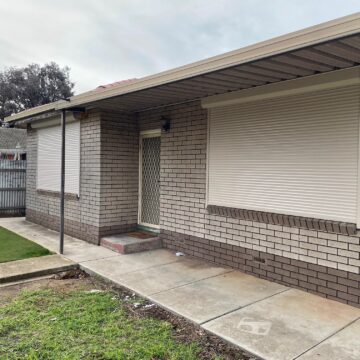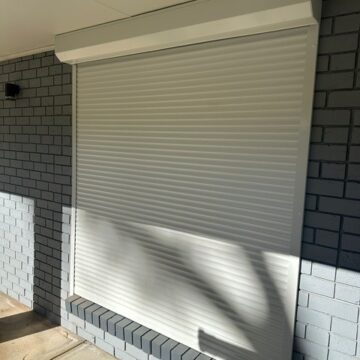

Unpredictable weather, rising energy costs, and the need for greater peace of mind—these are just a few of the challenges faced by Adelaide property owners. Whether it’s protecting your home from summer heatwaves, improving street-facing privacy for your family, or ensuring your business is secure after hours, a reliable solution can make all the difference. That’s where roller shutters step in.
Locally manufactured and tailored for South Australian conditions, roller shutters offer much more than a quick fix. They’re a long-term investment in comfort, security, and style—backed by over four decades of know-how from trusted, factory-direct specialists. With Classic Roller Shutters Adelaide, you’re not just getting a product; you’re gaining the support of a family business committed to quality, value, and friendly service.
If you’re considering roller shutter installation in Adelaide but don’t know where to start, you’re in the right place. This practical guide breaks down every step, from planning and requesting your free in-home quote to what happens on installation day and beyond. By the end, you’ll know exactly what to expect—and how to make the most of your investment in your property.
Step 1: Identify the Benefits You Want from Roller Shutters
Choosing roller shutters starts with pinning down what you really need: extra security, better insulation or a way to keep glare and noise at bay. For Adelaide property owners, locally made roller shutters tick multiple boxes—acting as a physical barrier after dark, locking in warmth during winter, deflecting harsh sun in summer and even meeting bushfire compliance standards (AS 3959:2018). Beyond function, they also lift the look of windows and storefronts, letting you match colours and profiles to your home’s style.
Before you reach for the phone, map out your primary concerns. Are street-facing windows feeling vulnerable? Do electric bills spike when the mercury rises? Or does traffic noise drift into open-plan living areas? By listing your top three objectives, you’ll choose the right features—like insulated slats for energy savings or manual locks for peace of mind—and avoid paying extra for bells and whistles you won’t use. For instance, one Adelaide homeowner saw a 20% reduction in cooling costs during the first summer after fitting foam-filled shutters on six west-facing windows.
List of Key Roller Shutter Benefits
- Security: A sturdy curtain of aluminium slats with lockable end-locks forms an effective deterrent to break-ins.
- Energy Efficiency: Polyurethane-filled slats can cut summer heat entering through windows by up to 90% and reduce winter heat loss by around 70%.
- Light and Privacy Control: Full block-out darkness at the flick of a switch or partial slat adjustment for filtered light and complete privacy.
- Noise Reduction: Quality roller shutters dampen outside noise by up to 50%, ideal for homes near busy roads or commercial areas.
- Bushfire Protection: Non-combustible materials and ember seals ensure compliance with AS 3959:2018, offering an extra layer of safety in at-risk suburbs.
- Aesthetic Enhancement: A wide range of Colourbond and powder-coat finishes lets you complement exterior brickwork or a modern façade.
How Adelaide’s Climate Affects Shutter Performance
Adelaide’s Mediterranean climate throws up extremes: scorching summers with temperatures often above 35°C, cool winter nights dropping below 10°C, and sudden gusty winds that heighten bushfire risk on the Adelaide Hills fringe. Insulated roller shutters buffer indoor spaces against temperature swings and keep dust, debris and embers from high winds at bay. In the CBD, where traffic hum can cut through walls, the noise-dampening effect of a well-fitted shutter makes a noticeable difference. Suburban homes facing the plains benefit from the privacy and glare reduction roller shutters provide, especially during low-angle afternoon sun.
Matching Benefits to Your Goals
Once you’ve identified your top priorities, align features to hit those targets. If reducing air-conditioning running times is crucial, choose thicker, foam-filled slats with sealed guide channels. For properties in bushfire-prone zones, focus on shutters manufactured from non-combustible aluminium and fitted with ember-proof seals. In busy street settings, channel more budget into premium motors and quiet operation for electric controls—ideal for early-morning or late-night use. By tuning in to your unique needs, you’ll end up with roller shutters that work hard for your home or business without unnecessary extras.
Step 2: Assess Your Property and Installation Requirements
Before you call in the experts, gather every detail about your openings, your power options and the type of building you own. Having accurate information on hand will save time and mean your free quote is as precise as possible.
Start by measuring each window or door opening—width, height and even depth for the pelmet box and guide channels. Decide whether you want the shutter installed inside the reveal (neater finish but less flexibility) or face-fitted to the wall (better for protruding sills or outward-opening windows). Think about power too: will you wind a manual crank, swap batteries or tap into mains power for an electric motor upgrade? Finally, consider whether you’re fitting a family home, a retail shopfront or an industrial roller door—each can have its own planning rules, fire-escape requirements and local regulations.
Measuring Openings Accurately
Take a steel tape and note down three measurements for each opening:
- Width: measure at the top, middle and bottom of the opening—use the smallest figure.
- Height: measure at left, centre and right—again, the smallest.
- Depth: from the wall face back into the reveal, to ensure enough room for the pelmet box and guides.
Record each measurement in millimetres and sketch a simple diagram, labelling which measurement goes where. This helps avoid costly on-site surprises.
Choosing Between Manual, Battery and Electric Controls
Which control suits your lifestyle? Here’s a quick comparison:
| Control Type | Cost Estimate | Convenience | Reliability & Maintenance |
|---|---|---|---|
| Manual | Low | Physically operated crank | Very low maintenance |
| Battery | Medium | Push-button or wand | Needs periodic charging/replacement |
| Electric | Higher | Wall switch, remote or app | Hard-wired reliability, may require electrician |
Manual cranks are budget-friendly and simple, but for heavy shutters or frequent use you’ll appreciate battery or 240 V electric options. Battery models suit retrofit jobs with no wiring, while electric motors deliver the smoothest operation and can integrate with home automation.
Bushfire-Prone Area Considerations
If your property lies in a bushfire-prone zone, Australian Standard AS 3959:2018 sets out the rules. Your roller shutters must use non-combustible aluminium profiles, fitted with ember-seal strips to block ash and sparks. They should also allow an operable exit—so confirm with your installer that emergency egress requirements are met. Checking these details now means full compliance and peace of mind when the fire season arrives.
Step 3: Explore Energy Efficiency Incentives and Rebates
Installing insulated roller shutters in Adelaide isn’t just about comfort and security—it can also unlock government-backed savings and rebates. By tapping into energy efficiency programs, you’ll reduce both your out-of-pocket costs and your household’s carbon footprint. Here’s how to make the most of available incentives and finance options.
When you improve your home’s thermal performance with roller shutters, you may qualify for grants or low-interest financing. These schemes reward energy-saving upgrades that lower bills and emissions, so you get a double win: a more comfortable living space and reduced running costs. Keep in mind that application processes vary, so it pays to plan ahead before you request your quotes.
Overview of the Household Energy Upgrades Fund
The Australian Government’s Household Energy Upgrades Fund provides rebates for eligible energy-saving home improvements, including window treatments such as roller shutters. Through this program, homeowners can:
- Access discounted finance or upfront rebates for approved products
- Lower electricity and gas bills by improving insulation and heat-blocking performance
- Contribute to national emissions-reduction targets
To check eligibility and current funding rounds, visit the Household Energy Upgrades Fund website. You’ll find details on application windows, participating financiers and qualifying products.
Quantifying Energy Savings
Roller shutters pack a real punch when it comes to reducing heating and cooling loads:
- Annual net savings typically range between $1,058 and $1,578 once you upgrade to a 3- to 5-star energy rating
- Insulated slats can cut summer heat gain through windows by up to 90%
- In winter, well-sealed shutters prevent around 40% of heat loss
By combining these figures with your current utility bills, you can estimate payback periods and long-term savings. For many Adelaide households, the reduced air-conditioning runtime alone recoups the cost of installation within a few years.
How to Claim Rebates and Finance
Securing rebates or low-interest loans involves a clear sequence:
- Identify a participating financier or installer accredited under the Household Energy Upgrades Fund.
- Request a detailed quote for roller shutters that specifies product star-rating and energy performance.
- Submit your quote and any required documentation (proof of ownership, electrical compliance if electric motors are included) to the financier or rebate portal.
- Complete installation with a certified provider—be sure they lodge the installation evidence before the rebate deadline.
- Claim your rebate or unlock discounted finance terms as soon as installation is confirmed.
By following these steps, you’ll make sure your roller shutter project benefits from every dollar of available support.
Step 4: Research Adelaide-Based Roller Shutter Providers
With measurements, budget and goals in hand, the next step is to find local professionals who can turn your vision into reality. Begin by casting a wide net: use Google and local business directories, ask neighbours who recently upgraded, and tap into community groups on social media. A handful of well-regarded names will emerge—now it’s time to dig deeper.
Not all roller shutter suppliers are created equal. Look for companies with at least a decade of experience in Adelaide, preferably those manufacturing locally rather than importing generic kits. A broad product range suggests they can tailor solutions, while in-house installers often deliver more consistent workmanship than outfits who subcontract every job. Pay attention to lead times—especially if building schedules are tight—and after-sales support, such as repair divisions and spare-parts availability.
Before you pick up the phone, make a quick checklist of the legal and safety credentials each provider should hold. A valid builder’s licence, public liability insurance and compliance with Australian standards (e.g. AS 3959 for bushfire zones) are non-negotiable. Jot down any trade association memberships or awards that highlight a company’s standing in the industry. With these basics covered, you can approach quotes with confidence, knowing you’re comparing reliable, professional operators.
Creating a Comparison Matrix
A simple comparison matrix helps you see the strengths and weaknesses of each installer at a glance. Here’s a template to get started:
| Provider Name | Years in Operation | Local Manufacturing | Product Range | Warranty Period | Average Lead Time |
|---|---|---|---|---|---|
| Example Roller Shutters | 15 | Yes | Shutters, blinds | 5 years | 2–3 weeks |
| Adelaide Shutter Experts | 10 | No | Shutters only | 3 years | 4–6 weeks |
| Hillside Roller Shutters | 8 | Yes | Shutters, doors, screens | 7 years | 1–2 weeks |
Fill in details as you call or email each company. This visual aid keeps facts straight when you’re ready to compare quotes.
Checking Customer Reviews and Case Studies
Online reviews are more than star ratings. Read the comments on Google Reviews, Facebook and local forums to spot recurring feedback—both praise and complaints. Did installers arrive on time? Was the finished product true to the sample colour and texture? Case studies or project galleries on a company’s website can also shed light on their craftsmanship, showing the variety of properties they service, from heritage cottages to new-build apartments.
Don’t just focus on five-star gush; a couple of three-star posts can reveal how issues get resolved. A prompt, fair response from management is often a better sign than spotless reviews alone. If possible, ask for client references—speaking directly to a past customer offers real insight into reliability and follow-up support.
Confirming Licences, Insurance and Warranties
Before signing any paperwork, request copies or proof of:
- A valid builder’s or contractor licence for roller shutters.
- Public liability insurance (minimum $5 million).
- Compliance certificates for electric motor installations (if you’re choosing a powered option).
- Documentation showing adherence to AS 3959:2018 (for bushfire-prone areas).
- Written warranty terms, covering both parts and labour (standard is 5 years or more).
Verifying these items guarantees the installer meets legal requirements and has a safety net if anything goes wrong. With licences, insurance and warranties in place, you can proceed to the next step knowing you’ve shortlisted qualified, reputable Adelaide-based roller shutter providers.
Step 5: Request a Free In-Home Consultation and Quotation
Once you’ve narrowed your shortlist and gathered measurements, the next move is to invite installers in for a no-obligation visit. A free in-home consultation lets you compare professional advice side by side and ensures quotes are based on your exact requirements. It also gives you a chance to meet the team, inspect product samples up close and discuss any site-specific challenges.
Most Adelaide-based suppliers will ask you to book an appointment online or via phone. When you schedule your consultation, you’ll lock in a time slot—often within a week—and confirm which openings you’d like quoted. Be ready to share basic details (number of windows, control type, preferred colours) so they can allocate the right specialist and allow enough time on site.
Preparing Your Documents and Questions
To make the most of your consultation, prepare a simple folder that includes:
- A copy of your floor plans or a hand-drawn sketch with measurements.
- Photographs of each opening, including the reveal depth and surrounding walls.
- A list of priorities: security, insulation, automation, noise reduction, bushfire compliance, aesthetics.
- Sample swatches or a Colourbond reference if you already have an exterior palette in mind.
- A rough budget range and any deadlines (e.g. before a family gathering or tenancy start date).
Having all this information at your fingertips helps installers give you accurate, apples-for-apples quotes. It also shows you’re serious about the project, which can sometimes unlock better pricing or faster lead times.
What to Expect from the Site Visit
When the consultant arrives, they’ll:
- Re-measure your windows and doors to verify your figures.
- Assess mounting options—inside the reveal or face-fit—and note any obstructions (e.g. awnings, downpipes).
- Demonstrate slat profiles, pelmet designs and control mechanisms (manual crank, battery wand, 240 V motor).
- Discuss product features—foam-filled insulation, ember-seal strips, noise-dampening guides—and answer any technical questions.
- Capture photos and site notes for the factory to produce a fully detailed quote later.
This face-to-face time is invaluable. You’ll see how each shutter system feels, hear motor noise levels and confirm that the chosen hardware suits your style.
Taking Advantage of Special Offers
While you’re on site, don’t forget to ask about current deals. Classic Roller Shutters Adelaide often run limited-time Adelaide specials—discounts of up to 30% on selected profiles and motor upgrades. In addition, enquire about finance plans, seasonal promotions or packaged savings for multi-window installs. Clarify lead times, deposit requirements and payment milestones so there are no surprises when you decide to proceed.
By the end of your in-home consultation, you should have a clear, written quotation covering materials, installation labour, any optional extras and warranty details. Armed with this, you’ll be ready for the next step: comparing quotes and confirming the best value for your roller shutter installation in Adelaide.
Step 6: Compare Quotes and Understand Pricing Structures
When you receive several roller shutter quotes, the numbers might look similar at first glance—but the devil is in the detail. A fair comparison means looking beyond the bottom line to see exactly what you’re paying for. Break each proposal down into core components: the cost of materials, any motorisation or automation options, labour rates for installation and site preparation, plus any extras such as custom colours or additional site works.
Start by listing the main cost elements on each quote:
- Materials: slat profiles, pelmet boxes, guide channels
- Insulation: foam-filled vs standard slats
- Motorisation: manual crank, battery unit or electric motor
- Installation labour: typically around $75 per hour
- Site preparation: removal of old fittings or repair of surrounding walls
- Optional extras: custom colours (often a 30% premium), ember seals, advanced controls
Understanding how these costs add up will help you identify which quote offers genuine value rather than just a low headline price.
Anatomy of a Roller Shutter Quote
A detailed quote will itemise each component so there are no surprises:
- Pelmet box and end-caps
- Guide channels or side rails
- Slat sections (standard or insulated)
- Motor type and control method (crank handle, battery wand, wall switch or remote)
- Installation labour hours and rate
- Site-specific works (e.g. cutting back render, patching brickwork)
- Delivery, call-out fees or travel surcharges
- Warranty period and coverage details
If any line item is missing or described vaguely (e.g. “shutter system” without specifying the motor model), ask for clarification.
Sample Quote Comparison Table
Below is a mock-up table to illustrate how three quotes can be laid out side by side. Adjust the figures to match the details you receive.
| Component | Provider A | Provider B | Provider C |
|---|---|---|---|
| Pelmet box & end-caps | $150 | $140 | $160 |
| Guide channels (pair) | $80 | $90 | $85 |
| Standard slats | $200 | $180 | $210 |
| Insulated slats | +$50 per shutter | +$45 per shutter | +$55 per shutter |
| Manual crank | $0 (included) | $50 | $0 (included) |
| Battery motor | $300 | $280 | $320 |
| Electric motor | $400 | $380 | $420 |
| Installation labour | $75/hr × 2 hrs = $150 | $80/hr × 1.5 hrs = $120 | $75/hr × 2 hrs = $150 |
| Site prep & extras | $100 | $0 | $120 |
| Custom colours premium | +30% | +25% | +30% |
| Total per shutter | $1,030 | $995 | $1,125 |
Use a table like this to spot which elements push a quote above or below the market average.
Spotting Hidden Fees and Exclusions
A low quote may conceal extras that appear later:
- Call-out or travel fees for remote suburbs
- Additional charges for tight or awkward installations (window sills, protruding architraves)
- Exclusions in warranty (motors, electrics or seal components)
- Separate fees for removing old shutters or making good after installation
Always read the fine print and ask your installer to confirm any potential charges upfront. That way, you can base your decision on a fully loaded cost comparison rather than unexpected invoices after the job is done.
Step 7: Evaluate Service Packages and Add-On Options
Selecting the right roller shutter system is only part of the story. Thoughtful add-ons and service agreements ensure your investment keeps working smoothly—and looking sharp—for years to come. Classic Roller Shutters Adelaide offers a range of extras, from motor upgrades to DIY spares, that can be tacked on at installation or added later. Beyond the core supply and fit, consider:
- Electrical Upgrades: Converting manual or battery-operated shutters to a hard-wired 240 V system for seamless, push-button operation.
- Spare Parts & DIY Kits: Quick-dispatch profiles, end-locks or replacement slats if you prefer tackling minor repairs yourself.
- Extended Warranties & Service Plans: Annual inspections, priority call-outs and longer coverage on both components and labour.
- Décor & Complementary Coverings: Curtains, plantation shutters or ZipTrak screens & outdoor blinds—layered treatments that marry function with style.
By tailoring your service package to match anticipated usage—say, electric controls for high-traffic windows or a maintenance plan in coastal suburbs—you’ll avoid sticker shock down the track.
Motorisation and Automation Features
Electric controls bring a new level of convenience. Whether it’s a simple wall switch or a smartphone app, motorisation lets you:
- Operate individual shutters or entire groups at once—perfect for whole-house light control.
- Schedule routines (e.g. lower at sunset, raise at sunrise) to simulate occupancy while you’re away.
- Integrate with home-automation platforms like Google Home or Amazon Alexa for voice control.
- Benefit from safety sensors that detect obstructions, reverse direction and prevent damage or injury.
Even if you start with manual cranks, keep in mind that every Classic Roller Shutter can be upgraded later. A plug-and-play motor retrofit is usually quicker and cheaper when built into your initial quote.
Repair and Maintenance Divisions
No matter how robust your shutters, wear and tear is inevitable—especially in Adelaide’s coastal or bushfire-prone suburbs. Classic Roller Shutters Adelaide runs a dedicated repair division staffed by factory-trained technicians. Whether it’s a sticky guide channel, a failed battery pack or a full motor replacement, you’ll benefit from:
- Rapid call-outs with no hidden call-out fees.
- Genuine parts straight from the factory floor.
- Annual servicing plans that include lubrication, alignment checks and operational tests.
For a full rundown of repair services, head to the Classic Roller Shutters Adelaide repair page: https://classicrollershutters.com.au/services/
Decor and Complementary Products
Roller shutters work brilliantly on their own, but layering window treatments gives you the best of all worlds. Classic Roller Shutters Adelaide also supplies:
- Curtains & Drapes: Plush fabrics to soften rooms and add a decorative finish.
- Plantation Shutters: Inside the home, these offer an elegant look and fine-tuned light control.
- ZipTrak Screens & Outdoor Blinds: Create protected alfresco areas or shield west-facing patios from afternoon glare.
Mixing and matching finishes—say, a muted sandwich-box colour outside with sheer curtains inside—lets you customise both form and function. Your consultant can show sample panels during the in-home visit, so you know exactly how each layer will sit together.
By investigating these packages and add-ons, you’ll end up with a tailored solution that not only meets immediate needs but also accommodates future changes, whether that’s smart-home integration, extra protection or a whole new aesthetic.
Step 8: Finalise Your Selection and Confirm Installation Details
By now you’ve narrowed down your options and gathered all the technical specs. This step is about cementing every detail—from slat profiles and colour choices to deposit amounts and installation dates—so there are no surprises on the big day. A signed agreement with clear timelines and responsibilities is your safety net, ensuring the job runs smoothly from start to finish.
Choosing Colours and Finishes
Choosing the right finish brings your shutters into harmony with the rest of the property. Classic Roller Shutters Adelaide stocks an extensive range of Colourbond shades and powder-coat options. Bring along a paint chip, brick sample or render swatch to compare against your home’s exterior under natural light. Decide whether you’d like the shutter box and guide rails to blend in or stand out—an accent colour can modernise a heritage façade, while a matched tone keeps a minimalist look. Don’t forget the interior face of each slat: a neutral or lighter shade reflects daylight and keeps rooms bright when shutters are raised. Once you’ve settled on a palette, request a final sample or digital render to confirm you’re completely happy before production begins.
Booking the Installation
With products selected, it’s time to lock in your installation slot. Most installers require a deposit—typically 10–20% of the total cost—to secure your booking. Agree on a firm start date, estimated duration and lead times for any special-order components. Confirm practical details like on-site parking or access codes, power availability for electric models, and whether any pre-install prep (such as removing old fittings) is needed. Keep a written record of your installer’s contact person and mobile number for direct communication. Once payment milestones and dates are set, you’ll receive a formal job confirmation outlining everything from arrival times to completion targets.
Reviewing the Contract
Before you sign on the dotted line, read the contract with a fine-tooth comb. It should clearly list your chosen product specifications—slat style, insulation rating, control type and colours—along with a line-by-line cost breakdown. Check deposit and payment terms, as well as the cancellation policy in case unforeseen circumstances arise. Make sure the warranty section covers both parts and labour (standard is at least five years) and that workmanship guarantees are spelled out. If there are any clauses or fees that seem vague or unfavourable, ask for clarification or an amendment. A solid, mutual agreement gives you confidence that Classic Roller Shutters Adelaide will deliver precisely what you’ve planned, on time and on budget.
Step 9: Prepare Your Home for Installation Day
With everything booked and confirmed, it’s time to get your property ready for the big day. A bit of preparation ensures the installers can work efficiently, keep your home tidy and finish on schedule. By clearing the workspace, organising access and making simple safety arrangements, you’ll help the team focus on fitting your new roller shutters without unnecessary delays or distractions.
Start by creating a clear path from the truck to each installation point. Move garden pots, outdoor chairs and potted plants out of the way. Inside, shift furniture or décor items that sit close to the windows or doors being fitted. Laying down drop sheets or old towels will protect flooring from dust and paint chips, while a well-lit work area helps installers spot any critical details.
Pre-Installation Site Checklist
- Remove furniture, ornaments and obstructions near each window or door.
- Clear pathways from entry points to installation zones.
- Lay down protective coverings on floors and window sills.
- Ensure power outlets are accessible if you’ve chosen electric motors.
- Keep a small bin or bag handy for installers to collect debris.
Ticking off this list avoids last-minute scrambles and gives the crew space to manoeuvre tools and ladders safely.
Notifying Neighbours (for shared or multi-unit properties)
If you live in a townhouse, apartment or close-set suburb, it’s polite to give neighbours a quick heads-up—especially when work might cause noise or restrict access. A simple note under the front door a day before installation is all that’s required.
Sample notice:
“Hi neighbour,
We’ve arranged for roller shutters to be installed at our place on [date] between [start time] and [finish time]. You may hear drilling or see ladders near the boundaries. Apologies in advance for any inconvenience, and thanks for your patience!
—[Your Name], [Contact Number]”
A friendly warning helps maintain good relations and avoids complaints to Body Corporates or strata managers.
Confirming Installer Requirements
Finally, touch base with your installer to iron out any practicalities:
- Provide details of any security codes, alarm systems or locked gates.
- Reserve a parking spot close to the front door or driveway.
- Share information on pets or children who need to be kept clear of the work area.
- Highlight any site restrictions—like shared footpaths or sensitive landscaping—that the team should know about.
Clear communication on these points means the installer can arrive on time, set up quickly and complete the job without unexpected holdups. With your home prepared and everyone on the same page, you’re all set for a smooth installation day and the exciting reveal of your new roller shutters.
Step 10: What to Expect on Installation Day
After all the planning, consultation and paperwork, installation day arrives. Here’s a step-by-step look at how Classic Roller Shutters Adelaide’s in-house team will transform your windows—or doors—into high-performance roller shutters.
When the installers pull up, they’ll introduce themselves and confirm which openings are being worked on. A site-specific toolbox, ladders and power tools come next, along with any required safety gear. Before any drilling or cutting starts, the team re-measures each reveal and mounting surface, ensuring factory-built components will fit perfectly. This final check prevents gaps, misalignments or unexpected on-site modifications.
With measurements signed off, the crew sets out to fit the pelmet boxes (the slim housings that conceal the rolled-up shutter), secure the guide channels on either side of your window or door, and install the aluminium slats—be they standard or foam-filled. If you’ve chosen motorised operation, the electrician will hard-wire the motor or fit the battery pack and control device at this stage.
Once every component is in place, the installers test each shutter through multiple open-close cycles. They’ll adjust guide tension, set limit switches on electric motors and confirm locking mechanisms are both smooth and secure. The final act is a tidy clean-up: removing debris, brushing down frames and clearing away packaging. All that’s left is the reveal of your new shutters in action.
Typical Installation Timeline
- Arrival and site briefing: 15–30 minutes
- Final measurements and marking: 20–30 minutes per opening
- Pelmet box and guide channel installation: 30–45 minutes per opening
- Slat fitting and motor wiring (if applicable): 30–60 minutes per opening
- Operational testing and adjustments: 15–20 minutes per opening
- Site cleanup and handover: 15–30 minutes
On average, expect each standard window shutter to take around 2–3 hours from start to finish. Larger doors or custom openings may require additional time, which your installer will have accounted for in the original schedule.
On-Site Communication Tips
Clear and prompt answers help keep the job on track. When installers ask about desired end-stop positions, shutter speeds or preferred switch locations, having a quick decision saves rework later. Feel free to point out any quirks—an uneven sill or an extra-wide architrave, for example—that might influence the final fit. If you spot something you’re unsure about—say, a slight gap at the top—mention it immediately so it can be tweaked before the team moves on.
Final Quality Checks with the Installer
Before the team packs up, walk through this simple checklist together:
- Smooth Travel: Lower and raise each shutter to ensure there’s no catching or sticking along the guides.
- Lock Function: Test manual or motorised locking points—slats should click securely into place.
- Noise Levels: Listen for any unusual rattles or grinding in the motorised models.
- Control Response: Operate remotes, wall switches or crank handles several times to confirm consistent performance.
- Finish Inspection: Check paint or powder-coat for uniform coverage, and confirm seals and end-caps are flush with the frame.
Once you’re satisfied, the installers will hand over any warranty certificates, user manuals and spare keys or remotes. And just like that, your property is protected by top-quality roller shutters built for Adelaide’s climate and your personal peace of mind.
Step 11: Conduct Post-Installation Inspection and User Training
Once the installation team has packed up and your new roller shutters are in place, it’s time for one last—but crucial—step: making sure everything works as it should and that you feel confident operating your shutters day-to-day. A thorough post-installation inspection and practical user training will identify any minor adjustments needed and ensure your investment delivers optimum performance and longevity.
Start by walking through each shutter with your installer. They’ll guide you through a visual and functional check, pointing out key features and helping you spot any alignment issues, paint blemishes or seal gaps. Next comes hands-on practice: you’ll try manual cranks, battery wands, wall switches and remotes under expert supervision, so you understand the nuances of each control type. Finally, collect and store all paperwork—warranty certificates, user manuals and contact details—so you can refer back if you need servicing or support in the future.
By the end of this session, you’ll have peace of mind that your roller shutters were installed correctly, you know how to operate them safely, and you have everything on hand to keep them running smoothly for years to come.
Inspection Walkthrough Checklist
- Visual Alignment
- Confirm each shutter sits squarely in its guides with no noticeable tilting or gaps at the sides.
- Paint and Finish
- Inspect pelmet boxes, guide channels and slats under natural light—look for uniform coverage and consistent colour match.
- Seal Integrity
- Check ember-seal strips (if fitted) for continuous adhesion and no loose edges around the frame.
- Smooth Operation
- Lower and raise every shutter through its full travel path, listening for catching or rubbing sounds.
- Lock Functionality
- Engage manual locks or test electronic locking points; slats should click firmly and hold under light pressure.
- Motor Test
- For battery and electric motors, operate the shutter multiple times in both directions to confirm consistent speed and responsiveness.
Operating Instructions for Different Control Types
- Manual Crank
• Insert the handle into the drive socket.
• Turn clockwise to close and counter-clockwise to open—apply steady, even pressure. - Battery Wand
• Push and hold the up/down buttons on the wand.
• Release to stop at any desired position; charge as per the manufacturer’s schedule. - Wall Switch / Remote Control
• Press and hold the designated Up or Down button.
• For remotes, use the Group or All-Up/All-Down functions to operate multiple shutters together.
• Familiarise yourself with the stop button or intermediate position setting. - Emergency Manual Override
• Locate the manual override point (usually on battery-pack models).
• In a power failure, use the supplied crank to operate the shutter until mains power is restored.
Securing Documentation and Support Contacts
Your installer will hand over a folder or envelope containing:
- Warranty Certificates: note coverage periods for parts and labour.
- User Manuals: detailed operating and maintenance instructions.
- Servicing Contacts: direct phone numbers and email addresses for Classic Roller Shutters Adelaide’s service division.
- Spare Keys or Remote Controls: keep duplicates in a safe location.
Store these documents together—perhaps in a labelled folder alongside other home appliance manuals. Having them at your fingertips means quick reference during routine maintenance or if you ever need to arrange a repair call-out. With inspection complete, controls mastered and paperwork filed, you’ll enjoy full confidence in your roller shutter installation for years to come.
Step 12: Plan for Ongoing Maintenance and Repairs
Once your roller shutters are in place and performing beautifully, a little regular care keeps them operating smoothly for years to come. Setting up a straightforward maintenance routine and knowing when to call in the experts will protect your investment, prevent costly downtime and ensure your shutters retain their finish and functionality.
Proper care is surprisingly simple—and it pays off in the long run. Think of a quick monthly clean and a twice-yearly inspection as the bare minimum. A few minutes spent wiping down slats and checking guide channels can head off issues like dirt build-up or guide wear before they escalate into sticking shutters or motor faults. At the same time, a yearly professional service will catch hidden wear on internal components, recalibrate limit switches and top up any lubrication in hard-to-reach spots.
Simple Maintenance Tasks
- Cleaning the Slats and Guides
Use a soft, lint-free cloth and warm soapy water to remove dust and grime from each slat. Rinse with clean water and dry thoroughly to prevent water spots. For the guide channels, a small brush or vacuum pickup can clear out debris that might cause catching. - Checking Seals and End-Locks
Inspect foam or rubber seals at the top and sides of the shutter for any signs of peeling or cracking. Gently press seals back into place or replace them if they’ve lost elasticity. Make sure end-locks click securely—worn locks can lead to rattling. - Lubrication
Every six months, apply a light spray of silicone-based lubricant to the guide channels and pivot points. Avoid oil-based sprays, which attract dirt. If you hear any squeaks or feel rough spots while operating, lubricate immediately to restore a smooth glide. - Visual Inspection
Take a quick look at the shutter box, slat finish and mounting brackets. Any paint chips, dents or loose screws should be addressed promptly—small repairs now save bigger touch-ups later.
Scheduling Annual Service Visits
Even with diligent DIY care, some tasks are best left to professionals. An annual service from Classic Roller Shutters Adelaide’s dedicated repair division includes:
- Full operational testing of manual and motorised controls
- Calibration of limit switches and safety sensors
- Inspection and replacement of worn bearings or springs
- Tightening of fixings and realignment of guide rails
- A written service report outlining any recommended repairs
Booking this preventive service once a year minimises the chance of unexpected failures, extends motor life and keeps warranty conditions intact. Contact our service team to arrange a convenient time—no call-out fees apply for annual maintenance.
Accessing Spare Parts and DIY Kits
For minor repairs between service visits, Classic Roller Shutters Adelaide stocks an extensive range of genuine spare parts. Whether you need replacement slats, guide-channel profiles, end-locks or a new battery pack, our factory-direct pricing makes DIY fixes quick and affordable. Simply order online or drop by our Adelaide showroom to pick up:
- Slat and guide-channel sections by the metre
- End-locks, spring assemblies and pivot pins
- Battery packs, remotes and motor components
- Ember-seal strips and weather seals
If you’re tackling a repair yourself, our service division can offer step-by-step advice over the phone or via email. And if it ever feels too complex, we’re just one call away to send out a qualified technician and have your shutters back to factory standard.
By combining regular DIY checks with professional servicing and easy access to genuine spare parts, you’ll enjoy trouble-free operation and keep your roller shutters looking and performing like new—for good.
Next Steps for Your Roller Shutter Project
You’re now armed with a clear roadmap—from identifying your key benefits and measuring your openings through to installation day and ongoing care. To recap, your journey will look something like this:
- Pin down your top priorities (security, insulation, light control, noise reduction, aesthetics).
- Measure windows and doors accurately, and decide on manual, battery or electric controls.
- Explore energy-efficiency rebates and finance options to reduce upfront costs.
- Research local, factory-direct providers and verify licences, insurance and warranties.
- Book free in-home consultations, compare detailed quotes and spot any hidden fees.
- Choose the right add-ons (motor upgrades, maintenance plans, spare-parts kits) to future-proof your investment.
- Finalise styles, colours, deposit and installation date, then prepare your home for a smooth install.
- Watch the in-house team fit your shutters, perform final quality checks and do a hands-on walkthrough.
- Learn simple maintenance tasks and schedule annual servicing to keep your shutters looking and working like new.
With Classic Roller Shutters Adelaide by your side—backed by over 40 years of local manufacturing expertise—you’re just one step away from transforming your property. Ready to experience the comfort, security and style that roller shutters provide?
Request your free in-home quote today and take advantage of our factory-direct pricing, personalized service and limited-time specials at classicrollershutters.com.au.