Classic Roller Shutters & Blinds
A stiff handle, a slipping strap, or a shutter that won’t budge usually points to one small but critical part: the roller shutter winder box. This compact reel sits beside your window, quietly doing the heavy lifting for manual shutters. Over time, its spring wears out, gears grind down, or the casing cracks—leaving you with a stubborn, half-open shutter that can compromise your home’s security and insulation. If you need help with this, call us on 83692266
The good news? Replacing a worn winder box is an easy, cost-effective fix when you know which part to buy and how to install it. In this guide, Classic Roller Shutters & Blinds walks you through everything you need to know—from spotting early warning signs to choosing the right kit and completing the job safely.
Whether you’re fixing a single window in Glenelg or managing a full shopfront on Gouger Street, this step-by-step guide will help you get your shutters rolling smoothly again.
Step 1: Understand Your Roller Shutter Winder Box
Before you rush to buy parts, it’s important to understand how a roller shutter winder box works. This will help you pick the right replacement and avoid installation mistakes.
Main Components:
-
Housing: Plastic or aluminium case bolted to the wall – material dependant on the brand
-
Spring-loaded reel: Stores tension to retract the strap
-
Spindle: Connects the handle to the reel
-
Strap: Usually 14 mm or 19 mm woven polyester
-
Handle: Gives you leverage to lift up to ~20 kg
-
Retaining clip & screw pattern: Aligns the reel with the wall mount
Common Types of Winder Boxes in Adelaide:
-
Surface-mounted vs flush-mounted (in-wall)
-
Vertical or horizontal orientation
-
Standard (for windows under 2 m²) or gear-assisted (3:1 ratio) for heavier commercial shutters
Step 2: Check If Your Winder Box Needs Replacing
Not all roller shutter problems mean the box is faulty. Before buying a new one, try these quick fixes:
| Problem | Likely Cause | Quick Fix |
|---|---|---|
| Strap slips back | Weak spring or loose screws | Tighten screws or replace box if spring is broken |
| Handle turns but shutter won’t lift | Strap jammed in wall guide | Remove guide, untwist strap |
| Grinding noise | Dust in reel or dry spindle | Light lubrication |
| Strap fraying | UV damage or sharp wall edge | Replace strap and fit a grommet |
If the spring no longer holds tension, the case is cracked, or the gears are stripped, it’s time for a replacement.
Need help? Contact our roller shutter repair team.
Step 3: Choose the Right Replacement Winder Box
There are only a few roller shutter winder box types on the market, you will easily be able to see the difference between them. Each one looks entirely different. Some are operated via a strap (like a seatbelt & some with wire)
What to Measure:
-
Strap width: Most Adelaide homes use 14 mm mini straps, heavy older style shutters use 19 mm maxi straps
-
Strap length: Shutter drop × 2.2 = enough tape for the reel ( 5 meter roll always reccomended)
-
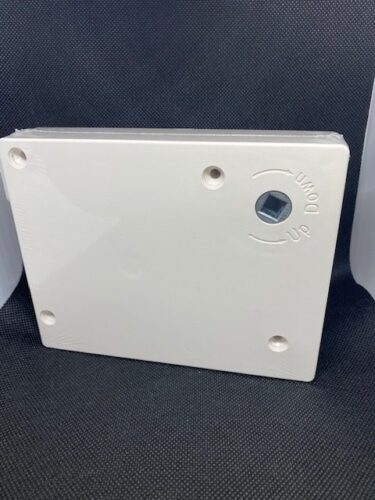
Box size: For in-wall units, typical is 75 mm × 110 mm there are 4 types of winder boxs, we stock them all. They are visually different, its easy to choose
-
Screw spacing: So you can reuse the wall plugs
Other Considerations:
-
Weight rating: Match to your shutter size – only a consideration if you’re thinking about installing manual shutters.
-
Gear ratio: Use 3:1 ratio boxes for panels over 2 m²
-
Left or right feed: Avoid strap crossovers by checking feed direction – ours are multi use
For expert advice on parts and installation, visit our roller shutter services page.
Step 4: Prepare for Installation of your roller shutter winder box
Before starting, gather everything you need:
Parts List:
-
Replacement winder box (pre-tensioned) – don’t pop the gear out, the spring will pop out and your done. You will then have to purchase another
-
Matching strap or tape (5–6 m)
-
Wall guide or pulley
-
Screws and wall plugs
-
Trim plates or blanking caps
Tools Required:
-
Flat and Phillips screwdrivers
-
Cordless drill with masonry bit
-
Tape measure
-
Utility knife
-
Pliers
-
Safety glasses and gloves
Step 5: Remove the Old Winder Box
Follow these steps carefully:
-
Detach the strap from the drum
-
Unscrew the box while supporting it with your other hand
-
Handle stuck parts with care—apply penetrating oil if needed
Step 6: Install the New Winder Box
-
Secure the winder box: Align the winder box with the drilled holes. insert screws through mounting holes & tighten. Ensure the box is secure
-
Connect the strap to the roller shutter: Thread the strap, open the winder box cover to access the internal mechanism, feed the strap through the guide slot and onto the winding drum inside the box.
-
Secure the cover: Place the cover back on and secure it – IMPORTANT: cover must be in place before testing the operation.
-
Test the winder box: turn the handle to wind up any excess strap, whilst keeping slight tension on strap.. The strap should run smoothly without jerking.
Step 7: Troubleshoot After Installation
-
Strap slipping? Open the box and realign
-
Shutter won’t stay up or down? Adjust spring tension
Step 8: Maintain Your Winder Box
Simple maintenance can extend the life of your new winder:
-
Dust the housing and clean the strap every 6–12 months
-
Tighten screws if needed
-
Inspect for fraying straps
-
Use a small amount of non-silicone spray on the spindle
- If your looking for a roller shutter strap guide here it is.
Step 9: DIY vs Professional Installation in Adelaide
| Option | Cost | Time | What You Get |
|---|---|---|---|
| DIY | $50 –$150 in parts | 1–2 hours | Box, strap, your labour |
| Professional | $180 –$250 all-inclusive | 20–30 minutes | Parts, labour, warranty |
When to call Classic Roller Shutters & Blinds:
-
Heavy or oversized shutters
-
Upper-storey windows – may need scaffold
-
Repeated failures after DIY attempts
-
Time constraints or safety concerns
Book a roller shutter repair or replacement now.
Why Choose Classic Roller Shutters & Blinds?
-
Trusted Adelaide experts
-
Same-day service available
-
No call-out fee for repairs
-
Local support and warranty
Learn more about our roller shutter services here.
Wrapping Up
A stuck roller shutter is usually a simple fix if you catch it early. By replacing your roller shutter winder box and keeping it maintained, you’ll enjoy years of smooth, secure operation. Whether you DIY or prefer a professional touch, Classic Roller Shutters & Blinds is here to help Adelaide homeowners keep their shutters in top shape.
Contact us today for expert roller shutter repairs and installations.