Roller shutters that grind, stick, or screech every time you open them are telling you something, they need attention. Knowing how to lubricate roller shutters properly is one of the simplest maintenance tasks you can do yourself, and it makes a real difference to how smoothly and quietly they operate. Left dry, the moving parts wear faster, which can lead to costly repairs or even full replacements down the track.
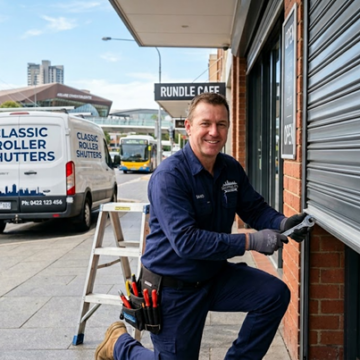
At Classic Roller Shutters Adelaide, we’ve been manufacturing, installing, and repairing roller shutters across Adelaide for over 40 years. Our repair division sees plenty of shutters that have seized up or sustained unnecessary damage, problems that regular lubrication would have prevented. We put this guide together based on what we see in the field every day, so you can keep your shutters running well between professional services.
Below, we’ll walk you through the right lubricants to use (and which ones to avoid), the specific components that need attention, and clear step-by-step instructions you can follow at home. Whether your shutters are manual or electric, this guide covers what you need to know to get the job done properly.
What to use and what to avoid
Before you start learning how to lubricate roller shutters, picking the right product is the most important decision you’ll make. Use the wrong lubricant and you’ll attract dirt and grit into the moving parts, which accelerates wear rather than reducing it. Getting this step right means your effort actually pays off.
The right lubricants to use
Silicone-based spray is the go-to choice for roller shutter guides and tracks. It stays clean, repels moisture, and doesn’t leave a sticky residue that collects dust over time. For dry climates like Adelaide’s, a dry PTFE (polytetrafluoroethylene) spray is another excellent option, since it forms a thin, dry film that keeps components moving freely without attracting airborne debris.
For most residential roller shutters, a silicone spray or dry PTFE spray will handle every part of the job without making a mess.
Here’s a quick comparison to help you choose the right product for your shutters:
| Lubricant Type | Best For | Residue Level |
|---|---|---|
| Silicone spray | Guides, tracks, rubber seals | Minimal, non-sticky |
| Dry PTFE spray | Guides, tracks, hinges | None |
| White lithium grease | Heavy-duty axle bearings only | Low, but thicker |
What to keep away from your shutters
WD-40 is not a lubricant for roller shutters. It’s a water displacer and solvent that works well for loosening rust, but it dries out quickly and leaves components dry again within days. Applying it to your guides will give you temporary relief and then make the underlying problem worse.
You should also avoid heavy oils, petroleum-based greases, and cooking sprays. These products break down rubber seals, attract grime, and can leave visible staining on your shutter slats. Stick to products specifically designed for plastic tracks and metal components, and you’ll get far better results over the long term without creating new problems in the process.
Step 1. Make it safe, then clean and inspect
The first step in how to lubricate roller shutters properly is making sure the shutter is safe and clean before you touch a spray can. Skipping this stage means you’ll be spraying product over dirt and debris, which traps grime into the guides and accelerates wear. A few minutes of preparation will make the whole job far more effective.
Cut the power and secure the shutter
If your roller shutter is motorised or electric, switch it off at the wall before you do anything else. You don’t want the shutter moving while your hands are near the guides or mechanical components. For manual shutters, lower the shutter to about halfway and use a clamp or wedge to hold it steady while you work.
Clean the guides before lubricating
Use a dry cloth or stiff brush to wipe down the side guides, removing loose dust, cobwebs, and built-up grime. For stubborn residue, a small amount of mild soapy water on a cloth works well – just dry the guides thoroughly before you apply any spray. While you’re cleaning, look for cracked seals, bent slats, or worn guide lining that may need attention.
If you spot damage during this inspection, address it before lubricating, otherwise you’ll just be maintaining a component that still needs repair.
Step 2. Lubricate the side guides the right way
The side guides are the most critical area to focus on when you learn how to lubricate roller shutters. They carry the shutter’s weight and take the most friction every time the shutter moves, which is why they dry out and wear faster than any other component. Getting the application right here will deliver the biggest improvement to how smoothly your shutter operates day to day.
How to apply the spray correctly
Hold your silicone or dry PTFE spray about 10 to 15 centimetres from the guide channel and apply a thin, even coat along the full length of both sides. Run the shutter up and down two or three times to work the lubricant deep into the channel, then wipe away any excess with a dry cloth to prevent drips onto glass or walls.
Apply the spray in short bursts rather than one long stream, as this keeps the coat even and avoids pooling at the base of the guide.
What a well-lubricated guide looks and feels like
After lubrication, the shutter should glide with noticeably less resistance and run quietly without grinding or catching. Check for these signs that the job is done properly:
- The shutter moves without snagging at any point along the guide
- No squealing or scraping sounds occur when operating
- Excess lubricant has been wiped cleanly from surrounding surfaces
If the shutter still feels stiff after running it a few times, the guide lining may be worn and will need replacing before further lubrication makes a real difference.
Step 3. Target other moving parts without damage
The guides aren’t the only components that benefit from attention when you work through how to lubricate roller shutters properly. The axle, bottom rail, and any accessible hinges all take regular wear and need light lubrication to stay in good condition. Working through these parts in a set order means you won’t miss anything critical, and you won’t accidentally apply the wrong product somewhere it causes damage.
Axle and barrel
Your axle or barrel sits at the top of the shutter and carries the full weight of the rolling mechanism, which means it sees significant stress over time. Apply a small amount of white lithium grease or dry PTFE spray directly to the visible bearing points at each end of the barrel. Avoid spraying anywhere near the motor housing on electric shutters, since lubricant inside the motor can cause electrical faults.
Keep any lubricant well clear of electrical components, connectors, and motor housings on motorised shutters.
Bottom rail and end caps
The bottom rail strikes the ground seal every time the shutter closes, so wiping a thin coat of silicone spray along its length reduces both noise and wear. Check the end caps on both sides of the bottom rail while you’re there. Here’s what to look for before you apply any lubricant:
- Cracks or chips in the plastic end cap
- The rail catching or dragging along one side
- Visible gaps where the end cap has pulled away from the rail
Step 4. Test the shutter and fix common issues
Once you’ve worked through the previous steps, testing is what confirms the whole job has been done correctly. Run your shutter up and down several times at normal speed and listen closely for any grinding, squealing, or catching. If you completed this guide on how to lubricate roller shutters correctly, the improvement should be obvious straight away.
Run the shutter through a full cycle
Open and close the shutter at least three times to spread the lubricant evenly through the guides and across each treated component. Watch the movement on both sides and check that neither edge drags or catches at any point. Use this quick checklist to confirm the job is done:
- No grinding or squealing during operation
- The shutter moves evenly on both sides without sticking
- No excess lubricant has dripped onto glass or walls
A shutter running silently from top to bottom on both sides means the lubrication job is complete.
What to do if problems remain
Some issues won’t resolve with lubrication alone. Here’s how to identify what’s still causing trouble after you’ve finished:
| Symptom | Likely Cause | Action |
|---|---|---|
| Shutter still stiff | Worn guide lining | Replace guide inserts |
| Rattling noise | Loose end caps or slats | Tighten or replace parts |
| Uneven movement | Bent guide or damaged slat | Book a professional inspection |
Keeping your shutters running smoothly
Regular lubrication is one of the cheapest and most effective ways to extend the life of your roller shutters. Running through the steps in this guide on how to lubricate roller shutters every six to twelve months keeps wear down and catches small problems before they turn into expensive repairs.
You should also keep an eye on the side guides, bottom rail, and end caps between sessions. A quick visual check every few months takes two minutes and can flag worn components, cracks, or loose fittings early, when they’re still straightforward to fix.
When lubrication isn’t enough and your shutters still grind, stick, or operate unevenly, professional repair is the right next step. The team at Classic Roller Shutters Adelaide has over 40 years of hands-on experience and a dedicated repair division ready to help. Book a free consultation or request a repair quote and get your shutters back in top condition.